
In this tutorial we will learn how to Install Apache Solr on CentOS.
Apache Solr is an open source enterprise search platform used to easily create search engines which searches websites, files and databases. Its major features include powerful full-text search, faceted search, distributed search, hit highlighting and index replication.
This article assumes you have at least basic knowledge of linux, know how to use the shell, and most importantly, you host your site on your own VPS. The installation is quite simple. I will show you through the step by step installation Apache Solr on CentOS 6.
Step 1. Install Java.
Download latest Java SE Development Kit 8 release from its official download page or use following commands to download from shell:
### CentOS 64-Bit ###
cd /opt/
wget --no-cookies --no-check-certificate --header "Cookie: gpw_e24=http%3A%2F%2Fwww.oracle.com%2F; oraclelicense=accept-securebackup-cookie" "http://download.oracle.com/otn-pub/java/jdk/8u40-b25/jdk-8u40-linux-x64.tar.gz"
tar xzf jdk-8u40-linux-x64.tar.gz
### CentOS 32-Bit ###
cd /opt/
wget --no-cookies --no-check-certificate --header "Cookie: gpw_e24=http%3A%2F%2Fwww.oracle.com%2F; oraclelicense=accept-securebackup-cookie" "http://download.oracle.com/otn-pub/java/jdk/8u40-b25/jdk-8u40-linux-i586.tar.gz"
tar xzf jdk-8u40-linux-i586.tar.g
Verify Installed Java version:
# java -version
java version "1.8.0_40"
Java(TM) SE Runtime Environment (build 1.8.0_40-b25)
Java HotSpot(TM) 64-Bit Server VM (build 25.40-b25, mixed mode)
Step 2. Install Solr.
Download the latest version of solr and extract it (5.0.0 is the latest at time of writing):
cd /opt
http://www.us.apache.org/dist/lucene/solr/5.0.0/solr-5.0.0.tgz
tar -xvf solr-5.0.0.tgz
mv /opt/solr-5.0.0 /opt/solr
mv /opt/solr/example /opt/solr/core
Step 3. Create script for handling the Solr server service.
Create a systemd service for Solr or if you are used to the old init scripts, you can keep using them. Create an init script for the Solr service:
nano /etc/init.d/solr
#!/bin/bash
#
# chkconfig: 2345 20 20
# short-description: Solr
# description: Startup script for Apache Solr Server

SOLR_DIR="/opt/solr/core"
LOG_FILE="/var/log/solr.log"
JAVA="/usr/bin/java -DSTOP.PORT=8079 -DSTOP.KEY=stopkey -jar start.jar"

start() {
echo -n "Starting Solr... "
cd $SOLR_DIR
$JAVA > $LOG_FILE 2>&1 &
sleep 2
RETVAL=$?

    if [ $RETVAL = 0 ]
    then
        echo "done."
    else
        echo "failed. See error code for more information."
    fi
    return $RETVAL
}

stop() {
echo -n "Stopping Solr... "
pkill -f start.jar > /dev/null
RETVAL=$?

    if [ $RETVAL = 0 ]
    then
        echo "done."
    else
        echo "failed. See error code for more information."
    fi
    return $RETVAL
}

case "$1" in
start)
start
;;
stop)
stop
;;
restart)
stop
start
;;
*)
echo $"Usage: solr {start|stop|restart}"
exit 3
esac
exit $RETVAL
Save the file and make it executable:
chmod +x /etc/init.d/solr
chkconfig --add solr
Start Solr using the following command:
/etc/init.d/solr start
Step 4. Configure Iptables or Firewall.
If you use iptables add a rule to allow access to Solr’s admin section and query Solr data:
 iptables -A INPUT -p tcp -m tcp --dport 8983 -j ACCEPT
service iptables save
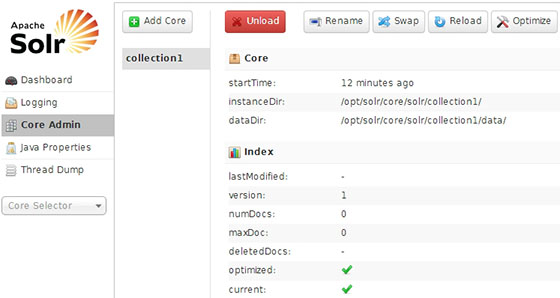
Step 5. Accessing Apache Solr.
Apache Solr will be available on HTTP port 8983 by default. Open your favorite browser and navigate to http://yourdomain.com:8983/solr/ or http://server-ip:8983/solr/.
Congratulation’s! You have successfully installed Apache Solr. Thanks for using this tutorial for installing Apache Solr on CentOS 6 system.
You Might Also Like: How To Install Apache Solr on Ubuntu 14.04