Let’s Encrypt is a free open certificate authority (CA) that provides free certificates for websites and other services. The service, which is backed by the Electronic Frontier Foundation, Mozilla, Cisco Systems, and Akamai. Unfortunately, LetsEncrypt.org certificates currently have a 3 month lifetime. This means you’ll need to renew your certificate quarterly for now.
Table of Contents
Step 1. First let’s start by ensuring your system is up-to-date.
Step 2. Login to your DirectAdmin VPS via SSH as user root.
Step 3. Get the latest Let’s Encrypt script
Step 4. Configure DirectAdmin.
Prerequisites
This article assumes you have at least basic knowledge of Linux, know how to use the shell, and most importantly, you host your site on your own VPS. The installation is quite simple and assumes you are running in the root account, if not you may need to add ‘sudo’ to the commands to get root privileges. I will show you through the step by step install Let’s Encrypt SSL using DirectAdmin on CentOS 7 server.
Install Let’s Encrypt SSL using DirectAdmin
Step 1. First let’s start by ensuring your system is up-to-date.
yum clean all
yum -y update
Step 2. Login to your DirectAdmin VPS via SSH as user root.
First, Login to your DirectAdmin VPS:
ssh root@Your_IP_Adress -p Port_number
Step 3. Get the latest Let’s Encrypt script
Next, we will clean the software list and make sure we’ve got the latest Let’s Encrypt script:
cd /usr/local/directadmin/custombuild/
./build clean all
./build update
./build letsencrypt
Then, rewrite the configuration files:
./build rewrite_confs
Step 4. Configure DirectAdmin.
In order to enable Let’s Encrypt support on DirectAdmin, open the DirectAdmin configuration file:
nano /usr/local/directadmin/conf/directadmin.conf
letsencrypt=1
You should also make sure that SNI is enabled in DirectAdmin by adding/modifying this line:
enable_ssl_sni=1
Save the file and restart DirectAdmin for the changes to take effect:
echo "action=directadmin&value=restart" >> /usr/local/directadmin/data/task.queue; /usr/local/directadmin/dataskq d2000
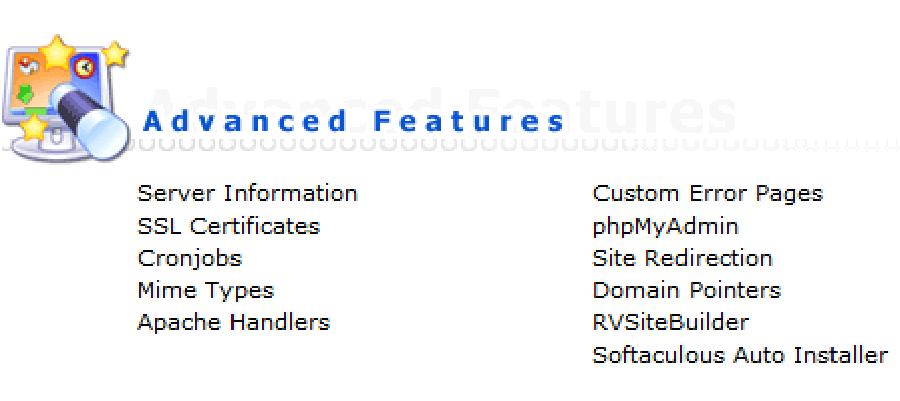
With this step Let’s Encrypt is enabled in DirectAdmin and we can proceed with the installation. Login to the control panel at https://yourdomain:2222 with your username and go to ‘SSL Certificates’ under ‘Advanced Features’:
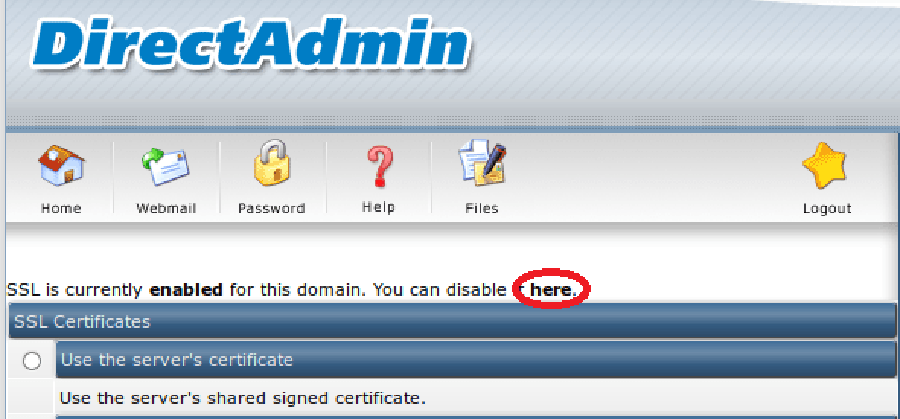
If the SSL option is disabled for the selected domain as shown in the screenshot below, you need to enable it by clicking ‘here’:
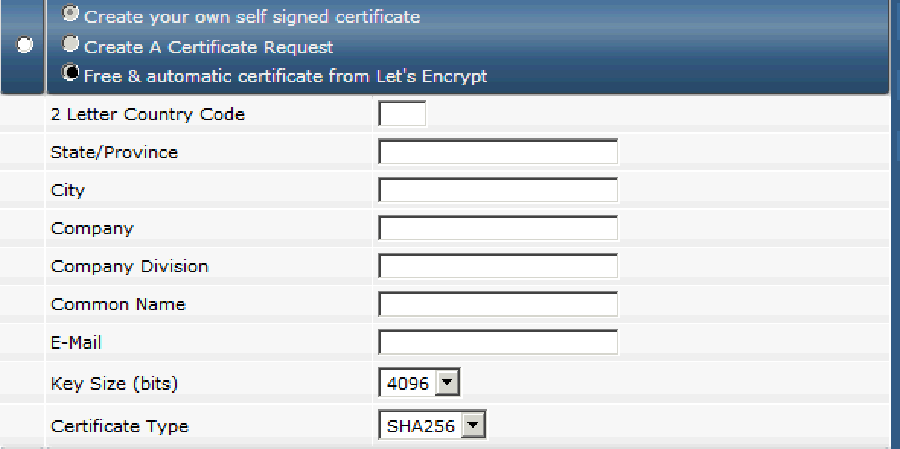
If you properly enabled Let’s Encrypt, you will see the ‘Free and automatic certificate from Let’s Encrypt’ option. Check the check-box next to the Let’s Encrypt option and enter all necessary details for your domain below:
Then click the ‘Save’ button and a free Let’s Encrypt SSL certificate will be automatically installed.
Finally Restart the web server for the changes to take effect:
systemctl restart httpd
Congratulation’s! You have successfully installed Install Let’s Encrypt SSL DirectAdmin on CentOS 7. Thanks for using this tutorial for installing Let’s Encrypt SSL using DirectAdmin on CentOS 7 systems. For additional help or useful information, we recommend you to check the official Apache Zeppelin web site.