How To Install Jenkins on Ubuntu 20.04

Introduction
When faced with repetitive technical tasks, finding automation solutions that work can be a chore. With Jenkins, an open-source automation server, you can efficiently manage tasks from building to deploying software. Jenkins is Java-based, installed from Ubuntu packages or by downloading and running its web application archive (WAR) file — a collection of files that make up a complete web application to run on a server.

In this tutorial we’ll install Jenkins on Ubuntu 20.04, start the development server and create an administrative user to get you started in exploring what Jenkins can do. While you’ll have a development-level server ready for use at the conclusion of this tutorial, to secure this installation for production, follow the guide How to Configure Jenkins with SSL Using an Nginx Reverse Proxy on Ubuntu 18.04.

Prerequisites
To follow this tutorial, you will need:

One Ubuntu 20.04 server configured with a non-root sudo user and firewall by following the Ubuntu 20.04 initial server setup guide. We recommend starting with at least 1 GB of RAM. Visit Jenkins’s “Hardware Recommendations” for guidance in planning the capacity of a production-level Jenkins installation.
Oracle JDK 11 installed, following our guidelines on installing specific versions of OpenJDK on Ubuntu 20.04.

Step 1 — Installing Jenkins
The version of Jenkins included with the default Ubuntu packages is often behind the latest available version from the project itself. To ensure you have the latest fixes and features, use the project-maintained packages to install Jenkins.

First, add the repository key to the system:

$ wget -q -O - https://pkg.jenkins.io/debian-stable/jenkins.io.key | sudo apt-key add -

After the key is added the system will return with OK.

Next, let’s append the Debian package repository address to the server’s sources.list:

$ sudo sh -c 'echo deb http://pkg.jenkins.io/debian-stable binary/ > /etc/apt/sources.list.d/jenkins.list'
After both commands have been entered, we’ll run update so that apt will use the new repository.
$ sudo apt update

Finally, we’ll install Jenkins and its dependencies.

$ sudo apt install jenkins

Now that Jenkins and its dependencies are in place, we’ll start the Jenkins server.

Step 2 — Starting Jenkins
Let’s start Jenkins by using systemctl:

$ sudo systemctl start jenkins

Since systemctl doesn’t display status output, we’ll use the status command to verify that Jenkins started successfully:

$ sudo systemctl status jenkins

If everything went well, the beginning of the status output shows that the service is active and configured to start at boot:

Output
● jenkins.service - LSB: Start Jenkins at boot time
   Loaded: loaded (/etc/init.d/jenkins; generated)
   Active: active (exited) since Fri 2020-06-05 21:21:46 UTC; 45s ago
     Docs: man:systemd-sysv-generator(8)
    Tasks: 0 (limit: 1137)
   CGroup: /system.slice/jenkins.service
Now that Jenkins is up and running, let’s adjust our firewall rules so that we can reach it from a web browser to complete the initial setup.

Step 3 — Opening the Firewall
To set up a UFW firewall, visit Initial Server Setup with Ubuntu 20.04, Step 4- Setting up a Basic Firewall. By default, Jenkins runs on port 8080. We’ll open that port using ufw:

$ sudo ufw allow 8080

Note: If the firewall is inactive, the following commands will allow OpenSSH and enable the firewall:

$ sudo ufw allow OpenSSH
$ sudo ufw enable

Check ufw’s status to confirm the new rules:

$ sudo ufw status

You’ll notice that traffic is allowed to port 8080 from anywhere:

Output
Status: active

To                         Action      From
--                         ------      ----
OpenSSH                    ALLOW       Anywhere
8080                       ALLOW       Anywhere
OpenSSH (v6)               ALLOW       Anywhere (v6)
8080 (v6)                  ALLOW       Anywhere (v6)

With Jenkins installed and our firewall configured, we can complete the installation stage and dive into Jenkins setup.

Step 4 — Setting Up Jenkins
To set up your installation, visit Jenkins on its default port, 8080, using your server domain name or IP address: http://your_server_ip_or_domain:8080

You should receive the Unlock Jenkins screen, which displays the location of the initial password:

Unlock Jenkins screen

In the terminal window, use the cat command to display the password:

$ sudo cat /var/lib/jenkins/secrets/initialAdminPassword

Copy the 32-character alphanumeric password from the terminal and paste it into the Administrator password field, then click Continue.

The next screen presents the option of installing suggested plugins or selecting specific plugins:

Customize Jenkins Screen

We’ll click the Install suggested plugins option, which will immediately begin the installation process.

Jenkins Getting Started Install Plugins Screen

When the installation is complete, you’ll be prompted to set up the first administrative user. It’s possible to skip this step and continue as admin using the initial password we used above, but we’ll take a moment to create the user.

Note: The default Jenkins server is NOT encrypted, so the data submitted with this form is not protected. Refer to How to Configure Jenkins with SSL Using an Nginx Reverse Proxy on Ubuntu 20.04 to protect user credentials and information about builds that are transmitted via the web interface.

Jenkins Create First Admin User Screen

Enter the name and password for your user:

Jenkins Create User

You’ll receive an Instance Configuration page that will ask you to confirm the preferred URL for your Jenkins instance. Confirm either the domain name for your server or your server’s IP address:

Jenkins Instance Configuration

After confirming the appropriate information, click Save and Finish. You’ll receive a confirmation page confirming that “Jenkins is Ready!”:

Jenkins is ready screen

Click Start using Jenkins to visit the main Jenkins dashboard:

Welcome to Jenkins Screen

At this point, you have completed a successful installation of Jenkins.

Conclusion
In this tutorial, you installed Jenkins using the project-provided packages, started the server, opened the firewall, and created an administrative user. At this point, you can start exploring Jenkins.

When you’ve completed your exploration, follow the guide How to Configure Jenkins with SSL Using an Nginx Reverse Proxy on Ubuntu 20.04 to protect your passwords, as well as any sensitive system or product information that will be sent between your machine and the server in plain text to continue using Jenkins.

To learn more about what you can do using Jenkins, check out other tutorials on the subject:

How to Build Android Apps with Jenkins
How To Set Up Continuous Integration Pipelines in Jenkins on Ubuntu 16.04

How To Create a Self-Signed SSL Certificate for Apache in Ubuntu 20.04

Introduction
TLS, or “transport layer security” — and its predecessor SSL — are protocols used to wrap normal traffic in a protected, encrypted wrapper. Using this technology, servers can safely send information to their clients without their messages being intercepted or read by an outside party.

In this guide, we will show you how to create and use a self-signed SSL certificate with the Apache web server on Ubuntu 20.04.

Note: A self-signed certificate will encrypt communication between your server and any clients. However, because it is not signed by any of the trusted certificate authorities included with web browsers and operating systems, users cannot use the certificate to validate the identity of your server automatically. As a result, your users will see a security error when visiting your site.

Because of this limitation, self-signed certificates are not appropriate for a production environment serving the public. They are typically used for testing, or for securing non-critical services used by a single user or a small group of users that can establish trust in the certificate’s validity through alternate communication channels.

For a more production-ready certificate solution, check out Let’s Encrypt, a free certificate authority. You can learn how to download and configure a Let’s Encrypt certificate in our How To Secure Apache with Let’s Encrypt on Ubuntu 20.04 tutorial.

Prerequisites
Before starting this tutorial, you’ll need the following:

Access to a Ubuntu 20.04 server with a non-root, sudo-enabled user. Our Initial Server Setup with Ubuntu 20.04 guide can show you how to create this account.
You will also need to have Apache installed. You can install Apache using apt. First, update the local package index to reflect the latest upstream changes:

 $ sudo apt update

Then, install the apache2 package:

 $ sudo apt install apache2

And finally, if you have a ufw firewall set up, open up the http and https ports:

 $ sudo ufw allow "Apache Full"

After these steps are complete, be sure you are logged in as your non-root user and continue with the tutorial.

Step 1 — Enabling mod_ssl
Before we can use any SSL certificates, we first have to enable mod_ssl, an Apache module that provides support for SSL encryption.

Enable mod_ssl with the a2enmod command:

$ sudo a2enmod ssl
Restart Apache to activate the module:

$ sudo systemctl restart apache2
The mod_ssl module is now enabled and ready for use.

Step 2 – Creating the SSL Certificate
Now that Apache is ready to use encryption, we can move on to generating a new SSL certificate. The certificate will store some basic information about your site, and will be accompanied by a key file that allows the server to securely handle encrypted data.

We can create the SSL key and certificate files with the openssl command:

 $ sudo openssl req -x509 -nodes -days 365 -newkey rsa:2048 -keyout /etc/ssl/private/apache-selfsigned.key -out /etc/ssl/certs/apache-selfsigned.crt

After you enter the command, you will be taken to a prompt where you can enter information about your website. Before we go over that, let’s take a look at what is happening in the command we are issuing:

openssl: This is the command line tool for creating and managing OpenSSL certificates, keys, and other files.
req -x509: This specifies that we want to use X.509 certificate signing request (CSR) management. X.509 is a public key infrastructure standard that SSL and TLS adhere to for key and certificate management.
-nodes: This tells OpenSSL to skip the option to secure our certificate with a passphrase. We need Apache to be able to read the file, without user intervention, when the server starts up. A passphrase would prevent this from happening, since we would have to enter it after every restart.
-days 365: This option sets the length of time that the certificate will be considered valid. We set it for one year here. Many modern browsers will reject any certificates that are valid for longer than one year.
-newkey rsa:2048: This specifies that we want to generate a new certificate and a new key at the same time. We did not create the key that is required to sign the certificate in a previous step, so we need to create it along with the certificate. The rsa:2048 portion tells it to make an RSA key that is 2048 bits long.
-keyout: This line tells OpenSSL where to place the generated private key file that we are creating.
-out: This tells OpenSSL where to place the certificate that we are creating.
Fill out the prompts appropriately. The most important line is the one that requests the Common Name. You need to enter either the hostname you’ll use to access the server by, or the public IP of the server. It’s important that this field matches whatever you’ll put into your browser’s address bar to access the site, as a mismatch will cause more security errors.

The full list of prompts will look something like this:

Country Name (2 letter code) [XX]:US
State or Province Name (full name) []:Example
Locality Name (eg, city) [Default City]:Example 
Organization Name (eg, company) [Default Company Ltd]:Example Inc
Organizational Unit Name (eg, section) []:Example Dept
Common Name (eg, your name or your server's hostname) []:your_domain_or_ip
Email Address []:[email protected]
Both of the files you created will be placed in the appropriate subdirectories under /etc/ssl.

Next we will update our Apache configuration to use the new certificate and key.

Step 3 – Configuring Apache to Use SSL
Now that we have our self-signed certificate and key available, we need to update our Apache configuration to use them. On Ubuntu, you can place new Apache configuration files (they must end in .conf) into /etc/apache2/sites-available/and they will be loaded the next time the Apache process is reloaded or restarted.

For this tutorial we will create a new minimal configuration file. (If you already have an Apache set up and just need to add SSL to it, you will likely need to copy over the configuration lines that start with SSL, and switch the VirtualHost port from 80 to 443. We will take care of port 80 in the next step.)

Open a new file in the /etc/apache2/sites-available directory:

 $ sudo nano /etc/apache2/sites-available/your_domain_or_ip.conf

Paste in the following minimal VirtualHost configuration:

/etc/apache2/sites-available/your_domain_or_ip.conf

   ServerName your_domain_or_ip
   DocumentRoot /var/www/your_domain_or_ip

   SSLEngine on
   SSLCertificateFile /etc/ssl/certs/apache-selfsigned.crt
   SSLCertificateKeyFile /etc/ssl/private/apache-selfsigned.key

Be sure to update the ServerName line to however you intend to address your server. This can be a hostname, full domain name, or an IP address. Make sure whatever you choose matches the Common Name you chose when making the certificate.

The remaining lines specify a DocumentRoot directory to serve files from, and the SSL options needed to point Apache to our newly-created certificate and key.

Now let’s create our DocumentRoot and put an HTML file in it just for testing purposes:

$ sudo mkdir /var/www/your_domain_or_ip

Open a new index.html file with your text editor:

$ sudo nano /var/www/your_domain_or_ip/index.html

Paste the following into the blank file:

/var/www/your_domain_or_ip/index.html

it worked!

This is not a full HTML file, of course, but browsers are lenient and it will be enough to verify our configuration.

Save and close the file
Next, we need to enable the configuration file with the a2ensite tool:

$ sudo a2ensite your_domain_or_ip.conf

Next, let’s test for configuration errors:

$ sudo apache2ctl configtest

If everything is successful, you will get a result that looks like this:

Output
AH00558: apache2: Could not reliably determine the server's fully qualified domain name, using 127.0.1.1. Set the 'ServerName' directive globally to suppress this message
Syntax OK

The first line is a message telling you that the ServerName directive is not set globally. If you want to get rid of that message, you can set ServerName to your server’s domain name or IP address in /etc/apache2/apache2.conf. This is optional as the message will do no harm.

If your output has Syntax OK in it, your configuration file has no syntax errors. We can safely reload Apache to implement our changes:

$ sudo systemctl reload apache2

Now load your site in a browser, being sure to use https:// at the beginning.

You should see an error. This is normal for a self-signed certificate! The browser is warning you that it can’t verify the identity of the server, because our certificate is not signed by any of its known certificate authorities. For testing purposes and personal use this can be fine. You should be able to click through to advanced or more information and choose to proceed.

After you do so, your browser will load the it worked! message.

Note: if your browser doesn’t connect at all to the server, make sure your connection isn’t being blocked by a firewall. If you are using ufw, the following commands will open ports 80 and 443:

$ sudo ufw allow "Apache Full"

Next we will add another VirtualHost section to our configuration to serve plain HTTP requests and redirect them to HTTPS.

Step 4 — Redirecting HTTP to HTTPS
Currently, our configuration will only respond to HTTPS requests on port 443. It is good practice to also respond on port 80, even if you want to force all traffic to be encrypted. Let’s set up a VirtualHost to respond to these unencrypted requests and redirect them to HTTPS.

Open the same Apache configuration file we started in previous steps:

$ sudo nano /etc/apache2/sites-available/your_domain_or_ip.conf

At the bottom, create another VirtualHost block to match requests on port 80. Use the ServerName directive to again match your domain name or IP address. Then, use Redirect to match any requests and send them to the SSL VirtualHost. Make sure to include the trailing slash:

/etc/apache2/sites-available/your_domain_or_ip.conf

    ServerName your_domain_or_ip
    Redirect / https://your_domain_or_ip/

Save and close this file when you are finished, then test your configuration syntax again, and reload Apache:

$ sudo apachectl configtest
$ sudo systemctl reload apache2

You can test the new redirect functionality by visiting your site with plain http:// in front of the address. You should be redirected to https:// automatically.

Conclusion
You have now configured Apache to serve encrypted requests using a self-signed SSL certificate, and to redirect unencrypted HTTP requests to HTTPS.

If you are planning on using SSL for a public website, you should look into purchasing a domain name and using a widely supported certificate authority such as Let’s Encrypt.

For more information on using Let’s Encrypt with Apache, please read our How To Secure Apache with Let’s Encrypt on Ubuntu 20.04 tutorial.

How To Install and Use GoAccess Web Log Analyzer on Ubuntu 20.04

The author selected the Internet Archive to receive a donation as part of the Write for DOnations program.

Introduction
GoAccess is a tool for monitoring web server logs in realtime. It’s written in C and uses the popular ncurses library for its dashboard interface, which can be accessed directly from the command-line.

This is great because you’re able to SSH into any web server you control and view or analyze relevant statistics quickly and securely. Apart from the command-line dashboard interface, it’s also capable of displaying the statistics in other formats such as HTML, JSON, and CSV, which you can use in other contexts or share with others.

GoAccess could also be a great alternative to client-side analytics tools depending on your needs. It analyzes your server logs directly, so you don’t need to load any additional scripts, and your data is completely under your control.

In this tutorial, you’ll install and configure GoAccess for Apache on an Ubuntu 20.04 web server. You’ll access the Apache log files with GoAccess before reviewing the modules available and navigation shortcuts on the command-line interface.

Prerequisites
For this tutorial, you’ll need the following:

One Ubuntu 20.04 server. You can set it by following this initial server setup for Ubuntu 20.04 tutorial, including a non-root user with sudo privileges and a firewall.
Apache installed by following How To Install Apache on Ubuntu 20.04.
Step 1 — Installing GoAccess
In this step you’ll install the GoAccess tool and its dependencies.

Start by ensuring that the package database and system are up to date:

$ sudo apt update
$ sudo apt full-upgrade

Now it’s time to install GoAccess. A version of the tool is available in the Ubuntu repos, but this is not usually the latest stable version. For example, the latest version of GoAccess at the time of writing is 1.4, while the version available from the Ubuntu 20.04 repos is 1.3.

To ensure that you have the latest stable version of GoAccess installed on your server, you can compile from source or use the official GoAccess repository on Ubuntu.

Method 1 — Compiling from source
First, install the dependencies required to compile GoAccess from source:

$ sudo apt install libncursesw5-dev libgeoip-dev libtokyocabinet-dev build-essential

You install the following dependencies:

build-essential: installs many packages, which includes gcc compilers for C, C+, and other programming languages, and make for building the GoAccess makefile.
libncursesw5-dev: installs the ncurses library that GoAccess uses for its command-line interface.
libgeoip-dev: includes the necessary files for the GeoIP library.
libtokyocabinet-dev: provides database dependencies for higher performance.
Next, download the latest version of the GoAccess from their official website with the following command:

$ wget http://tar.goaccess.io/goaccess-1.4.tar.gz

Once the download completes, extract the archive with:

$ tar -xzvf goaccess-1.4.tar.gz

Change into the newly unpacked directory like this:

$ cd goaccess-1.4/

Run the configure script found inside this directory:

$ ./configure --enable-utf8 --enable-geoip=legacy

The –enable-utf8 flag ensures GoAccess compiles with wide character support, while –enable-geoip enables GeoLocation support with the original GeoIP databases. You can replace legacy with mmdb to use the enhanced GeoIP2 databases instead. You can find other configuration options on the GoAccess website.

You’ll receive output similar to the following:

Output
. . .
Your build configuration:

Prefix : /usr/local
Package : goaccess
Version : 1.4
Compiler flags : -pthread
Linker flags : -lnsl -lncursesw -lGeoIP -lpthread
UTF-8 support : yes
Dynamic buffer : no
Geolocation : GeoIP Legacy
Storage method : In-Memory with On-Disk Persitance Storage
TLS/SSL : no
Bugs : [email protected]

Run the make command to build the makefile required for installing GoAccess:

$ make

Finally, install GoAccess using the previously created makefile to the system:

$ sudo make install

Ensure that the program was installed successfully by running:

goaccess –version
You will receive the following output:

$ Output
GoAccess - 1.4.
For more details visit: http://goaccess.io
Copyright (C) 2009-2020 by Gerardo Orellana

Build configure arguments:
--enable-utf8
--enable-geoip=legacy

Method 2 — Using the Official GoAccess Repos
Another way to install GoAccess is by using the official Ubuntu repository for the program. This method is preferable if you’d like it to be updated to a newer version automatically during system upgrades without having to compile from source for each new release. You need to add the repository to your server first:

$ echo "deb http://deb.goaccess.io/ $(lsb_release -cs) main" | sudo tee -a /etc/apt/sources.list.d/goaccess.list

First you get the release name of the distribution and then pipe that to tee, which appends to the file /etc/apt/sources.list.d/goaccess.list.

With the repository in your sources list, you can now download the GPG key to verify the signature:

$ wget -O - https://deb.goaccess.io/gnugpg.key | sudo apt-key --keyring /etc/apt/trusted.gpg.d/goaccess.gpg add -

Next, update the package database with the following command:

$ sudo apt update

Finally, install GoAccess:

$ 

sudo apt install goaccess
GoAccess is now installed on your Ubuntu server. In the next step, you’ll access and edit its configuration file so that you can make changes to how the program runs.

Step 2 — Editing the GoAccess Configuration
GoAccess comes with a configuration file where you can make permanent changes to the behavior of the program. You’ll edit this file to specify the time, date, and log format so that GoAccess knows how to parse the server logs.

The configuration file may be located at ~/.goaccessrc or %sysconfdir%/goaccess.conf where %sysconfdir% is either /etc/, /usr/etc/, or /usr/local/etc/. To find out where the config file is located on your server, run the following command:

goaccess --dcf

Sample output
/etc/goaccess/goaccess.conf
Edit this config file using nano:
$ sudo nano /etc/goaccess/goaccess.conf

Note: If this file does not exist on the server, ensure to create it first and populate it with the contents of the goaccess.conf file on GitHub.

Many of the lines in the file are commented out. To enable an option, remove the first # character in front of it. Let’s enable the time-format setting for Apache first. This setting specifies the log-format time and allows GoAccess to parse any plain-text Apache log files that meet the supported formatting criteria.

/etc/goaccess/goaccess.conf
# The following time format works with any of the
# Apache/NGINX’s log formats below.
#
time-format %H:%M:%S
Next, you’ll uncomment the Apache date-format setting that specifies the log-format date:

/etc/goaccess/goaccess.conf
# The following date format works with any of the
# Apache/NGINX’s log formats below.
#
date-format %d/%b/%Y
Finally, uncomment the log-format setting. Several lines change this setting and the exact one to uncomment depends on the way your web server is set up. If you have a non-virtual hosts setup, uncomment the following log-format line:

/etc/goaccess/goaccess.conf
# NCSA Combined Log Format
log-format %h %^[%d:%t %^] “%r” %s %b “%R” “%u”
Otherwise, if you have virtual hosts set up, uncomment the following line instead:

/etc/goaccess/goaccess.conf
# NCSA Combined Log Format with Virtual Host
log-format %v:%^ %h %^[%d:%t %^] “%r” %s %b “%R” “%u”
At this point, you can save the file and exit the editor. You are now ready to run the GoAccess program and analyze some Apache plain-text log files.

Step 3 — Accessing Apache’s Log Files with GoAccess
The Apache server grants access to your website and keeps an access log for all incoming HTTP traffic. These records, or log files, are stored on the system and can be a valuable source of information about your website’s usage and audience.

On Ubuntu, the Apache log files are stored in the /var/log/apache2 directory by default. To inspect the contents of this directory, run the following command:

$ sudo ls /var/log/apache2

Sample output
access.log error.log other_vhosts_access.log
If your server has been running for a long time, you may find compressed .gz files in this directory containing past log files as a result of log rotation. The most recent logs are placed in an access.log file. For web servers with virtual hosts, you may have to cd into sub-directories from within the /apache2 directory to locate each host’s log files.

Let’s go ahead and run GoAccess against the Apache access logs to gain insight into what type of traffic is being handled by the web server. Run the following command to analyze your access.log file with GoAccess:

$ sudo goaccess /var/log/apache2/access.log

This will launch the GoAccess command-line dashboard.

GoAccess command-line dashboard interface

Note: If you see a Log Format Configuration prompt instead, it means that the changes you made to the GoAccess config file in the previous step are not taking effect. Ensure that your the config file is in the right place and that you have uncommented the necessary settings.

As mentioned previously, you will sometimes have several compressed log files on a long-running web server. To run GoAccess on all these files without extracting them first, you can pipe the output of the zcat command to goaccess:

zcat /var/log/apache2/access.log.*.gz | goaccess -a
Next you’ll learn how to quickly navigate through the dashboard interface with keyboard shortcuts.

Step 4 — Navigating the Terminal Dashboard
At the top of the dashboard is a summary of several key metrics. This includes total requests for the reporting period, unique visitors, log size, 404 not found errors, requested files, size of the parsed log file, HTTP referrers, name of the log source, time taken to process the log file, and more.

Summary of dashboard metrics

Below the top panel, you will find all the available modules which provide more details on the aforementioned metrics and other data points supported by GoAccess. To navigate the interface, use the following keyboard shortcuts:

TAB to move forward through the available modules and SHIFT+TAB to move backwards.
F5 to refresh the dashboard.
g to move to the top of the dashboard screen and G to move to the last item in the dashboard.
o or ENTER to expand the selected module.
j and k to scroll down and up within the active module.
s to display the sort options for the active module.
/ to search across all modules and n to move to the next match.
0-9 and SHIFT+0 to quickly activate the respective numbered module.
? to view the quick help dialog.
q to quit the program.
Let’s examine each of the available modules on the dashboard next. Each one has a number and a title, and an indication of the total number of lines present. The > character indicates the active panel, which is also reflected at the top of the dashboard.

Active GoAccess panel demonstration

Here’s a brief explanation of each of the panels. Each section below correspond to the panel number and title in the program.

1 — Unique Visitors per Day
This panel displays the hits, unique visitors, and cumulative bandwidth for each reported date. A unique visitor is considered to be one with the same IP address, date, and user-agent. It includes web crawlers and spiders by default.

Unique visitors per day panel

2 – Requested Files (URLs)
This panel provides the statistics concerning the most highly requested non-static files on your web server. It displays the request path, HTTP protocol and method, unique visitors, number of hits, and cumulative bandwidth.

Requested files

3 — Static Requests
This panel provides the same metrics as the previous one, but for static files such as images, CSS, JavaScript, or other file types.

4 — Not Found URLs (404s)
This panel also displays the same metrics discussed in 2 and 3, but for paths that were not found on the server (404s).

5 — Visitor Hostnames and IPs
This panel provides detailed information on the hosts that connect to your web server. You can find their IP address, the number of visits, and the amount of bandwidth consumed. This is a great way to identify who is eating up all your bandwidth and block them if necessary.

Visitor hostnames and IPs

If you expand this panel by pressing o, you will see more info about each host such as its country of origin, city, and reverse DNS lookup result.

Vistor hostnames and IPs expanded

6 — Operating Systems
This panel reports the different operating systems used by the hosts to connect to your web server. Expanding this panel will display specific versions of each operating system.

Operating systems

7 — Browsers
Similar to the previous panel, this reports the browsers used by each unique visitor to your web server and lists specific versions for each browser once expanded.

Browsers

8 — Time distribution
Here, you will find an hourly report for the number of hits, unique visitors, and bandwidth consumed. This is a great way to spot periods of peak traffic on your server.

Time distribution panel

9 — Virtual Hosts
This panel displays the virtual hosts parsed from the log file. It becomes active only if %v is included in the log-format configuration.

10 — Referrer URLs
The URLs that referred the visiting hosts to your web server are reflected here. This panel is disabled by default and can only be enabled by commenting out the REFERRERS line highlighted following in the GoAccess config file:

/etc/goaccess/goaccess.conf
#ignore-panel VISIT_TIMES
#ignore-panel VIRTUAL_HOSTS
#ignore-panel REFERRERS
#ignore-panel REFERRING_SITES
Referrer URLs panel

11 — Referring Sites
This panel displays the IP address of the referring hosts, but not the whole URL.

12 — Keyphrases
Here, the keywords used on Google search, Google cache, and Google translate that led to your website are reported. This panel is also disabled by default and must be enabled in the settings:

/etc/goaccess/goaccess.conf
#ignore-panel REFERRERS
#ignore-panel REFERRING_SITES
#ignore-panel KEYPHRASES
#ignore-panel STATUS_CODES

13 — HTTP Status Codes
This panel reflects the overall statistics for HTTP status codes returned by your web server when responding to a request. Expanding the panel will display the aggregated stats for each status code.

HTTP status codes panel

14 — Remote User (HTTP Authentication)
This panel displays the user ID of the person requesting a document on your server as determined by HTTP authentication. For documents that are not password protected, this part will be -. Note that this panel is only enabled if %e is part of the log-format configuration.

15 — Cache status
This panel allows you to determine if a request is being cached and served from the cache. It is enabled if %C is part of the log-format variable, and the status could be MISS, BYPASS, EXPIRED, STALE, UPDATING, REVALIDATED, or HIT.

16 — Geo Location
This panel provides a summary of the geographical locations derived from visiting IP addresses. Expanding this panel will display the aggregated stats for each country of origin.

Geo location panel

You’ve reviewed the panels available in the dashboard, now you’ll generate reports in different formats.

Step 5 — Generating Reports
Aside from displaying the data in the terminal, GoAccess also allows you to generate HTML, JSON, or CSV reports. Make sure that you’re in the home directory before running any of the commands in this section:

cd ~
To output the report as static HTML, specify an HTML file as the argument to the -o flag. This flag also accepts filenames that end in .json or .csv.

$ sudo goaccess /var/log/apache2/access.log -o stats.html

A stats.html file should appear in your user directory.

ls

Output
goaccess-1.4 goaccess-1.4.tar.gz snap stats.html

You can copy this file to the user directory on your local machine using scp. Run this command from your local machine, and not the remote server:

scp user@your_server_ip:stats.html ~/stats.html

Once the file has been copied over, you can open it in your browser with the open command on macOS:

open ~/stats.html

Or if you’re using a Linux distribution on your local machine:

xdg-open ~/stats.html
HTML report in Firefox<

You’ve generated a HTML report and viewed this in your browser.

Conclusion
In this article, we covered the GoAccess command-line tool and discussed how to use it for analyzing server logs. Although we only considered how GoAccess may be used with Apache logs, the tool also supports other log formats such as Nginx, Amazon S3, Elastic Load Balancing, and CloudFront.

You can check the full GoAccess documentation or run man goaccess in your terminal.

How to Install PyCharm on Ubuntu 18.04

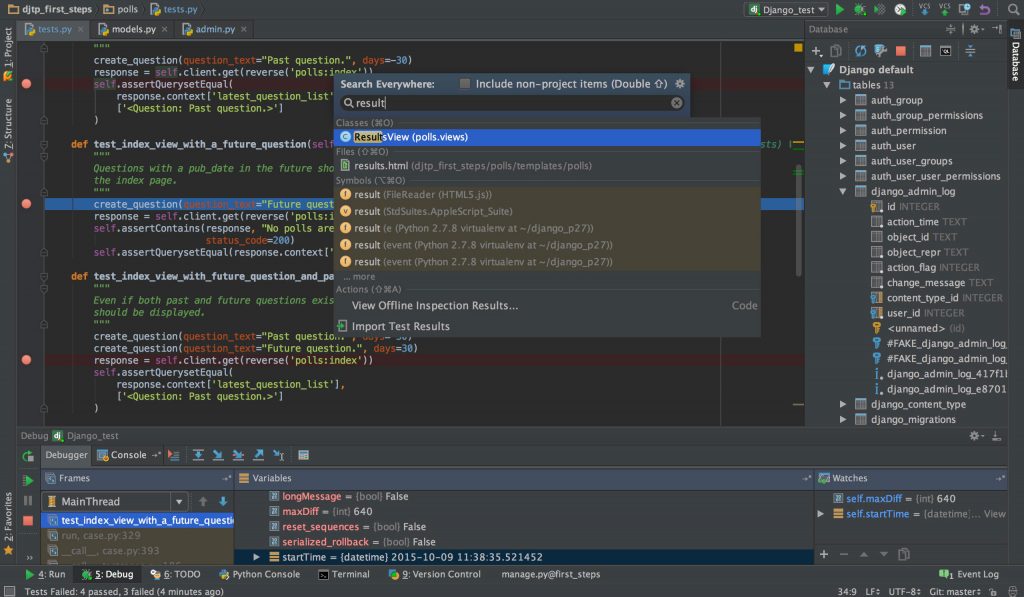
In this article we will learn How to Install PyCharm on Ubuntu 18.04.

PyCharm is a Python IDE for Professional Developers. You can use Professional or Free Community version.

install pycharm on ubuntu 18.04

PyCharm Features

Intelligent Coding Assistance
PyCharm provides smart code completion, code inspections, on-the-fly error highlighting and quick-fixes, along with automated code refactorings and rich navigation capabilities.

Built-in Developer Tools
PyCharm’s huge collection of tools out of the box includes an integrated debugger and test runner; Python profiler; a built-in terminal; integration with major VCS and built-in database tools; remote development capabilities with remote interpreters; an integrated ssh terminal; and integration with Docker and Vagrant.

Web Development
In addition to Python, PyCharm provides first-class support for various Python web development frameworks, specific template languages, JavaScript, CoffeeScript, TypeScript, HTML/CSS, AngularJS, Node.js, and more.

Scientific Tools
PyCharm integrates with IPython Notebook, has an interactive Python console, and supports Anaconda as well as multiple scientific packages including Matplotlib and NumPy.

System requirements:

    • Any 64-bit Linux distribution with Gnome, KDE, or Unity
    • 4 GB RAM minimum, 8 GB RAM recommended
    • 1.5 GB hard disk space + at least 1 GB for caches
    • 1024×768 minimum screen resolution
    • Python 2.7, or Python 3.5 or newer

Watch this video to learn how to install PyCharm on Ubuntu

Update all your system packages:

sudo apt-get update
sudo apt-get upgrade

Method-1: Direct Download

Go to PyCharm link to download for Ubuntu 18.04

Installation Instructions:
1. Copy the pycharm-2019.3.tar.gz to the desired installation location
(make sure you have rw permissions for that directory)

2. Unpack the pycharm-2019.3.tar.gz file to an empty directory using the following command: tar -xzf pycharm-2019.3.tar.gz

Note: A new instance MUST NOT be extracted over an existing one. The target folder must be empty

3. Run pycharm.sh from the bin subdirectory

Method-2: Install with Command line

sudo snap install [pycharm-professional|pycharm-community] --classic

If you want to use free version:

sudo snap install pycharm-community --classic

Successful Installation Message:

pycharm-community 2019.3 from jetbrains installed

Method-3: Install from Ubuntu Software

Step -1: Open Ubuntu software.

Step-2: Search “PyCharm”

Step-3: Click on “Install”

install pycharm on ubuntu 18.04

Learn how to install Atom on Ubuntu 18.04

How To Install and Configure the OpenLiteSpeed Web Server on Ubuntu 18.04

install openlitespeed server on ubuntu 18.04

In this article, we’ll learn how to install and configure OpenLiteSpeed on an Ubuntu 18.04 server.

install openlitespped server ubuntu 18OpenLiteSpeed is the Open Source edition of LiteSpeed Web Server Enterprise. OpenLiteSpeed contains all of the essential features found in LiteSpeed Enterprise, and represents our commitment to support the Open Source community. It features Apache-compatible rewrite rules, a built-in web-based administration interface, and customized PHP processing optimized for the server.
OpenLiteSpeed Features:

Event-Driven Architecture
Fewer processes, less overhead, and enormous scalability. Keep your existing hardware.

Understands Apache Rewrite Rules
OpenLiteSpeed is mod_rewrite compatible, with no new syntax to learn. Continue to use your existing rewrite rules.

Friendly Admin Interfaces
OLS comes with a built-in WebAdmin GUI. Control panel support is available with CyberPanel.

Built for Speed and Security
Features Anti-DDoS connection and bandwidth throttling, ModSecurity v3 integration, and more.

Intelligent Cache Acceleration
Built-in full-page cache module is highly-customizable and efficient for an exceptional user experience.

PageSpeed Optimization
Automatically implement Google’s PageSpeed optimization system with the mod_pagespeed module.

PHP LiteSpeed SAPI
Native SAPI for PHP allows external applications written in PHP to run up to 50% faster.

WordPress Acceleration
Experience a measurable performance boost with OpenLiteSpeed and LSCache for WordPress.

Step 1 – Installing OpenLiteSpeed on Ubuntu 18.04

OpenLiteSpeed provides a software repository we can use to download and install the server with Ubuntu’s standard apt command.

Update all your system packages:

sudo apt-get update
sudo apt-get upgrade

Download and add the developer’s software signing key:

$ wget -qO - https://rpms.litespeedtech.com/debian/lst_repo.gpg | sudo apt-key add -

Now we will add the repository information to our system:

$ sudo add-apt-repository 'deb http://rpms.litespeedtech.com/debian/ bionic main'

Install the OpenLiteSpeed server and its PHP processor using apt install:

$ sudo apt install openlitespeed lsphp73

Finally, create a soft link to the PHP processor we just installed. This directs the OpenLiteSpeed server to use the correct version:

$ sudo ln -sf /usr/local/lsws/lsphp73/bin/lsphp /usr/local/lsws/fcgi-bin/lsphp5


OpenLiteSpeed server is installed, we’ll secure it by updating the default admin account.

Step 2 – Configure OpenLiteSpeed & Setting the Admin Password

Configure the administrative password for OpenLiteSpeed web server. By default, the password is set to 123456, so we should change this immediately. We can do this by running a script provided by OpenLiteSpeed:

sudo /usr/local/lsws/admin/misc/admpass.sh

Provide a username for the administrative user as below:

Please specify the user name of administrator.
This is the user name required to login the administration Web interface.
 
User name [admin]: wpcademyadmin
 
Please specify the administrator's password. This is the password required to login the administration Web interface.
 
Password:
Retype password:

Administrator's username/password is updated successfully!

Step 3 – Accessing the OpenLiteSpeed Web Server

OpenLiteSpeed should have started automatically. We can verify this with the following command:

$ sudo /usr/local/lsws/bin/lswsctrl status

Output:

litespeed is running with PID 990.
sudo /usr/local/lsws/bin/lswsctrl start

Output:

[OK] litespeed: pid=5137.

We need to open up some ports on our firewall. Configure Firewall for Port Access. Add the firewall rules:

$ sudo ufw allow http
$ sudo ufw allow https
$ sudo ufw allow 8088
$ sudo ufw allow 7080

ReloAd ufw to effect the changes:

sudo ufw reload

In your web browser, navigate to your server’s domain name or IP address, followed by :8088 to specify the port:

http://server_domain_or_IP:8088

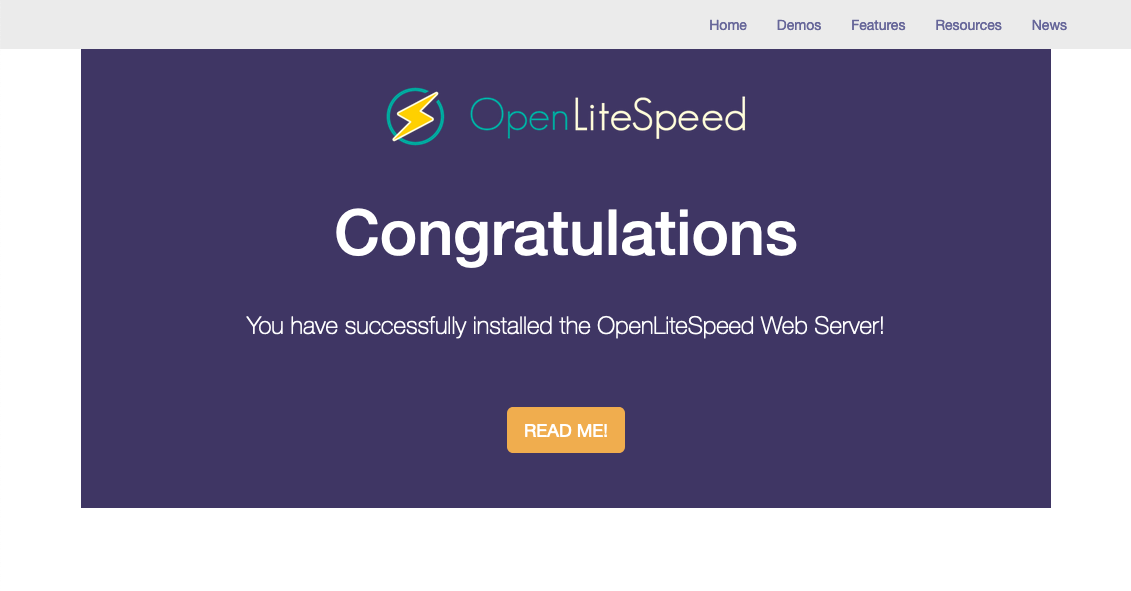
Browser should load the default OpenLiteSpeed web page as seen below:
install openlitespeed ubuntu 18.04

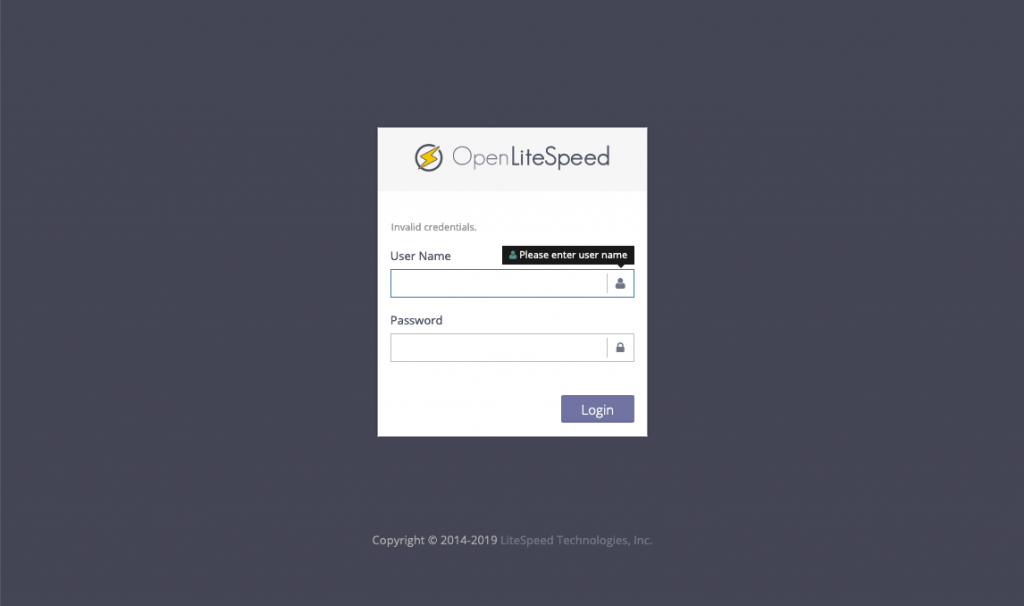
To configure the administrative interface. Got to your web browser, using HTTPS, navigate to your server’s domain name or IP address followed by :7080 to specify the port:

https://server_domain_or_IP:7080

install openlitespeed ubuntu 18.04 and configure admin interface

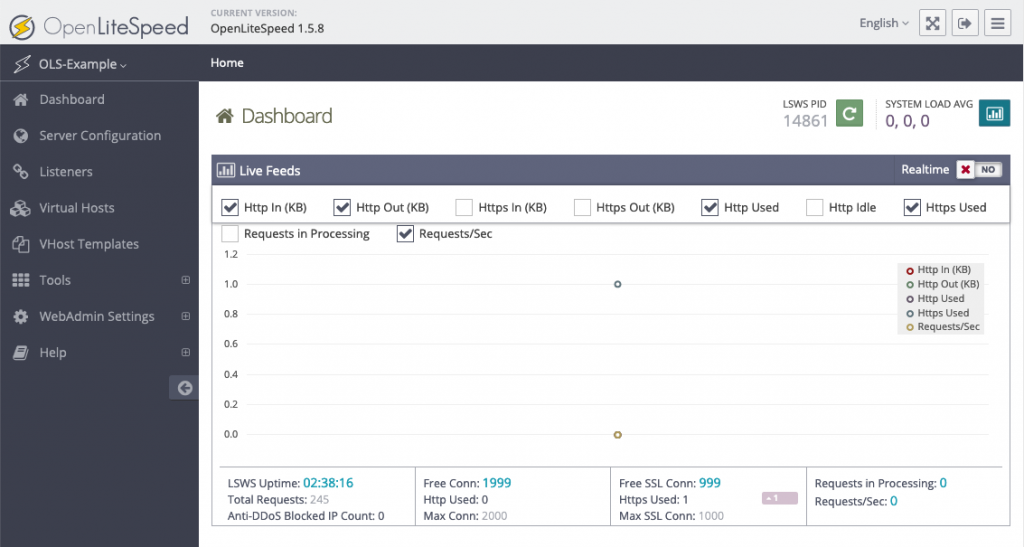
Enter the admin logins you had created during the OpenLiteSpeed configuration. Once you correctly authenticate, you will be presented with the OpenLiteSpeed administration interface:

openlitespeed-admin-dashboard

Step 4 – Configuring the Port

In the list of listeners, click the “View/Edit” button for the Default listener:

litesped listeners summary port config

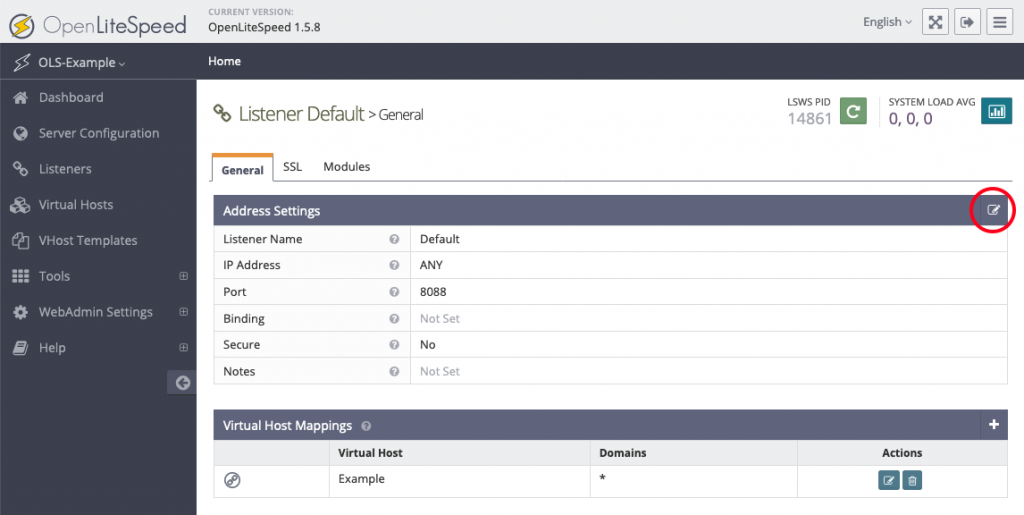
Click the edit button in the top-right corner of the “Address Settings” table to modify its values:
modify listener value port

On the next page, then click the floppy disk icon, Save.

change port 8088 to port 80

You’ll need to now open up port 80 on your firewall:

$ sudo ufw allow 80

The default web page should now be accessible in your browser on port 80 instead of port 8088.

Congratulations! You should have OpenLiteSpeed and PHP installed and running on an Ubuntu 18.04 server.

You are running Ubuntu 16.04 : Install OpenLiteSpeed on Ubuntu 16.04

Visit OpenLiteSpeed Official Website fore more details.

Easy guide to Add Your WordPress Site in Yandex Webmaster Tools

Add your Wordpress in yandex

In this tutorial, we will share how to add your WordPress site in Yandex webmaster tools to monitor your search engine traffic.

What is Yandex?

Yandex is a popular search engine like Google and Bing based in Russia. You can optimize your site for SEO in Yandex to get more visitors from Russia.


Yandex has a range of tools like generalized search engine, image search, email, videos, maps and more. It also has webmaster tools to help you rank your site, monitor traffic stats, search queries, keywords, and more.

You can connect your WordPress site with Yandex using the Yoast SEO plugin. It works similar to Google search console and Bing Webmaster tools.

Adding WordPress Site in Yandex Webmaster Tools

Before we start, you would need a Yandex Webmaster tools account to connect your site. Once you have created your account, you can login to your WordPress site to configure Yandex webmaster tools with Yoast SEO plugin.

Let’s take a look on how you can add your site in Yandex webmaster tools and start optimizing it right away.

Step 1: Create an Account at Yandex

First thing you need to do is login to your Yandex webmaster tools account. If you don’t have a Yandex account, then you can create one using this link.

After creating the account, you’ll see the Yandex Webmaster page. On this page, you need to click on the ‘+‘ button in top bar to add your site in Yandex.

In the site address field, you need to add your website’s full domain name and click on the Add button.

Note: If your main domain uses ‘www’ in the URL, then you need to add it before the domain (for example www.wpcademy.com)

On the next page, you will be asked to verify website ownership by adding meta content in your WordPress site. Go ahead and copy the content code from this page because you will need it in Step 2.

Step 2: Login to WordPress Admin Area and Add the Code

Now you need to login to your WordPress admin area and add the verification code in the Yoast SEO webmaster settings.

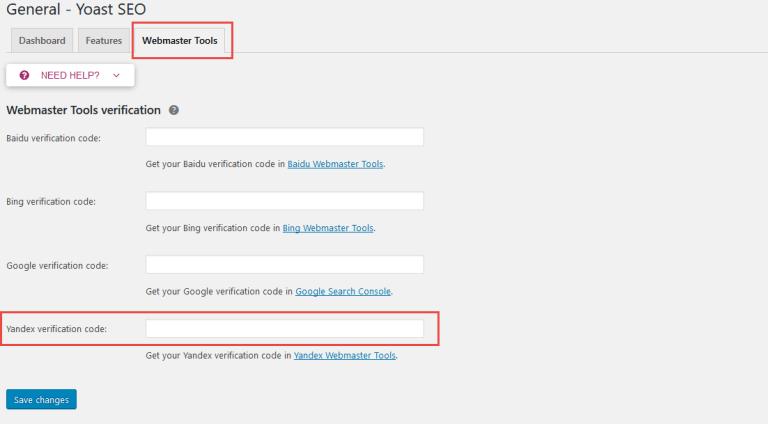
Simply head over to the SEO » General area and click on the Webmaster tools tab.

Next, you need to paste the code in the Yandex verification code field and click on the Save Changes button.

After adding the code in your WordPress site, you need to go back to the Yandex Webmaster tools page where you copied the code from and click on the Check button to verify ownership.

After successful verification, it will show your username that has the rights to manage your site in Yandex Webmaster tools. You can also delegate the rights to other users by adding their username and clicking on the Delegate rights button.

Now that your site is verified and added in Yandex Webmaster tools, you can see traffic stats, search errors, search queries, internal and external links, site information, robots.txt analysis, audit pages for mobile, and more on the Yandex dashboard. You can use the menu on left side of the screen to find any information that you may need.

Yandex Webmaster tools have options for site optimization that are filtered from troubleshooting to important settings like robots.txt and .htaccess. You can further optimize your robots.txt for SEO separately and regularly perform WordPress maintenance tasks to keep your site up to date.

How To Install SquirrelMail on CentOS 7

SquirrelMail on CentOS 7

Squirrelmail is one of the most popular Web-based email clients written in PHP. It has built-in pure PHP support for IMAP and SMTP, and it is designed to render all pages in pure HTML 4.0 with no JavaScript required, for maximum compatibility across browsers.

Prerequisites

This article assumes you have at least basic knowledge of Linux, know how to use the shell, and most importantly, you host your site on your own VPS. The installation is quite simple and assumes you are running in the root account, if not you may need to add ‘sudo’ to the commands to get root privileges. I will show you through the step by step installation SquirrelMail email clients on a CentOS 7 server.
Install SquirrelMail on CentOS 7

Step 1. First, let’s start by ensuring your system is up-to-date.

yum clean all
yum install epel-release
yum -y update

Step 2. Installing SquirrelMail on CentOS 7.

Install SquirrelMail using the yum default package manager:

yum install squirrelmail

Step 3. Configure SquirrelMail.

Once the webmail client is installed, you can configure it according to your needs by running the configuration script:

cd /usr/share/squirrelmail/config/
./conf.pl

SquirrelMail Configuration : Read: config.php (1.4.0)
---------------------------------------------------------
Main Menu --
1. Organization Preferences
2. Server Settings
3. Folder Defaults
4. General Options
5. Themes
6. Address Books
7. Message of the Day (MOTD)
8. Plugins
9. Database
10. Languages

D. Set pre-defined settings for specific IMAP servers
C Turn color off
S Save data
Q Quit

Command >>

There are different settings in the configuration file, but the main things that should be checked and configured are:

Set your default domain name (2. Server settings > 1. Domain)
Addresses of IMAP and SMTP servers.
Type of IMAP server.

Step 4. Accessing SquirrelMail.

SquirrelMail will be available on HTTP port 80 by default. Open your favorite browser and navigate to http://yourdomain.com/squirrelmail or http://server-ip/squirrelmail and complete the required the steps to finish the installation.

Congratulations! You have successfully installed SquirrelMail. Thanks for using this tutorial for installing SquirrelMail email clients in CentOS 7 systems. For additional help or useful information, we recommend you to check the official SquirrelMail web site.