How To Install Mate Desktop 1.22 on Ubuntu 18.04 LTS

Install Mate Desktop on Ubuntu 18

The MATE Desktop Environment is the continuation of GNOME 2. It provides an intuitive and attractive desktop environment using traditional metaphors for Linux and other Unix-like operating systems. There are several Linux distributions that support the MATE desktop including of course Ubuntu, and there is a dedicated Ubuntu MATE edition for this elegant desktop environment as well.

This article assumes you have at least basic knowledge of Linux, know how to use the shell, and most importantly, you host your site on your own VPS. The installation is quite simple and assumes you are running in the root account, if not you may need to add ‘sudo’ to the commands to get root privileges. I will show you through the step by step installation Mate Desktop on a Ubuntu 18.04 LTS (Bionic Beaver) server.

Install Mate Desktop on Ubuntu 18.04 LTS

Step 1. First make sure that all your system packages are up-to-date

sudo apt-get update
sudo apt-get upgrade

Step 2. Installing Mate Desktop Environment on Ubuntu 18.04 LTS.

Install Mate desktop using following command:

sudo apt install tasksel
sudo apt update
sudo tasksel install ubuntu-mate-desktop

During installation select a display manager, lightdm is the default display manager for the Mate desktop and wait for a few minutes, depending on your Internet connection speeds for the installation process to finish.

Step 3. Accessing Mate Desktop.

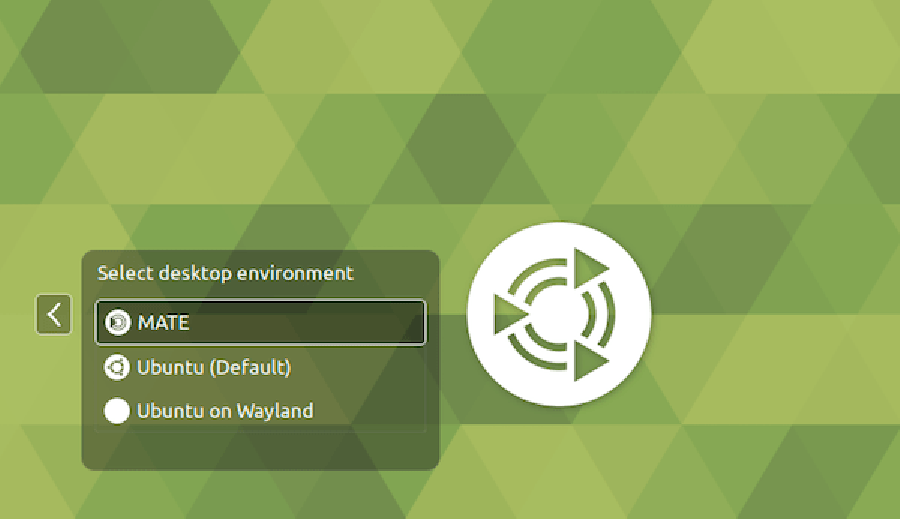
If everything goes OK, logout of your current session or restart your system and choose MATE desktop at the login interface as in the image below.
Mate-Dekstop-Environment-UI
Congratulation’s! You have successfully installed Mate Desktop. Thanks for using this tutorial for installing MATE Desktop Environment on your Ubuntu 18.04 LTS system. For additional help or useful information, we recommend you to check the official Mate Desktop web site.

How To Install Gitlab on Ubuntu 18.04 LTS

Install Gitlab on Ubuntu 18

Gitlab is graphical implementation of git, it is an open source repository management and version control system. GitLab is developed on Ruby on Rails. Using GitLab you can host your source code on your own server. This ensures security of the code, and gives you total freedom on the number of users as well as number of repositories and number of files. GitLab provides you with a platform to collaborate on projects and to keep track of changes in code. GitLab is widely used for software development and version control related tasks. In many ways it is similar to GitHub, except you can install it in your own server.

This article assumes you have at least basic knowledge of linux, know how to use the shell, and most importantly, you host your site on your own VPS. The installation is quite simple and assumes you are running in the root account, if not you may need to add ‘sudo’ to the commands to get root privileges. I will show you through the step by step installation Gitlab on a Ubuntu 18.04 LTS (Bionic Beaver) server.
GitLab Features

GitLab provides you web interface to edit files, directories and create merge requests.
It is self hosted, hence you have full control over your server and the source code hosted inside.
It provides LDAP user authentication and has two factor authentication system which makes the application very secure.
You can insert your own branding in the login page and it also supports project import from GitHub and other sources to GitLab.
It has lots of features like code reviews, issue tracking, activity feeds and inbuilt wiki.
It provides a fine work flow management which gives you ability to create groups for a project, ability to fork a repository as well as it provides ability to manage large binaries with git LFS.
GitLab comes with GitLab CI for continuous integration. You can also Docker with GitLab CI.
It’s free and open source hence you won’t have to deal with any licensing issues.

Install Gitlab on Ubuntu 18.04 LTS Bionic Beaver

Step 1. First make sure that all your system packages are up-to-date

sudo apt-get update
sudo apt-get upgrade

Step 2. Install and Configure the necessary dependencies.

Before we going to install Git-lab, we have to install some prerequisites like ssh and mail services:

sudo apt install curl openssh-server ca-certificates postfix

Step 3. Installing GitLab on Ubuntu 18.04 LTS.

Use following command to install GitLab packages on server:

curl -sS https://packages.gitlab.com/install/repositories/gitlab/gitlab-ce/script.deb.sh | sudo bash

The script will set up your server to use the GitLab maintained repositories. This lets you manage GitLab with the same package management tools you use for your other system packages. Once this is complete, you can install the actual GitLab application with apt:

sudo apt install gitlab-ce

If you are not comfortable installing the repository through a piped script, you can find the entire script here.

Step 4. Configure GitLab on Server.

Now start the configuration by using the gitlab-ctl command:

sudo gitlab-ctl reconfigure

Step 5. Accessing Gitlab.

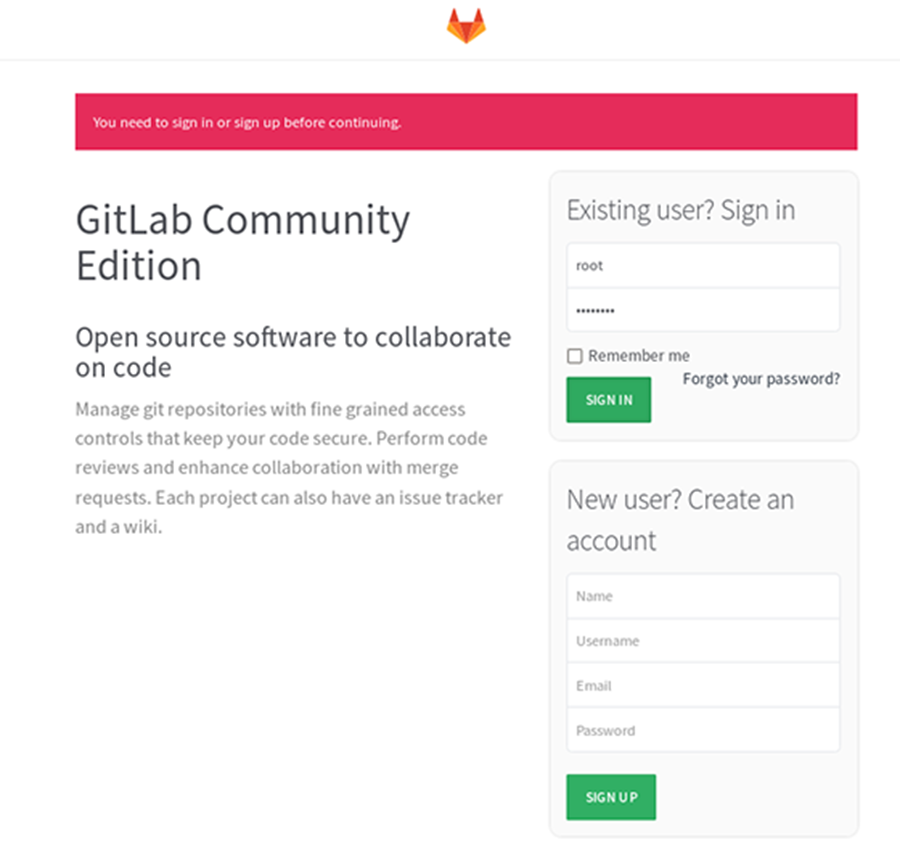
Gitlab will be available on HTTP port 80 by default. Open your favorite browser and navigate to http://yourdomain.com/ or http://server-ip. Since this is the first time we are accessing the web interface we will be prompted to set the password for the administrative account, so specify the password and the click on “Change your password”. If you are using a firewall, please open port 80 to enable access to the control panel.

install-gitlab

Congratulation’s! You have successfully installed Gitlab. Thanks for using this tutorial for installing Gitlab on Ubuntu 18.04 LTS (Bionic Beaver) system. For additional help or useful information, we recommend you to check the official Gitlab web site.

How To Install PrestaShop on Ubuntu 18.04 LTS

Install PrestaShop on Ubuntu 18

PrestaShop is an open-source e-commerce solution which allows you to maintain your own online shop. It PrestaShop is 100% free. This software is published under the Open Software License (OSL). It is written in PHP programming language with support for the MySQL database management system. More than 250,000 ecommerce sites run on PrestaShop. It supports many different payment gateway systems like PayPal, Google Checkout etc.

This article assumes you have at least basic knowledge of Linux, know how to use the shell, and most importantly, you host your site on your own VPS. The installation is quite simple and assumes you are running in the root account, if not you may need to add ‘sudo’ to the commands to get root privileges. I will show you through the step by step installation PrestaShop open-source shopping cart on a Ubuntu 18.04 LTS (Bionic Beaver) server.

Install PrestaShop on Ubuntu 18.04 LTS

Step 1. First make sure that all your system packages are up-to-date

sudo apt-get update
sudo apt-get upgrade

Step 2. Install LAMP (Linux, Apache, MariaDB and PHP) server.

A Ubuntu 18.04 LAMP server is required. If you do not have LAMP installed, you can follow our guide here. Also install all required PHP modules:

apt-get install php7.1-cli php7.1-gd php7.1-opcache php7.1-mysql php7.1-json php7.1-mcrypt php7.1-xml php7.1-curl

Step 3. Installing PrestaShop on Ubuntu 18.04 LTS.

First thing to do is to go to PrestaShop’s download page and download the latest stable version of PrestaShop, At the moment of writing this article it is version 1.7.3.3:

wget https://download.prestashop.com/download/releases/prestashop_1.7.3.3.zip

Unpack the PrestaShop archive to the document root directory on your server:

unzip prestashop_1.7.3.3.zip -d /var/www/html

We will need to change some folders permissions:

chown -R www-data.www-data /var/www/html/prestashop

Step 4. Configuring MariaDB for PrestaShop.

By default, MariaDB is not hardened. You can secure MariaDB using the mysql_secure_installation script. you should read and below each steps carefully which will set root password, remove anonymous users, disallow remote root login, and remove the test database and access to secure MariaDB:

mysql_secure_installation

Configure it like this:

- Set root password? [Y/n] y
- Remove anonymous users? [Y/n] y
- Disallow root login remotely? [Y/n] y
- Remove test database and access to it? [Y/n] y
- Reload privilege tables now? [Y/n] y

Next we will need to log in to the MariaDB console and create a database for the PrestaShop. Run the following command:

mysql -u root -p

This will prompt you for a password, so enter your MariaDB root password and hit Enter. Once you are logged in to your database server you need to create a database for PrestaShop installation:

CREATE DATABASE prestashop;
CREATE USER 'prestashopuser'@'localhost' IDENTIFIED BY 'PASSWORD';
GRANT ALL PRIVILEGES ON `prestashop`.* TO 'prestashopuser'@'localhost';
FLUSH PRIVILEGES;

Step 5. Configuring Apache web server for PrestaShop.

Create a new virtual host directive in Apache. For example, create a new Apache configuration file named ‘prestashop.conf’ on your virtual server:

sudo a2enmod rewrite
touch /etc/apache2/sites-available/prestashop.conf
ln -s /etc/apache2/sites-available/prestashop.conf /etc/apache2/sites-enabled/prestashop.conf
nano /etc/apache2/sites-available/prestashop.conf

Add the following lines:

<VirtualHost *:80>
ServerAdmin [email protected]
DocumentRoot /var/www/html/prestashop/
ServerName your-domain.com
ServerAlias www.your-domain.com
<Directory /var/www/html/prestashop/>
Options FollowSymLinks
AllowOverride All
Order allow,deny
allow from all
</Directory>
ErrorLog /var/log/apache2/your-domain.com-error_log
CustomLog /var/log/apache2/your-domain.com-access_log common
</VirtualHost>

Now, we can restart Apache web server so that the changes take place:

systemctl restart apache2.service

Step 6. Accessing PrestaShop.

PrestaShop will be available on HTTP port 80 by default. Open your favorite browser and navigate to http://yourdomain.com/ or http://server-ip/ and complete the required the steps to finish the installation. If you are using a firewall, please open port 80 to enable access to the control panel.
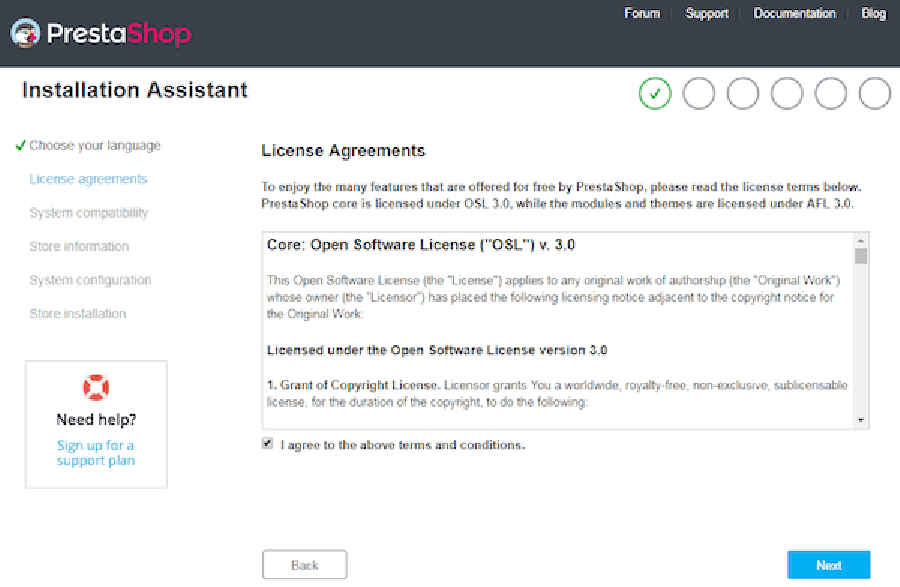
install-PrestaShop

Congratulation’s! You have successfully installed PrestaShop. Thanks for using this tutorial for installing PrestaShop open-source shopping cart software on your Ubuntu 18.04 LTS (Bionic Beaver) system. For additional help or useful information, we recommend you to check the official PrestaShop web site.
How To Install Ntopng on Ubuntu 18.04 LTS

Install Ntopng on Ubuntu 18

Ntopng is a relatively useful tool if you are looking to monitor different network protocols on your servers. It provides a bunch of tools for monitoring various protocols, traffic variants, and yes, bandwidth across multiple time frames. ntopng is based on libpcap and it has been written in a portable way in order to virtually run on every Unix platform, Mac OS and on Win32 as well.

This article assumes you have at least basic knowledge of Linux, know how to use the shell, and most importantly, you host your site on your own VPS. The installation is quite simple and assumes you are running in the root account, if not you may need to add ‘sudo’ to the commands to get root privileges. I will show you through the step by step installation Ntopng on a Ubuntu 18.04 LTS (Bionic Beaver) server.

Install Ntopng on Ubuntu 18.04 LTS

Step 1. First make sure that all your system packages are up-to-date

sudo apt-get update
sudo apt-get upgrade

Step 2. Installing Ntopng on Ubuntu 18.04 LTS.

To install Ntopng, run the following command as your server’s root user:

wget http://apt.ntop.org/18.04/all/apt-ntop.deb
dpkg -i apt-ntop.deb

Then, run:

apt-get update
apt-get install pfring-dkms nprobe ntopng n2disk cento

Step 3. Configure Ntopng.

Create ntopng configuration file, In this article we use nano as text editor. You can use your favorite text editor to create ntopng configuration files:

sudo nano /etc/ntopng/ntopng.conf

# /etc/ntopng/ntopng.conf
#
#        The  configuration  file is similar to the command line, with the exception that an equal
#        sign '=' must be used between key and value. Example:  -i=p1p2  or  --interface=p1p2  For
#        options with no value (e.g. -v) the equal is also necessary. Example: "-v=" must be used.
#
#
#       -G|--pid-path
#        Specifies the path where the PID (process ID) is saved.
#
-G=/var/tmp/ntopng.pid
#
#       -e|--daemon
#        This  parameter  causes ntop to become a daemon, i.e. a task which runs in the background
#        without connection to a specific terminal. To use ntop other than as a casual  monitoring
#        tool, you probably will want to use this option.
#
-e=
#
#       -i|--interface
#        Specifies  the  network  interface or collector endpoint to be used by ntopng for network
#        monitoring. On Unix you can specify both the interface name  (e.g.  lo)  or  the  numeric
#        interface id as shown by ntopng -h. On Windows you must use the interface number instead.
#        Note that you can specify -i multiple times in order to instruct ntopng to create  multi‐
#        ple interfaces.
#
-i=1
#
#       -w|--http-port
#        Sets the HTTP port of the embedded web server.
#
-w=3000
#
#       -m|--local-networks
#        ntopng determines the ip addresses and netmasks for each active interface. Any traffic on
#        those  networks  is considered local. This parameter allows the user to define additional
#        networks and subnetworks whose traffic is also considered local in  ntopng  reports.  All
#        other hosts are considered remote. If not specified the default is set to 192.168.1.0/24.
#
#        Commas  separate  multiple  network  values.  Both netmask and CIDR notation may be used,
#        even mixed together, for instance "131.114.21.0/24,10.0.0.0/255.0.0.0".
#
-m=192.168.1.0/24
#
#       -n|--dns-mode
#        Sets the DNS address resolution mode: 0 - Decode DNS responses  and  resolve  only  local
#        (-m)  numeric  IPs  1  -  Decode DNS responses and resolve all numeric IPs 2 - Decode DNS
#        responses and don't resolve numeric IPs 3 - Don't decode DNS responses and don't  resolve
#
-n=1
#
#       -S|--sticky-hosts
#        ntopng  periodically purges idle hosts. With this option you can modify this behaviour by
#        telling ntopng not to purge the hosts specified by -S. This parameter requires  an  argu‐
#        ment  that  can  be  "all"  (Keep  all hosts in memory), "local" (Keep only local hosts),
#        "remote" (Keep only remote hosts), "none" (Flush hosts when idle).
#
-S=
#
#       -d|--data-dir
#        Specifies the data directory (it must be writable). Default directory is ./data
#
-d=/var/tmp/ntopng
#
#       -q|--disable-autologout
#        Disable web interface logout for inactivity.
#
-q=

Create ntopng.start file:

sudo nano /etc/ntopng/ntopng.start

##Add this line##

--local-networks "192.168.0.0/24"  ## give your local IP Ranges here.
--interface 1

To see all available interfaces and options, use the ntopng -h option:

sudo ntopng -h

Start Ntopng server daemon:

systemctl start ntopng.service
systemctl start redis-server.service

Step 4. Test Ntopng.

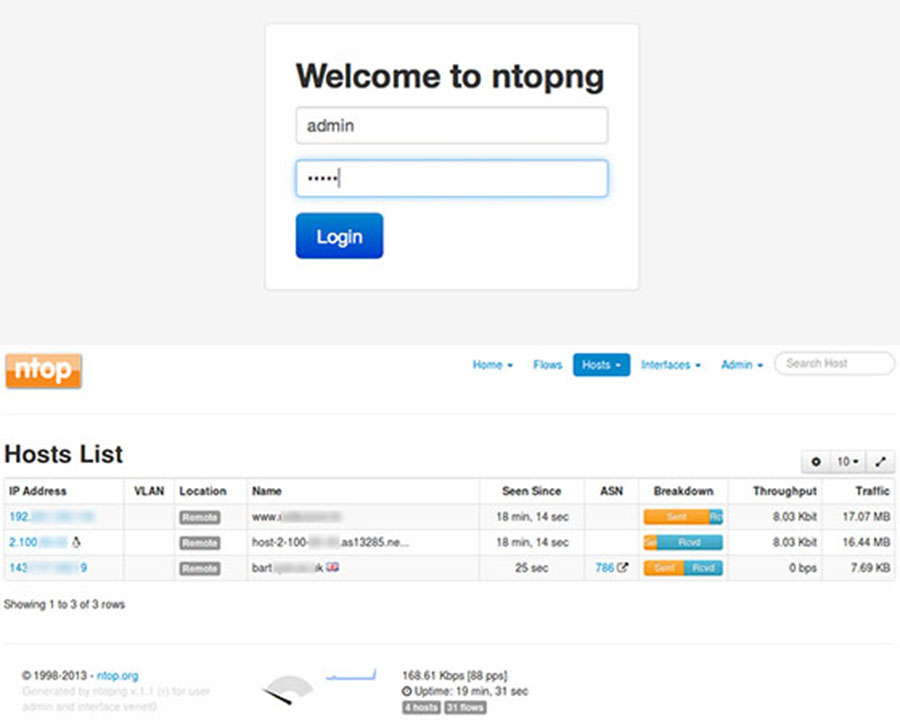
Now you can test your ntopng application by typing http://yourserver.name:3000. You will see ntopng login page. For the first time, you can use user ‘admin’ and password ‘admin’.
Ntopng-web-interface

Congratulation’s! You have successfully installed Ntopng. Thanks for using this tutorial for installing Ntopng high speed web-based traffic analysis and flow collection on your Ubuntu 18.04 LTS Bionic Beaver system. For additional help or useful information, we recommend you to check the official Ntopng web site.

How To Install phpMyAdmin 4.8.5 on Ubuntu 18.04 LTS

Install phpMyAdmin on Ubuntu 18

phpMyAdmin is web-based client written in php for managing MySQL and MariaDB databases. It provides a user friendly web interface to access and manage your databases. To ease usage to a wide range of people, phpMyAdmin is being translated into 72 languages and supports both LTR and RTL languages.

This article assumes you have at least basic knowledge of Linux, know how to use the shell, and most importantly, you host your site on your own VPS. The installation is quite simple and assumes you are running in the root account, if not you may need to add ‘sudo’ to the commands to get root privileges. I will show you through the step by step installation phpMyAdmin on a Ubuntu 18.04 LTS (Bionic Beaver) server.

Install phpMyAdmin on Ubuntu 18.04 LTS

Step 1. First make sure that all your system packages are up-to-date

sudo apt-get update
sudo apt-get upgrade

Step 2. Install LAMP (Linux, Apache, MariaDB and PHP) server.

A Ubuntu 18.04 LAMP server is required. If you do not have LAMP installed, you can follow our guide here. Also install all required PHP modules:

apt-get install php7.1-cli php7.1-gd php7.1-opcache php7.1-mysql php7.1-json php7.1-mcrypt php7.1-xml php7.1-curl

Step 3. Installing phpMyAdmin on Ubuntu 18.04 LTS.

Use this command to install phpmyadmin on Ubuntu 18.04:


sudo apt install phpmyadmin

Important, this step will ask you to select the web server where the application would be installed, it is mandatory that you select with the spacebar “Apache” server or your designate, not doing this will cause the files wont’t be copied correctly and then can not find the installed application.

Step 4. Accessing phpMyAdmin.

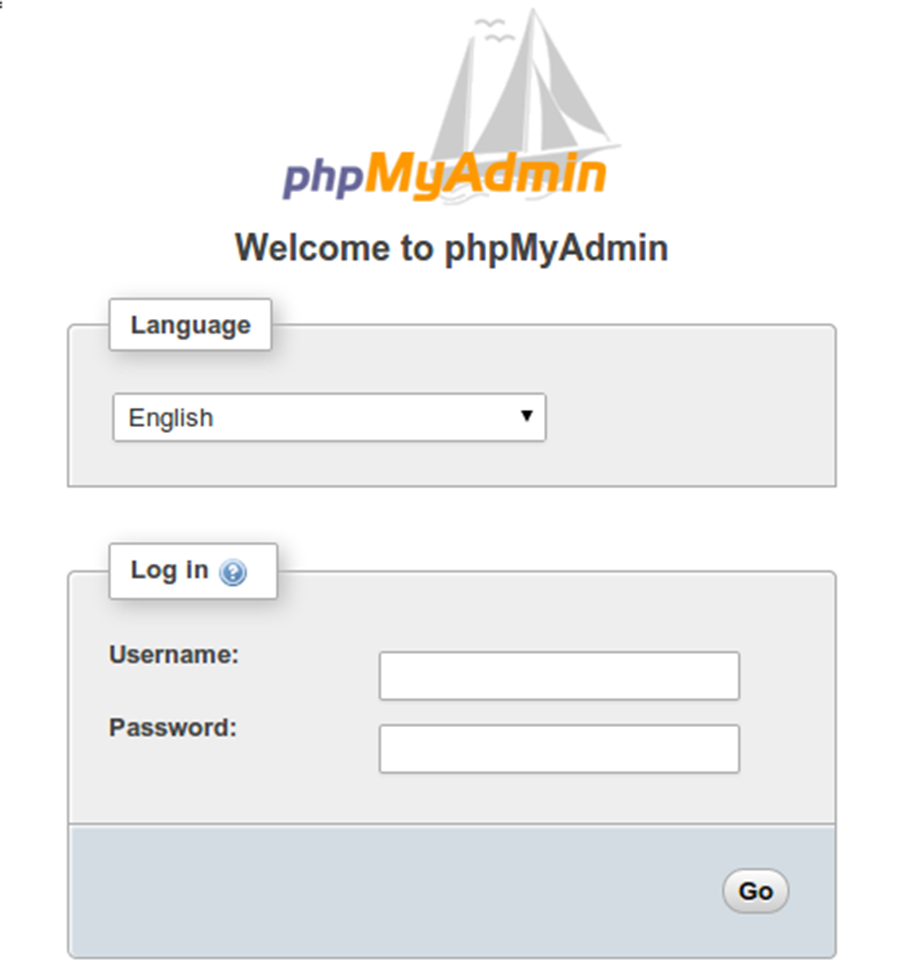
Now open your browser and surf to http://your-ip-address/phpmyadmin and your phpmyadmin will ask you for user and password of your mysql installation such as on step 2, you can use root as user and the root mysql password, or any other mysql user/password. If you are using a firewall, please open port 80 to enable access to the control panel.

phpMyAdmin-login

Congratulation’s! You have successfully installed phpMyAdmin. Thanks for using this tutorial for installing phpMyAdmin on Ubuntu 18.04 LTS system. For additional help or useful information, we recommend you to check the official phpMyAdmin web site.

How To Install Cockpit 192 on Ubuntu 18.04 LTS

Install Cockpit on Ubuntu 18

Cockpit is a free software which delivers a web-based interface for your system admin to do tasks, such as launching containers, storage management, network setup, inspecting logs and so forth.
Cockpit features

Easy to use — Cockpit is ideal for new sysadmins, allowing them to easily perform simple tasks such as storage administration, inspecting journals and stopping and starting services.
No interference — Jumping between the terminal and the internet tool is no problem. A service began via Cockpit could be stopped through the terminal. If an error happens in the terminal, it can be understood from the Cockpit journal interface.

Multi-server — You can track and manage several servers at the same

This article assumes you have at least basic knowledge of Linux, know how to use the shell, and most importantly, you host your site on your own VPS. The installation is quite simple and assumes you are running in the root account, if not you may need to add ‘sudo’ to the commands to get root privileges. I will show you through the step by step installation Cockpit on a Ubuntu 18.04 LTS (Bionic Beaver) server.

Install Cockpit on Ubuntu 18.04 LTS Bionic Beaver

Step 1. First make sure that all your system packages are up-to-date

sudo apt-get update
sudo apt-get upgrade

Step 2. Installing Cockpit on Ubuntu 18.04 LTS.

The cockpit package is available in the official Ubuntu 18.04 repositories, so installing using following command:

apt install cockpit

The cockpit-docker supports Docker management. So install using following command:

apt install -y cockpit-docker

Step 3. Accessing to Cockpit.

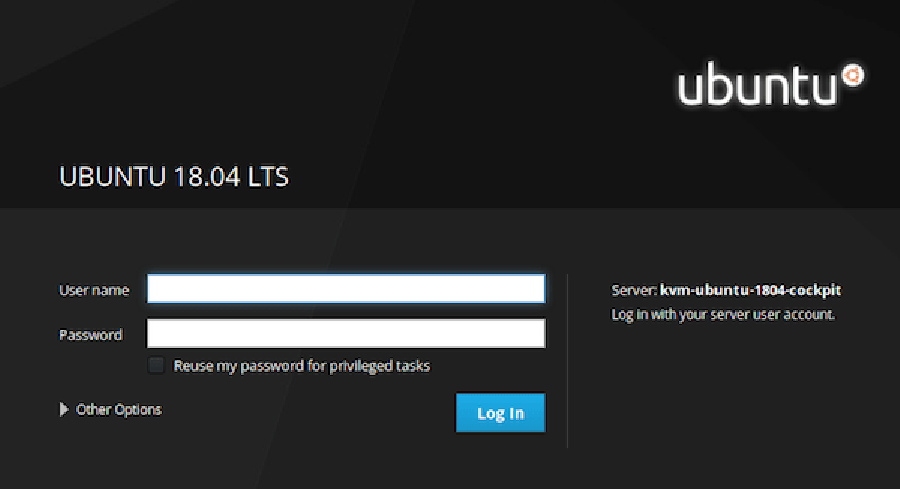
Cockpit will be available on HTTP port 9090 by default. Open your favorite browser and navigate to http://yourdomain.com:9090 or http://server-ip:9090 and complete the required the steps to finish the installation. We’ll be asked to enter the login details in order to enter into the dashboard. Here, the username and password is the same as that of the login details we use to login to our linux server. If you are using a firewall, please open port 9090 to enable access to the control panel.
Cockpit-Userinterface
Congratulation’s! You have successfully installed Cockpit. Thanks for using this tutorial for installing Cockpit in Ubuntu 18.04 LTS Bionic Beaver system. For additional help or useful information, we recommend you to check the official Cockpit web site.

How To Install EHCP on Ubuntu 18.04 LTS

Install EHCP on Ubuntu 18

EHCP (Easy Hosting Control Panel) is an open-source and powerful hosting control panel that lets you to host any websites, create email accounts, create additional (sub) domains and create FTP accounts and many more. Ehcp is the only first hosting control panel was written using PHP programming language and available for free.

This article assumes you have at least basic knowledge of Linux, know how to use the shell, and most importantly, you host your site on your own VPS. The installation is quite simple and assumes you are running in the root account, if not you may need to add ‘sudo’ to the commands to get root privileges. I will show you through the step by step installation Easy Hosting Control Panel on a Ubuntu 18.04 (Bionic Beaver) server.

Install EHCP on Ubuntu 18.04 LTS

Step 1. First make sure that all your system packages are up-to-date

sudo apt-get update
sudo apt-get upgrade

Step 2. Installing EHCP on Ubuntu 18.04 LTS.

First, download the latest EHCP version from the official website with the following command:

wget http://ehcp.net/ehcp_1804.tgz

Extract the ehcp source using following tar command:

tar -zxvf ehcp_1804.tgz

Change to ehcp directory, then run install.sh script:

cd ehcp
./install.sh

Read the instructions carefully, your server will send statistical information to the EHCP developers. If you choose to move on, the install script will install all required packages including Apache, MySql and Postfix. You will need to provide some information to configure the services and set the admin passwords.

Step 4. Accessing Easy Hosting Control Panel.

EHCP will be available on HTTP port 80 by default. Open your favorite browser and navigate to http://yourdomain.com or http://server-ip. Enter the administrative credentials. Default admin username is ‘admin‘ and default admin password is ‘1234‘. If you had entered a new password during the installation please provide the same. If you are using a firewall, please open port 80 to enable access to the control panel.

Congratulation’s! You have successfully installed EHCP. Thanks for using this tutorial for installing Easy Hosting Control Panel in Ubuntu 18.04 LTS (Bionic Beaver) systems. For additional help or useful information, we recommend you to check the official EHCP web site.