How To Install ClamAV (0.101.2.tar.gz.sig)on Ubuntu 18.04 LTS

Install ClamAV on Ubuntu 18

ClamAV is an open source (GPL) antivirus engine designed for detecting viruses, malware and other malicious threats on Linux. It’s easy to use and best for Linux based Web and Mail server.

This article assumes you have at least basic knowledge of Linux, know how to use the shell, and most importantly, you host your site on your own VPS. The installation is quite simple and assumes you are running in the root account, if not you may need to add ‘sudo’ to the commands to get root privileges. I will show you through the step by step installation ClamAV on a Ubuntu 18.04 LTS (Bionic Beaver) server.

Install ClamAV on Ubuntu 18.04 LTS

Step 1. First make sure that all your system packages are up-to-date

sudo apt-get update
sudo apt-get upgrade

Step 2. Installing ClamAV on Ubuntu 18.04 LTS.

ClamAV is available in the Ubuntu repositories, you can install using following command:

sudo apt install clamav

Update virus database with Freshclam:

sudo freshclam

It’ll take a few minutes to complete. When it’s done, restart the service:

sudo systemctl start clamav-freshclam

Try to scan:

clamscan --infected --remove --recursive /home

Step 3. Installing ClamTK.

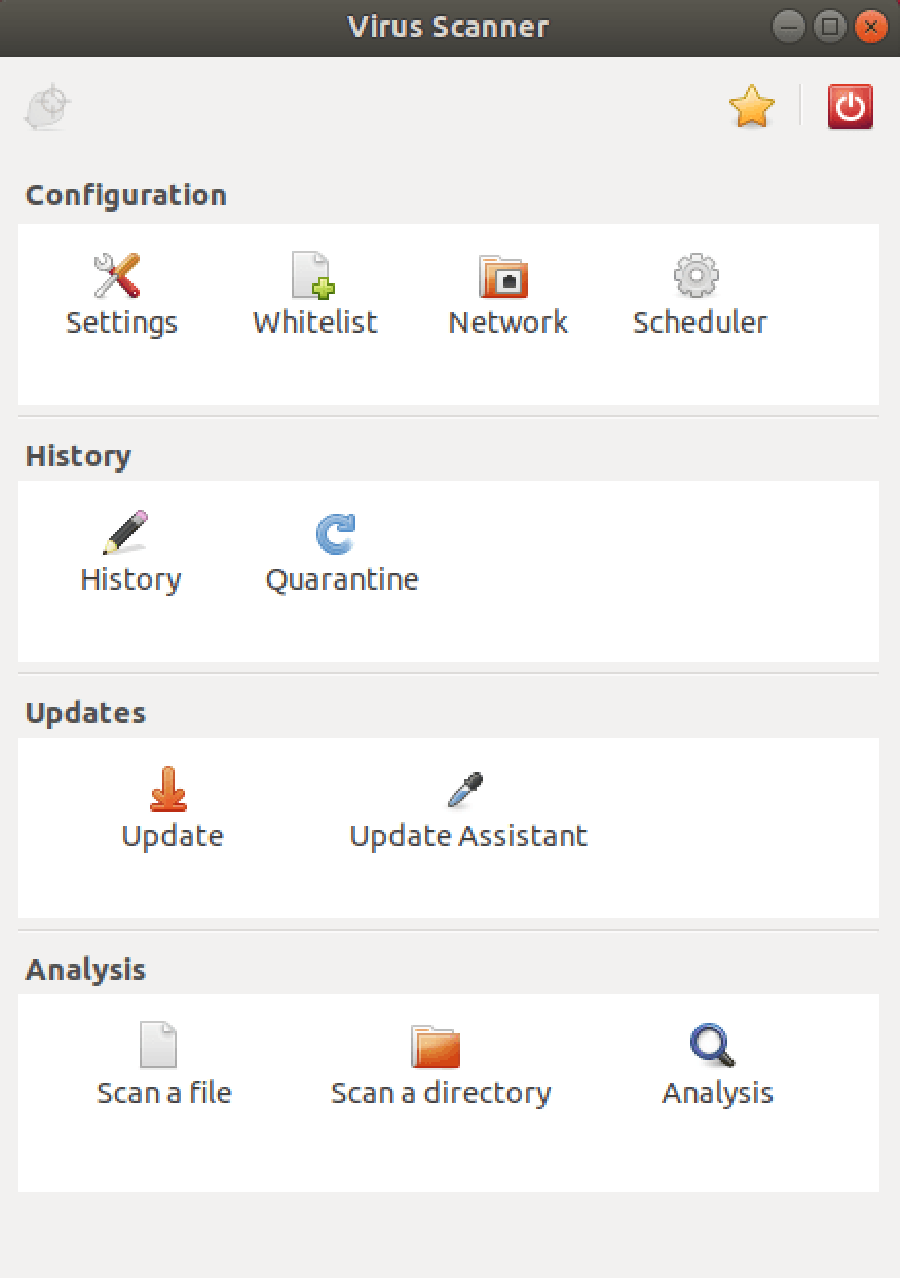
ClamTK package provides GUI window, This is useful for desktop user:

sudo apt install clamtk

ClamTk-GUI

Congratulation’s! You have successfully installed ClamAV. Thanks for using this tutorial for installing ClamAV open source antivirus engine in Ubuntu 18.04 LTS Bionic Beaver system. For additional help or useful information, we recommend you to check the official ClamAV web site.

How To Install Nextcloud on Ubuntu 18.04 LTS

Install Nextcloud on Ubuntu 18

Nextcloud is open source self-hosted file sync and share application (Calendar, Contacts, Documents, Email, and more). The developers at Nextcloud are doing their best to give the users a more secure platform, fewer bugs and overall a better product.

This article assumes you have at least basic knowledge of linux, know how to use the shell, and most importantly, you host your site on your own VPS. The installation is quite simple and assumes you are running in the root account, if not you may need to add ‘sudo’ to the commands to get root privileges. I will show you through the step by step installation Nextcloud on a Ubuntu 18.04 LTS (Bionic Beaver) server.

Install Nextcloud on Ubuntu 18.04 LTS

Step 1. First make sure that all your system packages are up-to-date

sudo apt-get update
sudo apt-get upgrade

Step 2. Install LAMP (Linux, Apache, MariaDB and PHP) server.

A Ubuntu 18.04 LAMP server is required. If you do not have LAMP installed, you can follow our guide here. Also install all required PHP modules:

apt-get install php7.1-cli php7.1-gd php7.1-opcache php7.1-mysql php7.1-json php7.1-mcrypt php7.1-xml php7.1-curl

Step 3. Installing Nextcloud.

First thing to do is to go to Nextcloud’s download page and download the latest stable version of Nextcloud, At the moment of writing this article it is version 13.0.2:

wget https://download.nextcloud.com/server/releases/nextcloud-13.0.2.zip

Unpack the Nextcloud archive to the document root directory on your server:

unzip nextcloud-13.0.2.zip
mv nextcloud /var/www/html

We will need to change some folders permissions:

chown -R www-data:www-data /var/www/html/nextcloud

Step 4. Configuring MariaDB for Nextcloud.

By default, MariaDB is not hardened. You can secure MariaDB using the mysql_secure_installation script. You should read and below each steps carefully which will set root password, remove anonymous users, disallow remote root login, and remove the test database and access to secure MariaDB.

mysql_secure_installation

Configure it like this:

- Set root password? [Y/n] y
- Remove anonymous users? [Y/n] y
- Disallow root login remotely? [Y/n] y
- Remove test database and access to it? [Y/n] y
- Reload privilege tables now? [Y/n] y

Next we will need to log in to the MariaDB console and create a database for the Nextcloud. Run the following command:

mysql -u root -p

This will prompt you for a password, so enter your MariaDB root password and hit Enter. Once you are logged in to your database server you need to create a database for Nextcloud installation:

MariaDB [(none)]> CREATE DATABASE nextcloud;
MariaDB [(none)]> GRANT ALL PRIVILEGES ON nextcloud.* TO 'nextcloud'@'localhost' IDENTIFIED BY 'strong_password';
MariaDB [(none)]> FLUSH PRIVILEGES;
MariaDB [(none)]> \q

Disable MariaDB binary logging by commenting the following lines:

nano /etc/mysql/my.cnf

Add the following three lines in [mysqld] section:

log-bin        = /var/log/mysql/mariadb-bin
log-bin-index  = /var/log/mysql/mariadb-bin.index
binlog_format  = mixed

Step 5. Configuring Apache web server for Nextcloud.

Create a new virtual host directive in Apache. For example, create a new Apache configuration file named ‘nextcloud.conf’ on your virtual server:

sudo a2enmod rewrite
touch /etc/apache2/sites-available/nextcloud.conf
ln -s /etc/apache2/sites-available/nextcloud.conf /etc/apache2/sites-enabled/nextcloud.conf
nano /etc/apache2/sites-available/nextcloud.conf

Add the following lines:

<VirtualHost *:80>
ServerAdmin [email protected]
DocumentRoot "/var/www/html/nextcloud/"
ServerName your-domain.com
ServerAlias www.your-domain.com
<Directory "/var/www/html/nextcloud/">
Options FollowSymLinks
AllowOverride All
Order allow,deny
allow from all
</Directory>
ErrorLog /var/log/apache2/your-domain.com-error_log
CustomLog /var/log/apache2/your-domain.com-access_log common
</VirtualHost>

Now, we can restart Apache web server so that the changes take place:

systemctl restart apache2.service

Step 6. Accessing Nextcloud.

Nextcloud will be available on HTTP port 80 by default. Open your favorite browser and navigate to http://yourdomain.com/ or http://server-ip/ and complete the required the steps to finish the installation. If you are using a firewall, please open port 80 to enable access to the control panel. What you do with Nextcloud is up to you. You can add new modules or just use it as a cloud-based file sync and share. You can install the Android app and even make use of the ownCloud desktop clients (they’ll work fine with Nextcloud).
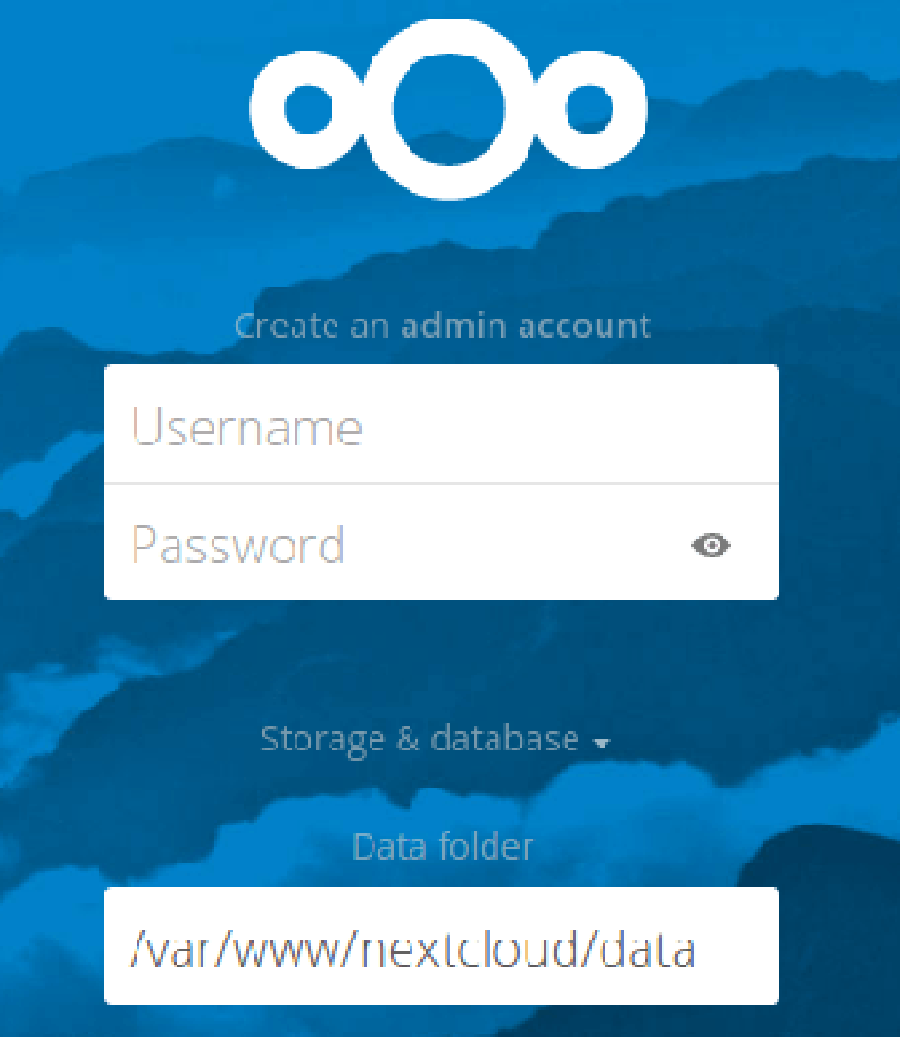
install-nextcloud-on-Ubuntu-16.04

Congratulation’s! You have successfully installed Nextcloud. Thanks for using this tutorial for installing Nextcloud personal cloud storage on your Ubuntu 18.04 LTS (Bionic Beaver) system. For additional help or useful information, we recommend you to check the official Nextcloud web site.
How To Install MongoDB 4.0. on Ubuntu 18.04 LTS

Install MongoDB on Ubuntu 18

MongoDB is a cross-platform document-oriented database program. Classified as a NoSQL database program, MongoDB uses JSON-like documents with schemata. MongoDB is developed by MongoDB Inc. and licensed under the Server Side Public License (SSPL).

MongoDB is a NoSQL document-oriented database. Refers to a database with a data model other than the tabular format used in relational databases such as MySQL, PostgreSQL, and Microsoft SQL. MongoDB features include: full index support, replication, high availability, and auto-sharding. It is a cross-platform and it makes the process of data integration faster and much easier. Since it is free and open-source, MongoDB is used by number of websites and organizations.

This article assumes you have at least basic knowledge of Linux, know how to use the shell, and most importantly, you host your site on your own VPS. The installation is quite simple and assumes you are running in the root account, if not you may need to add ‘sudo’ to the commands to get root privileges. I will show you through the step by step installation MongoDB on a Ubuntu 18.04 LTS (Bionic Beaver) server.

Install MongoDB on Ubuntu 18.04 LTS

Step 1. First make sure that all your system packages are up-to-date

sudo apt-get update
sudo apt-get upgrade

Step 2. Install MongoDB on Ubuntu 18.04 LTS.

First to completely remove an existing Mongodb from your machine if you have that in already:

sudo apt-get remove mongodb
sudo apt-get autoremove

A stable version of MongoDB packages are already in the default Ubuntu repository. However, the version in Ubuntu’s repository isn’t the latest. If you want to install the latest version you must add a third-party repository to your system and install it from there:

sudo apt-key adv --keyserver hkp://keyserver.ubuntu.com:80 --recv 0C49F3730359A14518585931BC711F9BA15703C6

After adding the repository key to Ubuntu, run the commands below to add MongoDB repository to your system:

echo "deb http://repo.mongodb.org/apt/ubuntu trusty/mongodb-org/3.4 multiverse" | sudo tee /etc/apt/sources.list.d/mongodb-org-3.4.list

After that, update your system and refresh existing repositories by running the commands below:

apt update

And now install the latest stable version of MongoDB:

apt install -y mongodb-org

Step 3. Verifying MongoDB database.

After installing MongoDB, the commands below can be used to stop, start and enable MongoDB to automatically startup when the systems boots up:

# sudo systemctl start mongod.service
# sudo systemctl enable mongod.service
# sudo systemctl status mongod.service
● mongodb.service - LSB: An object/document-oriented database
   Loaded: loaded (/etc/init.d/mongodb; bad; vendor preset: enabled)
   Active: active (running) since Thu 2016-06-4 16:40:35 IST; 14s ago
     Docs: man:systemd-sysv-generator(8)
  Process: 2849 ExecStart=/etc/init.d/mongodb start (code=exited, status=0/SUCCESS)
  Main PID: 1593 (code=exited, status=0/SUCCESS)
    Tasks: 13 (limit: 512)
   Memory: 51.9M
      CPU: 100ms
   CGroup: /system.slice/mongodb.service
           └─2861 /usr/bin/mongod --config /etc/mongodb.conf

A good way to start using MongoDB on your Ubuntu 16.04 is to read the MongoDB manual on the official web site.

https://docs.mongodb.org/manual/

Congratulation’s! You have successfully installed MongoDB. Thanks for using this tutorial for installing MongoDB in Ubuntu 18.04 LTS Bionic Beaver system. For additional help or useful information, we recommend you to check the official MongoDB web site.

How To Install PostgreSQL 11.2 on Ubuntu 18.04 LTS

Install PostgreSQL on Ubuntu 18

PostgreSQL is a free, open-source object-relational database management system (object-RDBMS), similar to MySQL, and is standards-compliant and extensible. It is commonly used as a back-end for web and mobile applications. PostgreSQL, or ‘Postgres’ as it is nicknamed, adopts the ANSI/ISO SQL standards together, with the revisions.

This article assumes you have at least basic knowledge of linux, know how to use the shell, and most importantly, you host your site on your own VPS. The installation is quite simple and assumes you are running in the root account, if not you may need to add ‘sudo’ to the commands to get root privileges. I will show you through the step by step installation PostgreSQL on a Ubuntu 18.04 (Bionic Beaver) server.

Install PostgreSQL on Ubuntu 18.04 LTS

Step 1. First make sure that all your system packages are up-to-date

sudo apt-get update
sudo apt-get upgrade

Step 2. Installing PostgreSQL server on Ubuntu 18.04 LTS.

PostgreSQL is available in the default repositories. So enter the following command from the Terminal to install it:

apt install postgresql postgresql-contrib phppgadmin

Step 3. Access PostgreSQL command prompt.

After installing PostgreSQL database server, by default it creates a user ‘postgres’ with role ‘postgres’. It also creates a system account with same name ‘postgres’. So to connect to postgres server, login to your system as user postgres and connect database:

su - postgres
psql

Now you are logged in to PostgreSQL database server. To check login info use following command from database command prompt:

postgres-# \conninfo

To disconnect from PostgreSQL database command prompt just type below command and press enter. It will return you back to Ubuntu command prompt:

postgres-# \q

Create new user and database:

### For example, let us create a new user called “mona” with password “ramona”, and database called “monadb”. ###
sudo -u postgres createuser -D -A -P mona
sudo -u postgres createdb -O mona monadb

Step 4. Configure Apache2 for phpPgAdmin.

phpPgAdmin is a web-based administration tool for PostgreSQL. It is perfect for PostgreSQL DBAs, newbies, and hosting services. You need to configure apache for phpPgAdmin. Edit the file /etc/apache2/conf-available/phppgadmin.conf:

nano /etc/apache2/conf-available/phppgadmin.conf

Comment out the line #Require local by adding a # in front of the line and add below the line allow from all so that you can access from your browser:
phpPgAdmin-apache2-conf

Step 5. Configure phpPgAdmin.

Next, edit the file /etc/phppgadmin/config.inc.php:

nano /etc/phppgadmin/config.inc.php

Now change the following option:

$conf[‘extra_login_security'] = true;
to
$conf[‘extra_login_security'] = false;

Now, we can restart Apache and phpPgAdmin so that the changes take place:

systemctl restart postgresql
systemctl restart apache2
systemctl enable postgresql
systemctl enable apache2

Step 6. Accessing phpPgAdmin.

phpPgAdmin will be available on HTTP port 80 by default. Open your favorite browser and navigate to http://yourdomain.com/phppgadmin or http://server-ip/phppgadmin. If you are using a firewall, please open port 80 to enable access to the control panel.
phppgadmin-ubuntu-16.04

Congratulation’s! You have successfully installed PostgreSQL Server. Thanks for using this tutorial for installing PostgreSQL in Ubuntu 18.04 (Bionic Beaver) systems. For additional help or useful information, we recommend you to check the official PostgreSQL web site.

How To Install Plex Media Server on Ubuntu 18.04 LTS

Install Plex Media Server on Ubuntu 18

Plex Media Server is a great multimedia tool which will turn your Ubuntu to a features multimedia server. You can stream your music or movies from any devices at home.

This article assumes you have at least basic knowledge of Linux, know how to use the shell, and most importantly, you host your site on your own VPS. The installation is quite simple and assumes you are running in the root account, if not you may need to add ‘sudo’ to the commands to get root privileges. I will show you through the step by step installation MongoDB on a Ubuntu 18.04 LTS (Bionic Beaver) server.

Install Plex Media Server on Ubuntu 18.04 LTS

Step 1. First make sure that all your system packages are up-to-date

sudo apt-get update
sudo apt-get upgrade

Step 2. Installing Plex Media Server on Ubuntu 18.04 LTS.

First, download the latest Plex Media Server for Ubuntu with the following command:

wget https://downloads.plex.tv/plex-media-server/1.13.0.5023-31d3c0c65/plexmediaserver_1.13.0.5023-31d3c0c65_amd64.deb

Next, install the DEB package we downloaded from the first step above:

sudo dpkg -i plexmediaserver_1.13.0.5023-31d3c0c65_amd64.deb

Then, start Plex Media Server and enable it to start on boot time by running the following command:

systemctl enable plexmediaserver.service
systemctl start plexmediaserver.service

Step 3. Configure Plex.

Now, open a web browser and type the following address. Change the IP address with your Ubuntu 18.04 IP address:

http://192.168.1.8:32400/manage

Congratulation’s! You have successfully installed Plex. Thanks for using this tutorial for installing Plex Media Server in Ubuntu 18.04 LTS Bionic Beaver system. For additional help or useful information, we recommend you to check the official Plex Media Server web site.

How To Install Kodi on Ubuntu 18.04 LTS

Install Kodi on Ubuntu 18

Kodi (formerly XBMC Media Center) is an open source and very powerful project that provides all the necessary tools for transforming your regular PC into a bona fide HTPC, which if used in conjunction a big screen TV and a Hi-Fi audio system, will transform your living room into a veritable home theater. Currently Kodi can be used to play almost all popular audio and video formats around. It was designed for network playback, so you can stream your multimedia from anywhere in the house or directly from the internet using practically any protocol available. Use your media as-is: Kodi can play CDs and DVDs directly from the disk or image file, almost all popular archive formats from your hard drive, and even files inside ZIP and RAR archives. In this tutorial we will learn How To Install Kodi on Ubuntu 18.04 LTS.

This article assumes you have at least basic knowledge of linux, know how to use the shell, and most importantly, you host your site on your own VPS. The installation is quite simple and assumes you are running in the root account, if not you may need to add ‘sudo’ to the commands to get root privileges. I will show you through the step by step installation Kodi in Ubuntu 18.04 (Bionic Beaver) server.

Install Kodi on Ubuntu 18.04 LTS Bionic Beaver

Step 1. First, make sure that all your system packages are up-to-date

sudo apt-get update
sudo apt-get upgrade

Step 2. Installing Kodi on Ubuntu 18.04 LTS.

Method 1. Install Kodi from PPA.

Install Kodi on Ubuntu 18.04 directly from Kodi’s PPA repository:

sudo apt-get install software-properties-common
sudo add-apt-repository ppa:team-xbmc/ppa
sudo apt-get update
sudo apt-get install kodi

Method 2. Install Kodi from command line.

Run the following commands to install Kodi:

sudo apt install kodi

After installing the application you can verify the version of kodi media player using the following command:

kodi -v

You can start Kodi from command by entering executing the following linux command:

kodi

Or, log out and select log in with Kodi session. Or launch the media center from the Dash (may need restart).

Congratulation’s! You have successfully installed kodi. Thanks for using this tutorial for installing kodi media center on 18.04 LTS (Bionic Beaver) system. For additional help or useful information, we recommend you to check the official Kodi web site.

How To Install Adobe Flash Player on Ubuntu 18.04 LTS

Install Adobe Flash Player on Ubuntu 18

Adobe Flash player is important plugin that allows our web browsers to play multimedia contents like audio and videos streaming, flash based games and other rich media stuff. Adobe Flash player is supported by different web browsers like IE ( Internet Explorer) , Chrome, Firefox , Safari and Opera and can be installed on different operating system like Windows , Linux/ UNIX and Mac OS X and Android.

This article assumes you have at least basic knowledge of linux, know how to use the shell, and most importantly, you host your site on your own VPS. The installation is quite simple. I will show you through the step by step installation adobe flash player on Ubuntu 18.04 LTS Bionic Beaver.

Install Adobe Flash Player on Ubuntu

Step 1. First of all make sure that all packages are up to date.

apt-get update
apt-get upgrade

Step 2. Installing Adobe Flash on Ubuntu 18.04 LTS.

First, enable this repository before attempting to install flash plugin:

add-apt-repository "deb http://archive.canonical.com/ $(lsb_release -sc) partner"

After enabling the partner’s repository, run the commands to install Adobe flash plugin:

apt update
apt install adobe-flashplugin browser-plugin-freshplayer-pepperflash

Once installing, restart Firefox or any other web browser before using the flash plugin. To make some changes to the plugin, click the Activities from the top left corner, then on the Activities Overview, search for Flash Plugin.

Congratulation’s! You have successfully installed adobe flash player. Thanks for using this tutorial for installing adobe flash player on Ubuntu 18.04 LTS (Bionic Beaver) system. For additional help or useful information, we recommend you to check the official Adobe web site.