How To Install Mattermost on CentOS 7

Mattermost on CentOS 7

Mattermost is an open source, private cloud Slack-alternative. A workplace messaging system for web, PCs and phones, released under the MIT license.

As an alternative to proprietary SaaS messaging, Mattermost brings all your team communication into one place, making it searchable and accessible anywhere. Mattermost is “Slack-compatible, not Slack-limited”, supporting a superset of Slack’s incoming and outgoing webhook integrations, including compatibility with existing Slack integrations. From your existing Slack teams, you can import users, public channel history and even theme setting colors into Mattermost.

Prerequisites

This article assumes you have at least basic knowledge of linux, know how to use the shell, and most importantly, you host your site on your own VPS. The installation is quite simple and assumes you are running in the root account, if not you may need to add ‘sudo’ to the commands to get root privileges. I will show you through the step by step installation Mattermost on a CentOS 7 server.
Install Mattermost on CentOS 7

Step 1. First let’s start by ensuring your system is up-to-date.

yum clean all
yum -y update

Step 2. Installing MySQL database.

Install and set up the database for use by the Mattermost server. You can install MySQL using command below:

wget http://dev.mysql.com/get/mysql57-community-release-el7-9.noarch.rpm
yum localinstall mysql57-community-release-el7-9.noarch.rpm

Next, install MySQL:

sudo yum install mysql-community-server

Start the MySQL server:

systemctl start mysqld.service
chkconfig mysqld on

Configuring MySQL for SugarCRM.

By default, MySQL is not hardened. You can secure MySQL using the mysql_secure_installation script. you should read and below each steps carefully which will set root password, remove anonymous users, disallow remote root login, and remove the test database and access to secure MySQL:

mysql_secure_installation

Configure it like this:

- Set root password? [Y/n] y
- Remove anonymous users? [Y/n] y
- Disallow root login remotely? [Y/n] y
- Remove test database and access to it? [Y/n] y
- Reload privilege tables now? [Y/n] y

Next we will need to log in to the MySQL console and create a database for the Mattermost. Run the following command:

mysql -u root -p

This will prompt you for a password, so enter your MariaDB root password and hit Enter. Once you are logged in to your database server you need to create a database for Mattermost installation:

mysql> CREATE USER 'mmuser'@'localhost' IDENTIFIED BY 'mmuser_strong_password';
mysql> CREATE DATABASE mattermostdb;
mysql> GRANT ALL PRIVILEGES ON mattermostdb.* TO 'mmuser'@'localhost';
mysql> FLUSH PRIVILEGES;
mysql> EXIT;

Step 3. Installing Mattermost Server.

First thing to do is to go to Mattermost’s download page and download the latest stable version of Mattermost, At the moment of writing this article it is version 3.6.2:

wget https://releases.mattermost.com/3.6.2/mattermost-3.6.2-linux-amd64.tar.gz

Unpack the Mattermost archive to the document root directory on your server:

tar xf *.gz
mv mattermost /opt/

Create the storage directory for files:

mkdir /opt/mattermost/data

Set up a system user and group called mattermost that will run this service, and set the ownership and permissions:

useradd --system --user-group mattermost
chown -R mattermost:mattermost /opt/mattermost
chmod -R g+w /opt/mattermost

Set up the database driver through the /opt/mattermost/config/config.json file. In it, search for “DriverName” and “DataSource” lines and change as follows:

"DriverName": "mysql"
"DataSource": "mmuser:@tcp(localhost:3306)/mattermost?charset=utf8"

Save, exit, and test the Mattermost Server with the following command:

sudo -u mattermost /opt/mattermost/bin/platform

When the server starts, it shows some log information and the text Server is listening on :8065. You can stop the server by pressing CTRL+C in the terminal window.

Step 4. Create a systemd unit for Mattermost.

Create a systemd file for Mattermost, /etc/systemd/system/mattermost.service and, in it, paste the following configuration:

[Unit]
Description=Mattermost
After=syslog.target network.target postgresql-9.4.service

[Service]
Type=simple
WorkingDirectory=/opt/mattermost/bin
User=mattermost
ExecStart=/opt/mattermost/bin/platform
PIDFile=/var/spool/mattermost/pid/master.pid
LimitNOFILE=49152

[Install]
WantedBy=multi-user.target

Make the service executable:

chmod 664 /etc/systemd/system/mattermost.service

And reload the services:

systemctl daemon-reload

Enable Mattermost service:

chkconfig mattermost on

And start it with systemd:

systemctl start mattermost

Step 5. Installing and configure NGINX.

In a production system, use a proxy server in front of Mattermost Server. In this case, NGINX. The main benefits of doing this are:

SSL termination
Port mapping :80 to :8065
HTTP to HTTPS redirect
Standard request logs

In order to install NGINX on CentOS 7, create a yum repository file, /etc/yum.repos.d/nginx.repo, with the following content:
[nginx]
name=nginx repo
baseurl=http://nginx.org/packages/rhel/7.1/$basearch/
gpgcheck=0
enabled=1

Install Nginx using YUM command:

yum install nginx.x86_64

After the installation is complete, start NGINX:

systemctl start nginx
systemctl enable nginx

Configuration Nginx.

In order to configure NGINX as proxy server, create the file /etc/nginx/sites-available/mattermost and past:

upstream backend {
server localhost:8065;
}

proxy_cache_path /var/cache/nginx levels=1:2 keys_zone=mattermost_cache:10m max_size=3g inactive=120m use_temp_path=off;

server {
listen 80;
server_name mattermost.mydomain.com;

location /api/v3/users/websocket {
proxy_set_header Upgrade $http_upgrade;
proxy_set_header Connection "upgrade";
client_max_body_size 50M;
proxy_set_header Host $http_host;
proxy_set_header X-Real-IP $remote_addr;
proxy_set_header X-Forwarded-For $proxy_add_x_forwarded_for;
proxy_set_header X-Forwarded-Proto $scheme;
proxy_set_header X-Frame-Options SAMEORIGIN;
proxy_buffers 256 16k;
proxy_buffer_size 16k;
proxy_read_timeout 600s;
proxy_pass http://backend;
}

location / {
client_max_body_size 50M;
proxy_set_header Connection "";
proxy_set_header Host $http_host;
proxy_set_header X-Real-IP $remote_addr;
proxy_set_header X-Forwarded-For $proxy_add_x_forwarded_for;
proxy_set_header X-Forwarded-Proto $scheme;
proxy_set_header X-Frame-Options SAMEORIGIN;
proxy_buffers 256 16k;
proxy_buffer_size 16k;
proxy_read_timeout 600s;
proxy_cache mattermost_cache;
proxy_cache_revalidate on;
proxy_cache_min_uses 2;
proxy_cache_use_stale timeout;
proxy_cache_lock on;
proxy_pass http://backend;
}
}

Remove the existing default sites-enabled file:

rm /etc/nginx/sites-enabled/default

Enable the mattermost configuration:

ln -s /etc/nginx/sites-available/mattermost /etc/nginx/sites-enabled/mattermost

Finally, restart Nginx service:

systemctl restart nginx

Step 7. Accessing Mattermost.

Mattermost will be available on HTTP port 80 by default. Open your favorite browser and navigate to http://mattermost.mydomain.com/ and continue to configure Mattermost by entering an email address and creating an account. If you are using a firewall, please open port 80 to enable access to the control panel.

Congratulation’s! You have successfully installed Mattermost. Thanks for using this tutorial for installing Mattermost on CentOS 7 system. For additional help or useful information, we recommend you to check the official Mattermost web site.

How To Install Apache on CentOS 7

Apache on CentOS 7

Apache Web Server is an open source Web server creation, deployment and management software. Initially developed by a group of software programmers, it is now maintained by the Apache Software Foundation. Apache HTTP Server is the most popular web server in the world and has been so since April 1996. It played a key role in the growth of the World Wide Web. It is estimated that Apache Server is serving 54.2% of all active websites and 53.3% of the top servers across all domains.

Prerequisites

This article assumes you have at least basic knowledge of linux, know how to use the shell, and most importantly, you host your site on your own VPS. The installation is quite simple and assumes you are running in the root account, if not you may need to add ‘sudo’ to the commands to get root privileges. I will show you through the step by step installation Apache web server on a CentOS 7 server.
Install Apache on CentOS 7

Step 1. First let’s start by ensuring your system is up-to-date.

yum clean all
yum -y update

Step 2. Installing Apache on CentOS 7.

We will be installing Apache with yum, which is the default package manager for CentOS 7:

yum install httpd openssl mod_ssl

Once Apache has finished installing, the httpd service will need to be started and enabled so it will run automatically when the server starts:

sudo systemctl restart httpd
sudo systemctl status httpd
sudo systemctl enable httpd

You can verify that Apache is really running by opening your favorite web browser and entering the URL http://your-server’s-address. you should get a “Testing 123″ page similar to the image below:

Install Apache on CentOS 7

Step 3. Configure Firewalld for Apache.

Add new rule to Firewalld:

firewall-cmd --permanent --zone=public --add-service=http

## OR ##

firewall-cmd --permanent --zone=public --add-port=80/tcp

Restart firewalld service:

systemctl restart firewalld.service

Congratulation’s! You have successfully installed Apache. Thanks for using this tutorial for installing Apache web server on CentOS 7 system. For additional help or useful information, we recommend you to check the official Apache web site.

How To Install Dropbox on CentOS 7

Dropbox on CentOS 7

Dropbox is a useful file-sharing and syncing service that lets you sync files between different machines over the Internet for free. It’s very useful for backing up your important documents, pictures, MP3 files, video files, and other data.

Prerequisites

This article assumes you have at least basic knowledge of linux, know how to use the shell, and most importantly, you host your site on your own VPS. The installation is quite simple and assumes you are running in the root account, if not you may need to add ‘sudo’ to the commands to get root privileges. I will show you through the step by step installation Dropbox on a CentOS 7 server.
Install Dropbox on CentOS 7

Step 1. First let’s start by ensuring your system is up-to-date.

yum clean all
yum -y update

Step 2. Installing Dropbox.

Download the latest Linux Dropbox client from the below link:

### 32-Bit ###
curl -Lo dropbox-linux-x86.tar.gz https://www.dropbox.com/download?plat=lnx.x86

### 64-Bit ###
curl -Lo dropbox-linux-x86_64.tar.gz https://www.dropbox.com/download?plat=lnx.x86_64

After downloading, we need to create a folder for client software and extract the compressed file:

mkdir -p /opt/dropbox-client
tar xzfv dropbox-linux-x86_64.tar.gz --strip 1 -C /opt/dropbox-client

Step 3. Linking Dropbox client.

We needed to run the below command on the server in the folder where we want to store the Dropbox files:

cd /usr/share/dropbox
/opt/dropbox-client/dropboxd

The first time you run the client, you should see output that looks like this:

This computer isn't linked to any Dropbox account...
Please visit https://www.dropbox.com/cli_link_nonce?nonce=9c4d26a095e82e2abmwe468029d66236f to link this device.

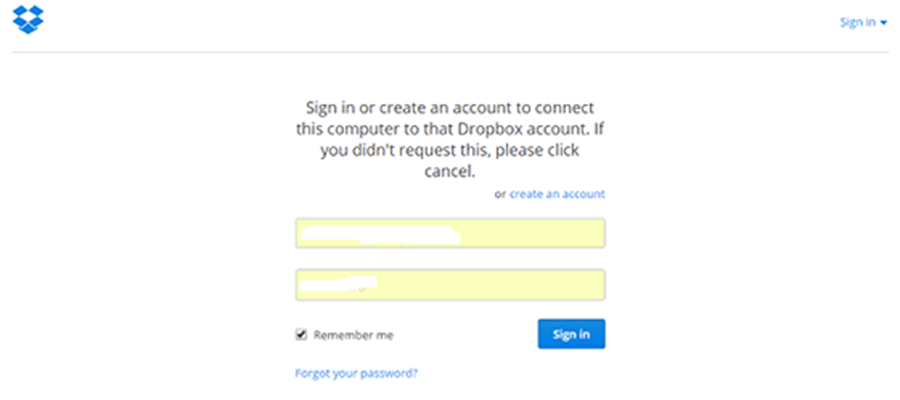
We needed to copy above link code and paste it on any browser and enter the credentials of your Dropbox account and save when we click on continue.
dropbox-client
The next step is to set up some scripts so that Dropbox will run as a service, so that you don’t need to be logged in for the client to keep running:

curl -o /etc/init.d/dropbox https://gist.githubusercontent.com/thisismitch/6293d3f7f5fa37ca6eab/raw/2b326bf77368cbe5d01af21c623cd4dd75528c3d/dropbox
curl -o /etc/systemd/system/dropbox.service https://gist.githubusercontent.com/thisismitch/6293d3f7f5fa37ca6eab/raw/99947e2ef986492fecbe1b7bfbaa303fefc42a62/dropbox.service

Make the scripts executable with this command:

chmod +x /etc/systemd/system/dropbox.service /etc/init.d/dropbox

The script expects the /etc/systemd/dropbox file to contain a list of system users that will run Dropbox. Create the file and open it for editing with this command:

nano /etc/sysconfig/dropbox

Next, add a line that specifies that DROPBOX_USERS is equal to your system username. For example, if your username is “wpcademy”, it should look like this and don’t forget Save and exit:

DROPBOX_USERS="wpcademy"

Finally, We needed to start and enable them to start at boot time with the below commands:

systemctl daemon-reload
systemctl start dropbox
systemctl enable dropbox

Congratulation’s! You have successfully installed Dropbox. Thanks for using this tutorial for installing Dropbox on CentOS 7 system. For additional help or useful information, we recommend you to check the official Dropbox web site.

How To Install Plesk on Linux System

Plesk on Linux System

Plesk is one of the widely used web hosting control panels in the web hosting business. It offers simple server and website management solutions with single-click mechanisms. Plesk consists of webserver suite (LAMP), Mail server, FTP Server, Name Server applications etc.

Plesk supports a wide range of Linux releases, including all of the commonly used distributions like CentOS, Ubuntu, Debian and Cloudlinux. Plesk is a an enterprise hosting control panel and it requires license to work effectively. They also offers 15 day trial license which is intended for testing purposes.

Prerequisites

This article assumes you have at least basic knowledge of linux, know how to use the shell, and most importantly, you host your site on your own VPS. The installation is quite simple and assumes you are running in the root account, if not you may need to add ‘sudo’ to the commands to get root privileges. I will show you through the step by step installation Plesk web hosting control panels on a Linux system server.
Install Plesk on Linux System

Step 1. Download the autoinstaller from Plesk website:

wget http://autoinstall.plesk.com/plesk-installer

Add execute permissions to the autoinstaller:

chmod +x plesk-installer

Launch the autoinstaller:

./plesk-installer

Follow the script prompts and pick the options that best suits your use case.

Step 2. Accessing Plesk.

Once this is complete, you’ll be able to access your Plesk server via the web management interface. To do this, open a browser and point it to https://yourserverip:8443 and login to the control panel as root user.

Congratulation’s! You have successfully installed Plesk. Thanks for using this tutorial for installing Plesk web hosting control panels on a Linux system. For additional help or useful information, we recommend you to check the official Plesk web site.

How To Install Apache OpenOffice on CentOS 7

Apache OpenOffice on CentOS 7

Apache OpenOffice, commonly known as OpenOffice.org or OpenOffice, is an open-source office productivity software suite whose main components are for word processing, spreadsheets, presentations, graphics, and databases

Prerequisites

This article assumes you have at least basic knowledge of linux, know how to use the shell, and most importantly, you host your site on your own VPS. The installation is quite simple and assumes you are running in the root account, if not you may need to add ‘sudo’ to the commands to get root privileges. I will show you through the step by step installation Apache OpenOffice on a CentOS 7 server.
Install Apache OpenOffice on CentOS 7

Step 1. First let’s start by ensuring your system is up-to-date.

yum clean all
yum -y update

Step 2. Download Apache OpenOffice Linux Package.

Follow below steps to download OpenOffice and extract tar file:

### 32-Bit ###
wget http://sourceforge.net/projects/openofficeorg.mirror/files/4.1.2/binaries/en-US/Apache_OpenOffice_4.1.2_Linux_x86_install-rpm_en-US.tar.gz
tar xzf Apache_OpenOffice_4.1.2_Linux_x86_install-rpm_en-US.tar.gz

### 64-Bit ###
wget http://sourceforge.net/projects/openofficeorg.mirror/files/4.1.2/binaries/en-US/Apache_OpenOffice_4.1.2_Linux_x86-64_install-rpm_en-US.tar.gz
tar xzf Apache_OpenOffice_4.1.2_Linux_x86-64_install-rpm_en-US.tar.gz

Remove OpenOffice.org and LibreOffice.org Packages with following command:

yum remove openoffice* libreoffice*

Step 3. Installing Apache OpenOffice.

You will see list of rpms packages inside en-US directory. Install all rpms packages using following command:

cd en-US/RPMS/
rpm -Uvh *.rpm

Now install the desktop integration features for your setup. Go to desktop-integration in the installation directory, and install required package:

cd desktop-integration/
rpm -Uvh openoffice4.1-redhat-menus-*.noarch.rpm

Step 4. Accessing Apache OpenOffice.

After successfully installed all the packages start Openoffice using following command:

openoffice4

Congratulation’s! You have successfully installed Apache OpenOffice. Thanks for using this tutorial for installing Apache OpenOffice on CentOS 7 system. For additional help or useful information, we recommend you to check the official Apache OpenOffice web site.

How To Install MyCollab Project Management Software on CentOS 7

MyCollab Project Management Software on CentOS 7

MyCollab is the free and open source collaboration tools, it has three existing modules: Project Management, CRM and Document Management. Intuitive UI, rich features, high performance and stability are the advantages compared with various popular tools in the market such as Redmine, Bugzilla, Mantis etc. This open source is included in a trusted commercial product that is deployed on hundreds of companies’ servers.

Table of Contents

Step 1. First let’s start by ensuring your system is up-to-date.

Step 2. Install LAMP server.

Step 3. Installing Java.

Step 3. Installing MyCollab Project Management Software.

Step 4. Configuring MariaDB for Concrete5.

Step 5. Configure Firewall for MyCollab.

Step 6. Accessing MyCollab.

Prerequisites

This article assumes you have at least basic knowledge of Linux, know how to use the shell, and most importantly, you host your site on your own VPS. The installation is quite simple and assumes you are running in the root account, if not you may need to add ‘sudo’ to the commands to get root privileges. I will show you through the step by step installation MyCollab Project Management Software on a CentOS 7 server.
Install MyCollab Project Management Software on CentOS 7

Step 1. First let’s start by ensuring your system is up-to-date.

yum clean all
yum -y update

Step 2. Install LAMP server.

A CentOS 7 LAMP stack server is required. If you do not have LAMP installed, you can follow our guide here.

Step 3. Installing Java.

You will also need the Java Runtime Environment (JRE) version 8 or higher. You can install it by running the following command:

yum install java-1.8.0-openjdk

Step 3. Installing MyCollab Project Management Software.

First thing to do is to go to MyCollab Project Management Software’s download page and download the latest stable version of MyCollab:

wget https://github.com/MyCollab/mycollab/releases/download/Release_5.4.10/MyCollab-All-5.4.10.zip

After downloading Concrete5 you will need to unzip master.zip. To do this, run:

unzip MyCollab-All-5.4.10.zip

You can install MyCollab by running the provided startup.sh installation script:

cd MyCollab-5.4.10/bin
sudo ./startup.sh

Step 4. Configuring MariaDB for Concrete5.

By default, MariaDB is not hardened. You can secure MariaDB using the mysql_secure_installation script. you should read and below each steps carefully which will set root password, remove anonymous users, disallow remote root login, and remove the test database and access to secure MariaDB:

mysql_secure_installation

Configure it like this:

- Set root password? [Y/n] y
- Remove anonymous users? [Y/n] y
- Disallow root login remotely? [Y/n] y
- Remove test database and access to it? [Y/n] y
- Reload privilege tables now? [Y/n] y

Next we will need to log in to the MariaDB console and create a database for the Concrete5. Run the following command:

mysql -u root -p

This will prompt you for a password, so enter your MariaDB root password and hit Enter. Once you are logged in to your database server you need to create a database for Concrete5 installation:

MariaDB [(none)]>CREATE USER 'mcuser'@'localhost' IDENTIFIED BY 'password';
MariaDB [(none)]>GRANT ALL PRIVILEGES ON mycollab.* TO 'mcuser'@'localhost' IDENTIFIED BY 'password' WITH GRANT OPTION;
MariaDB [(none)]>FLUSH PRIVILEGES;
MariaDB [(none)]>exit;

Step 5. Configure Firewall for MyCollab.

Next step, we should allow HTTP traffic on port 8080 through firewalld. You can do this by running the following command:

firewall-cmd --zone=public --permanent --add-port=8080/tcp
firewall-cmd --reload

Step 6. Accessing MyCollab.

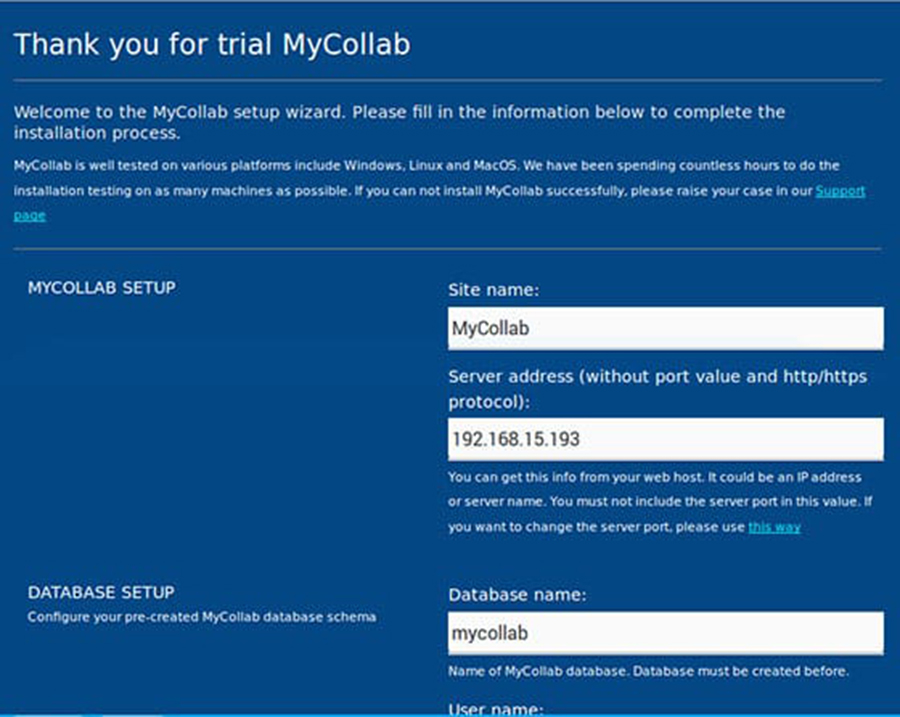
MyCollab will be available on HTTP port 80 by default. Open your favorite browser and navigate to http://yourdomain.com:8080 or http://server-ip:8080 and complete the required the steps to finish the installation.
mycollab-setup-wizard
Congratulation’s! You have successfully installed MyCollab. Thanks for using this tutorial for installing MyCollab Project Management Software on CentOS 7 system. For additional help or useful information, we recommend you to check the official MyCollab Project Management Software web site.

How To Install KDE Plasma on CentOS 7

KDE Plasma on CentOS 7

KDE is a well-known desktop environment for the Unix-Like systems designed for users who wants to have a nice desktop environment for their machines, It is one of the most used desktop interfaces out there.

Table of Contents

Step 1. First let’s start by ensuring your system is up-to-date.

Step 2. Installing KDE Plasma.

Prerequisites

This article assumes you have at least basic knowledge of Linux, know how to use the shell, and most importantly, you host your site on your own VPS. The installation is quite simple and assumes you are running in the root account, if not you may need to add ‘sudo’ to the commands to get root privileges. I will show you through the step by step installation KDE Plasma desktop environment on a CentOS 7 server.
Install KDE Plasma on CentOS 7

Step 1. First let’s start by ensuring your system is up-to-date.

yum clean all
yum -y update

Step 2. Installing KDE Plasma.

Installing the KDE Desktop is now simple, following command will install KDE:

yum groupinstall -y "KDE Plasma Workspaces"

By default after installing these packages, the default target should have automatically updated, meaning that after a reboot the GUI will automatically be loaded. We can check the current default target as shown below:

# systemctl set-default graphical.target
Removed symlink /etc/systemd/system/default.target.
Created symlink from /etc/systemd/system/default.target to /usr/lib/systemd/system/graphical.target.

All done. Reboot your CentOS 7 system:

reboot

Congratulation’s! You have successfully installed KDE. Thanks for using this tutorial for installing KDE Plasma desktop environment on CentOS 7 system. For additional help or useful information, we recommend you to check the official KDE web site.