How To Install Dropbox on CentOS 7

Dropbox on CentOS 7

Dropbox is a useful file-sharing and syncing service that lets you sync files between different machines over the Internet for free. It’s very useful for backing up your important documents, pictures, MP3 files, video files, and other data.

Prerequisites

This article assumes you have at least basic knowledge of linux, know how to use the shell, and most importantly, you host your site on your own VPS. The installation is quite simple and assumes you are running in the root account, if not you may need to add ‘sudo’ to the commands to get root privileges. I will show you through the step by step installation Dropbox on a CentOS 7 server.
Install Dropbox on CentOS 7

Step 1. First let’s start by ensuring your system is up-to-date.

yum clean all
yum -y update

Step 2. Installing Dropbox.

Download the latest Linux Dropbox client from the below link:

### 32-Bit ###
curl -Lo dropbox-linux-x86.tar.gz https://www.dropbox.com/download?plat=lnx.x86

### 64-Bit ###
curl -Lo dropbox-linux-x86_64.tar.gz https://www.dropbox.com/download?plat=lnx.x86_64

After downloading, we need to create a folder for client software and extract the compressed file:

mkdir -p /opt/dropbox-client
tar xzfv dropbox-linux-x86_64.tar.gz --strip 1 -C /opt/dropbox-client

Step 3. Linking Dropbox client.

We needed to run the below command on the server in the folder where we want to store the Dropbox files:

cd /usr/share/dropbox
/opt/dropbox-client/dropboxd

The first time you run the client, you should see output that looks like this:

This computer isn't linked to any Dropbox account...
Please visit https://www.dropbox.com/cli_link_nonce?nonce=9c4d26a095e82e2abmwe468029d66236f to link this device.

We needed to copy above link code and paste it on any browser and enter the credentials of your Dropbox account and save when we click on continue.
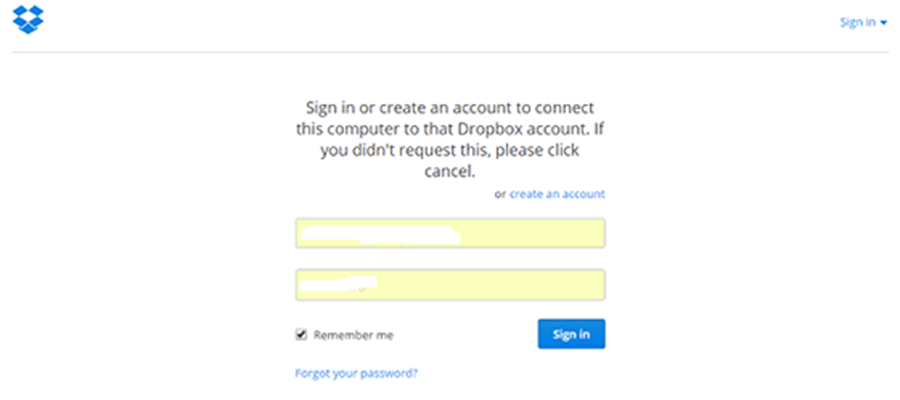
dropbox-client
The next step is to set up some scripts so that Dropbox will run as a service, so that you don’t need to be logged in for the client to keep running:

curl -o /etc/init.d/dropbox https://gist.githubusercontent.com/thisismitch/6293d3f7f5fa37ca6eab/raw/2b326bf77368cbe5d01af21c623cd4dd75528c3d/dropbox
curl -o /etc/systemd/system/dropbox.service https://gist.githubusercontent.com/thisismitch/6293d3f7f5fa37ca6eab/raw/99947e2ef986492fecbe1b7bfbaa303fefc42a62/dropbox.service

Make the scripts executable with this command:

chmod +x /etc/systemd/system/dropbox.service /etc/init.d/dropbox

The script expects the /etc/systemd/dropbox file to contain a list of system users that will run Dropbox. Create the file and open it for editing with this command:

nano /etc/sysconfig/dropbox

Next, add a line that specifies that DROPBOX_USERS is equal to your system username. For example, if your username is “wpcademy”, it should look like this and don’t forget Save and exit:

DROPBOX_USERS="wpcademy"

Finally, We needed to start and enable them to start at boot time with the below commands:

systemctl daemon-reload
systemctl start dropbox
systemctl enable dropbox

Congratulation’s! You have successfully installed Dropbox. Thanks for using this tutorial for installing Dropbox on CentOS 7 system. For additional help or useful information, we recommend you to check the official Dropbox web site.

How To Install Plesk on Linux System

Plesk on Linux System

Plesk is one of the widely used web hosting control panels in the web hosting business. It offers simple server and website management solutions with single-click mechanisms. Plesk consists of webserver suite (LAMP), Mail server, FTP Server, Name Server applications etc.

Plesk supports a wide range of Linux releases, including all of the commonly used distributions like CentOS, Ubuntu, Debian and Cloudlinux. Plesk is a an enterprise hosting control panel and it requires license to work effectively. They also offers 15 day trial license which is intended for testing purposes.

Prerequisites

This article assumes you have at least basic knowledge of linux, know how to use the shell, and most importantly, you host your site on your own VPS. The installation is quite simple and assumes you are running in the root account, if not you may need to add ‘sudo’ to the commands to get root privileges. I will show you through the step by step installation Plesk web hosting control panels on a Linux system server.
Install Plesk on Linux System

Step 1. Download the autoinstaller from Plesk website:

wget http://autoinstall.plesk.com/plesk-installer

Add execute permissions to the autoinstaller:

chmod +x plesk-installer

Launch the autoinstaller:

./plesk-installer

Follow the script prompts and pick the options that best suits your use case.

Step 2. Accessing Plesk.

Once this is complete, you’ll be able to access your Plesk server via the web management interface. To do this, open a browser and point it to https://yourserverip:8443 and login to the control panel as root user.

Congratulation’s! You have successfully installed Plesk. Thanks for using this tutorial for installing Plesk web hosting control panels on a Linux system. For additional help or useful information, we recommend you to check the official Plesk web site.

How To Install Apache OpenOffice on CentOS 7

Apache OpenOffice on CentOS 7

Apache OpenOffice, commonly known as OpenOffice.org or OpenOffice, is an open-source office productivity software suite whose main components are for word processing, spreadsheets, presentations, graphics, and databases

Prerequisites

This article assumes you have at least basic knowledge of linux, know how to use the shell, and most importantly, you host your site on your own VPS. The installation is quite simple and assumes you are running in the root account, if not you may need to add ‘sudo’ to the commands to get root privileges. I will show you through the step by step installation Apache OpenOffice on a CentOS 7 server.
Install Apache OpenOffice on CentOS 7

Step 1. First let’s start by ensuring your system is up-to-date.

yum clean all
yum -y update

Step 2. Download Apache OpenOffice Linux Package.

Follow below steps to download OpenOffice and extract tar file:

### 32-Bit ###
wget http://sourceforge.net/projects/openofficeorg.mirror/files/4.1.2/binaries/en-US/Apache_OpenOffice_4.1.2_Linux_x86_install-rpm_en-US.tar.gz
tar xzf Apache_OpenOffice_4.1.2_Linux_x86_install-rpm_en-US.tar.gz

### 64-Bit ###
wget http://sourceforge.net/projects/openofficeorg.mirror/files/4.1.2/binaries/en-US/Apache_OpenOffice_4.1.2_Linux_x86-64_install-rpm_en-US.tar.gz
tar xzf Apache_OpenOffice_4.1.2_Linux_x86-64_install-rpm_en-US.tar.gz

Remove OpenOffice.org and LibreOffice.org Packages with following command:

yum remove openoffice* libreoffice*

Step 3. Installing Apache OpenOffice.

You will see list of rpms packages inside en-US directory. Install all rpms packages using following command:

cd en-US/RPMS/
rpm -Uvh *.rpm

Now install the desktop integration features for your setup. Go to desktop-integration in the installation directory, and install required package:

cd desktop-integration/
rpm -Uvh openoffice4.1-redhat-menus-*.noarch.rpm

Step 4. Accessing Apache OpenOffice.

After successfully installed all the packages start Openoffice using following command:

openoffice4

Congratulation’s! You have successfully installed Apache OpenOffice. Thanks for using this tutorial for installing Apache OpenOffice on CentOS 7 system. For additional help or useful information, we recommend you to check the official Apache OpenOffice web site.

How To Install MyCollab Project Management Software on CentOS 7

MyCollab Project Management Software on CentOS 7

MyCollab is the free and open source collaboration tools, it has three existing modules: Project Management, CRM and Document Management. Intuitive UI, rich features, high performance and stability are the advantages compared with various popular tools in the market such as Redmine, Bugzilla, Mantis etc. This open source is included in a trusted commercial product that is deployed on hundreds of companies’ servers.

Table of Contents

Step 1. First let’s start by ensuring your system is up-to-date.

Step 2. Install LAMP server.

Step 3. Installing Java.

Step 3. Installing MyCollab Project Management Software.

Step 4. Configuring MariaDB for Concrete5.

Step 5. Configure Firewall for MyCollab.

Step 6. Accessing MyCollab.

Prerequisites

This article assumes you have at least basic knowledge of Linux, know how to use the shell, and most importantly, you host your site on your own VPS. The installation is quite simple and assumes you are running in the root account, if not you may need to add ‘sudo’ to the commands to get root privileges. I will show you through the step by step installation MyCollab Project Management Software on a CentOS 7 server.
Install MyCollab Project Management Software on CentOS 7

Step 1. First let’s start by ensuring your system is up-to-date.

yum clean all
yum -y update

Step 2. Install LAMP server.

A CentOS 7 LAMP stack server is required. If you do not have LAMP installed, you can follow our guide here.

Step 3. Installing Java.

You will also need the Java Runtime Environment (JRE) version 8 or higher. You can install it by running the following command:

yum install java-1.8.0-openjdk

Step 3. Installing MyCollab Project Management Software.

First thing to do is to go to MyCollab Project Management Software’s download page and download the latest stable version of MyCollab:

wget https://github.com/MyCollab/mycollab/releases/download/Release_5.4.10/MyCollab-All-5.4.10.zip

After downloading Concrete5 you will need to unzip master.zip. To do this, run:

unzip MyCollab-All-5.4.10.zip

You can install MyCollab by running the provided startup.sh installation script:

cd MyCollab-5.4.10/bin
sudo ./startup.sh

Step 4. Configuring MariaDB for Concrete5.

By default, MariaDB is not hardened. You can secure MariaDB using the mysql_secure_installation script. you should read and below each steps carefully which will set root password, remove anonymous users, disallow remote root login, and remove the test database and access to secure MariaDB:

mysql_secure_installation

Configure it like this:

- Set root password? [Y/n] y
- Remove anonymous users? [Y/n] y
- Disallow root login remotely? [Y/n] y
- Remove test database and access to it? [Y/n] y
- Reload privilege tables now? [Y/n] y

Next we will need to log in to the MariaDB console and create a database for the Concrete5. Run the following command:

mysql -u root -p

This will prompt you for a password, so enter your MariaDB root password and hit Enter. Once you are logged in to your database server you need to create a database for Concrete5 installation:

MariaDB [(none)]>CREATE USER 'mcuser'@'localhost' IDENTIFIED BY 'password';
MariaDB [(none)]>GRANT ALL PRIVILEGES ON mycollab.* TO 'mcuser'@'localhost' IDENTIFIED BY 'password' WITH GRANT OPTION;
MariaDB [(none)]>FLUSH PRIVILEGES;
MariaDB [(none)]>exit;

Step 5. Configure Firewall for MyCollab.

Next step, we should allow HTTP traffic on port 8080 through firewalld. You can do this by running the following command:

firewall-cmd --zone=public --permanent --add-port=8080/tcp
firewall-cmd --reload

Step 6. Accessing MyCollab.

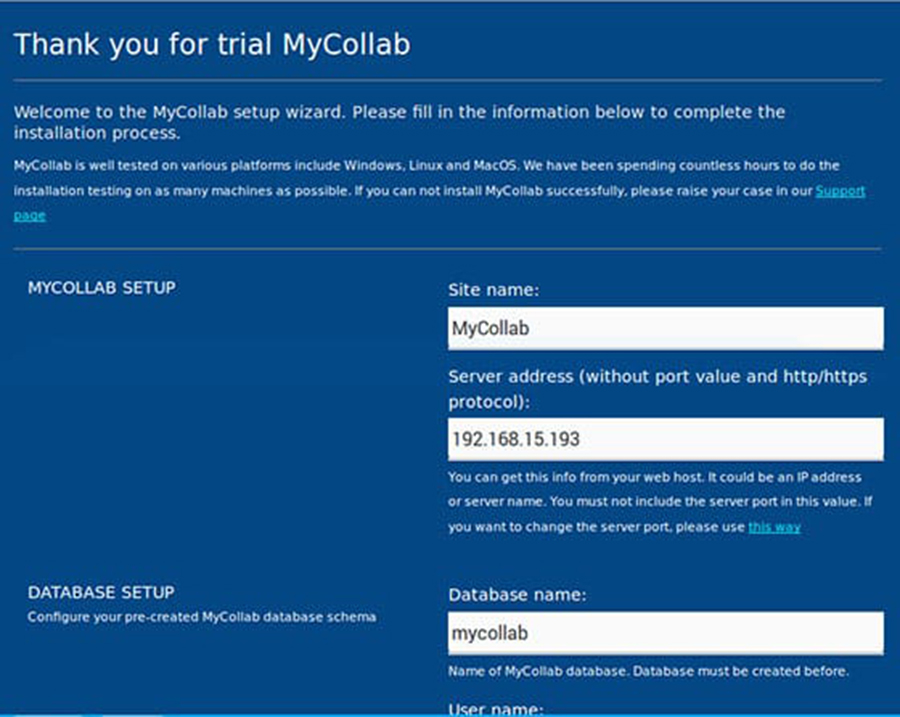
MyCollab will be available on HTTP port 80 by default. Open your favorite browser and navigate to http://yourdomain.com:8080 or http://server-ip:8080 and complete the required the steps to finish the installation.
mycollab-setup-wizard
Congratulation’s! You have successfully installed MyCollab. Thanks for using this tutorial for installing MyCollab Project Management Software on CentOS 7 system. For additional help or useful information, we recommend you to check the official MyCollab Project Management Software web site.

How To Install KDE Plasma on CentOS 7

KDE Plasma on CentOS 7

KDE is a well-known desktop environment for the Unix-Like systems designed for users who wants to have a nice desktop environment for their machines, It is one of the most used desktop interfaces out there.

Table of Contents

Step 1. First let’s start by ensuring your system is up-to-date.

Step 2. Installing KDE Plasma.

Prerequisites

This article assumes you have at least basic knowledge of Linux, know how to use the shell, and most importantly, you host your site on your own VPS. The installation is quite simple and assumes you are running in the root account, if not you may need to add ‘sudo’ to the commands to get root privileges. I will show you through the step by step installation KDE Plasma desktop environment on a CentOS 7 server.
Install KDE Plasma on CentOS 7

Step 1. First let’s start by ensuring your system is up-to-date.

yum clean all
yum -y update

Step 2. Installing KDE Plasma.

Installing the KDE Desktop is now simple, following command will install KDE:

yum groupinstall -y "KDE Plasma Workspaces"

By default after installing these packages, the default target should have automatically updated, meaning that after a reboot the GUI will automatically be loaded. We can check the current default target as shown below:

# systemctl set-default graphical.target
Removed symlink /etc/systemd/system/default.target.
Created symlink from /etc/systemd/system/default.target to /usr/lib/systemd/system/graphical.target.

All done. Reboot your CentOS 7 system:

reboot

Congratulation’s! You have successfully installed KDE. Thanks for using this tutorial for installing KDE Plasma desktop environment on CentOS 7 system. For additional help or useful information, we recommend you to check the official KDE web site.

How To Install Katello on CentOS 7

Katello on CentOS 7

Katello is an open source content management software. It also performs provisioning and configuration task using foreman. In other words, we can say Katello is the open source Satellite SeServer, whichan push updates to its register Linux Servers or clients. In fact, it is a lifecycle management plugin to Foreman which handles subscription, and repository management.

Table of Contents

Step 1. First, let’s start by ensuring your system is up-to-date.

Step 2. Set Hostname and Firewall Rules.

Step 3. Installing Katello.

Step 4. Accessing the Katello.

Prerequisites

This article assumes you have at least basic knowledge of Linux, know how to use the shell, and most importantly, you host your site on your own VPS. The installation is quite simple and assumes you are running in the root account, if not you may need to add ‘sudo’ to the commands to get root privileges. I will show you through the step by step installation Katello content management software on a CentOS 7 server.
Install Katello on CentOS 7

Step 1. First, let’s start by ensuring your system is up-to-date.

yum clean all
yum -y update

Step 2. Set Hostname and Firewall Rules.

Use the following command to set the hostname:

hostnamectl set-hostname "katello.wpcademy.com

Also update the hostname file too inside /etc/hostname:

echo "192.168.77.1 katello.idroot.net" >> /etc/hosts

Once done with hostname now you’ll need to change firewall rules to open the ports for Katello:

firewall-cmd --permanent --zone=public --add-port=80/tcp --add-port=443/tcp --add-port=5647/tcp --add-port=9090/tcpfirewall-cmd --permanent --zone=public --add-port=8140/tcp --add-port=8443/tcp --add-port=8000/tcp --add-port=67/udp --add-port=68/udp --add-port=69/udpfirewall-cmd --reload

Step 3. Installing Katello.

Katello requires some repositories to be set up before the installation process so there are some repositories that here we are setting up for Katello:

yum -y install http://fedorapeople.org/groups/katello/releases/yum/3.2/katello/el7/x86_64/katello-repos-latest.rpm
yum -y install http://yum.theforeman.org/releases/1.13/el7/x86_64/foreman-release.rpm
yum -y install http://yum.puppetlabs.com/puppetlabs-release-el-7.noarch.rpm
yum -y install http://dl.fedoraproject.org/pub/epel/epel-release-latest-7.noarch.rpm
yum -y install foreman-release-scl

Run the following command to install Katello packages:

yum update
yum install katello

Next, configure your server with NTP for time syncing. Set the time zone with respect to your location:

rm -f /etc/localtime
ln -s /usr/share/zoneinfo/Asia/Calcutta /etc/localtime
yum install ntp -y
ntpdate in.pool.ntp.org

Next start katello installation using foreman-installer command like shown below:

foreman-installer --scenario katello --foreman-admin-username admin --foreman-admin-password

*In above command replace Specify_Passwd with a strong password and this password will be used to login to foreman dashboard in web access of katello.

When the installation will be completed, you’ll get an output stating that Installing Success. If in case your server is running behind the proxy server then you’ll have to run below given command:

foreman-installer --scenario katello --katello-proxy-url http:// --katello-proxy-port --foreman-admin-username admin --foreman-admin-password

Step 4. Accessing the Katello.

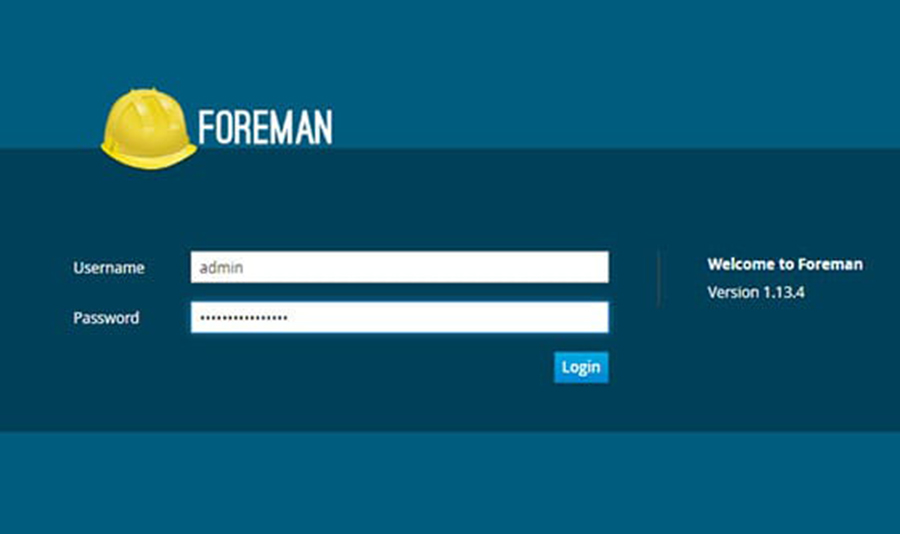
Katello will be available on HTTP port 80 by default. Open your favorite browser and navigate to http://katello.wpcademy.com or http://server-ip and complete the required the steps to finish the installation. Use the username as admin and password that we specify in the above step.

Install Katello on CentOS 7
Install-Katello-Foreman
Congratulation’s! You have successfully installed Katello. Thanks for using this tutorial for installing Katello content management software on a CentOS 7 server. For additional help or useful information, we recommend you to check the official Katello website.

How To Install PhpRedmin on CentOS 7

PhpRedmin on CentOS 7

Redis is an open source, BSD licensed, advanced key-value store. It is often referred to as a data structure server since keys can contain strings, hashes, lists, sets and sorted sets. Redis also supports datatypes such as Transitions, Publish and Subscribe. ‘Redis ’ is considered more powerful than ‘Memcache’ . It would be smart to bring ‘Redis’ into practice and put ‘Memcache’ down for a while.

Table of Contents

Step 1. First let’s start by ensuring your system is up-to-date.

Step 2. Installing LAMP server.

Step 3. Installing PhpRedmin.

Step 4. Disable SELINUX.

Step 5. Accessing PhpRedmin.

Prerequisites

This article assumes you have at least basic knowledge of Linux, know how to use the shell, and most importantly, you host your site on your own VPS. The installation is quite simple and assumes you are running in the root account, if not you may need to add ‘sudo’ to the commands to get root privileges. I will show you through the step by step installation PhpRedmin on a CentOS 7 server.
Install PhpRedmin on CentOS 7

Step 1. First let’s start by ensuring your system is up-to-date.

yum clean all
yum -y update

Step 2. Installing LAMP server.

A CentOS 7 LAMP stack server is required. If you do not have LAMP installed, you can follow our guide here. Also install required modules:

yum install git gcc make tcl php­70w-pear php70w-devel

Step 3. Installing PhpRedmin.

Now we can get Phpredmin from Github:

git clone -­b php7 https://github.com/phpredis/phpredis.git
cd phpredis/
phpize
./configure
make && make install

Next, you should load the Redis module in your PHP:

echo 'extension=redis.so' > /etc/php.d/redis.ini

Restart the apache service for the changes to take effects:

systemctl restart httpd

Finally, test if your Redis module has been loaded successfully:

### php -i |grep redis

/etc/php.d/redis.ini,
redis
Registered save handlers => files user redis rediscluster
This program is free software; you can redistribute it and/or modify

Then we can install Phpredmin:

cd /var/www
git clone https://github.com/sasanrose/phpredmin.git
mkdir -p ./phpredis/logs/apache2handler/
chown apache:apache ./phpredmin/ -­R

Create a virtual host for PhpRedmin:

nano /etc/httpd/conf.d/phpredmin.conf

Add the following lines:

Alias /phpredmin /var/www/phpredmin/public

AllowOverride All

# Apache 2.4

Require all granted


# Apache 2.2
Order Deny,Allow
Allow from all

Restart the apache service for the changes to take effects:

systemctl start httpd.service
systemctl enable httpd.service

Step 4. Disable SELINUX.

You can disable SELINUX or you can add a rule for permission, you can follow our guide here.

Step 5. Accessing PhpRedmin.

PhpRedmin will be available on HTTP port 80 by default. Open your favorite browser and navigate to http://yourdomain.com/phpredmin or http://server-ip/phpredmin. If you are using a firewall, please open port 80 to enable access to the control panel.

Congratulation’s! You have successfully installed PhpRedmin. Thanks for using this tutorial for installing PhpRedmin on CentOS 7 server. For additional help or useful information, we recommend you to check the official PhpRedmin web site.