How to Install WordPress with LEMP on Ubuntu 20.04

Introduction

WordPress is the most popular content management systems (CMS) on the internet currently, allows users to set up flexible blogs and websites using a MySQL backend with PHP processing. WordPress has seen an incredible adoption rate among new and experienced engineers alike, and is a great choice for getting a website up and running efficiently. After an initial setup, almost all administration for WordPress websites can be done through its graphical interface— these features and more make WordPress a great choice for websites built to scale.

In this tutorial, you’ll focus on getting an instance of WordPress set up on a LEMP stack (Linux, Nginx, MySQL, and PHP) for an Ubuntu 20.04 server.

Prerequisites

In order to complete this tutorial, you’ll need access to an Ubuntu 20.04 server. To successfully install WordPress with LEMP on your server, you’ll also need to perform the following tasks before starting this tutorial:

  • Create a sudo user on your server: The steps in this tutorial are using a non-root user with sudo privileges. You can create a user with sudo privileges by following our Ubuntu 20.04 initial server setup tutorial.
  • Install a LEMP stack: WordPress will need a web server, a database, and PHP in order to correctly function. Setting up a LEMP stack (Linux, Nginx, MySQL, and PHP) fulfills all of these requirements. Follow this tutorial to install and configure this software.
  • Secure your site with SSL: WordPress serves dynamic content and handles user authentication and authorization. TLS/SSL is the technology that allows you to encrypt the traffic from your site so that your connection is secure. The way you set up SSL will depend on whether you have a domain name for your site.

When you are finished with setup, log in to your server as the sudo user to continue.

Step 1 — Creating a MySQL Database and User for WordPress

WordPress uses MySQL to manage and store site and user information. Although you already have MySQL installed, let’s create a database and a user for WordPress to use.

To get started, log in to the MySQL root (administrative) account. If MySQL is configured to use the auth_socket authentication plugin (which is default), you can log in to the MySQL administrative account using sudo:

 $ sudo mysql

If you have changed the authentication method to use a password for the MySQL root account, use the following command instead:

 $ mysql -u root -p

You will be prompted for the password you set for the MySQL root account.

Once logged in, create a separate database that WordPress can control. You can call this whatever you would like, but we will be using wordpress in this guide to keep it simple. You can create a database for WordPress by entering:

Mysql> CREATE DATABASE wordpress DEFAULT CHARACTER SET utf8 COLLATE utf8_unicode_ci;
Note: Every MySQL statement must end in a semi-colon (;). If you’ve encountered an error, check to make sure the semicolon is present.

Next, let’s create a separate MySQL user account that we will use exclusively to operate on our new database. Creating single-purpose databases and accounts is a good idea from a management and security standpoint. We’ll use the name wordpressuser in this guide — feel free to change this if you’d like.

In the following command, you are going to create an account, set a password, and grant access to the database you created. Remember to choose a strong password here:

CREATE USER 'wordpressuser'@'localhost' IDENTIFIED BY 'password';
GRANT ALL ON wordpress.* TO 'wordpressuser'@'localhost';

You now have a database and user account, each made specifically for WordPress.

With the database tasks complete, let’s exit out of MySQL by typing:

EXIT

The MySQL session will exit, returning you to the regular Linux shell.

Step 2 — Installing Additional PHP Extensions

When setting up the LEMP stack, it required a very minimal set of extensions to get PHP to communicate with MySQL. WordPress and many of its plugins leverage additional PHP extensions, and you’ll use a few more in this tutorial.

Let’s download and install some of the most popular PHP extensions for use with WordPress by typing:

 $ sudo apt update
 $ sudo apt install php-curl php-gd php-intl php-mbstring php-soap php-xml php-xmlrpc php-zip

Note: Each WordPress plugin has its own set of requirements. Some may require additional PHP extension packages to be installed. Check your plugin documentation to discover its PHP requirements. If they are available, they can be installed with apt as demonstrated above.

When you are finished installing the extensions, restart the PHP-FPM process so that the running PHP processor can leverage the newly installed features:

 $ sudo systemctl restart php7.4-fpm

You now have all of the PHP extensions needed, installed on the server.

Step 3 — Configuring Nginx
Next, let’s make a few adjustments to our Nginx server block files. Based on the prerequisite tutorials, you should have a configuration file for your site in the /etc/nginx/sites-available/ directory configured to respond to your server’s domain name or IP address and protected by a TLS/SSL certificate. We’ll use /etc/apache2/sites-available/wordpress as an example here, but you should substitute the path to your configuration file where appropriate.

Additionally, we will use /var/www/wordpress as the root directory of our WordPress install in this guide. Again, you should use the web root specified in your own configuration.

Note: It’s possible you are using the /etc/nginx/sites-available/default default configuration (with /var/www/html as your web root). This is fine to use if you’re only going to host one website on this server. If not, it’s best to split the necessary configuration into logical chunks, one file per site.

Open your site’s server block file with sudo privileges to begin:

 $ sudo nano /etc/nginx/sites-available/wordpress

Within the main server block, let’s add a few location blocks.

Start by creating exact-matching location blocks for requests to /favicon.ico and /robots.txt, both of which you do not want to log requests for.

Use a regular expression location to match any requests for static files. We will again turn off the logging for these requests and will mark them as highly cacheable, since these are typically expensive resources to serve. You can adjust this static files list to contain any other file extensions your site may use:

/etc/nginx/sites-available/wordpress
server {
    . . .

    location = /favicon.ico { log_not_found off; access_log off; }
    location = /robots.txt { log_not_found off; access_log off; allow all; }
    location ~* \.(css|gif|ico|jpeg|jpg|js|png)$ {
        expires max;
        log_not_found off;
    }
    . . .
}

Inside of the existing location / block, let’s adjust the try_files list. Comment out the default setting by prepending the line with a pound sign (#) and then add the highlighted line. This way, instead of returning a 404 error as the default option, control is passed to the index.php file with the request arguments.

This should look something like this:

/etc/nginx/sites-available/wordpress
server {
. . .
location / {
#try_files $uri $uri/ =404;
try_files $uri $uri/ /index.php$is_args$args;
}
. . .
}

When you are finished, save and close the file.

Now, let’s check our configuration for syntax errors by typing:

 $ sudo nginx -t

If no errors were reported, reload Nginx by typing:

$ sudo systemctl reload nginx

Next, let’s download and set up WordPress.

Step 4 — Downloading WordPress
Now that your server software is configured, let’s download and set up WordPress. For security reasons, it is always recommended to get the latest version of WordPress directly from the project’s website.

Change into a writable directory and then download the compressed release by typing:

 $ cd /tmp

This changes your directory to the temporary folder. Then, enter the following command to download the latest version of WordPress in a compressed file:

curl -LO https://wordpress.org/latest.tar.gz

Note: The -LO flag is used to get directly to the source of the compressed file. -L ensures that fetching the file is successful in the case of redirects, and -O writes the output of our remote file with a local file that has the same name. To learn more about curl commands, visit How to Download Files with cURL
Extract the compressed file to create the WordPress directory structure:

tar xzvf latest.tar.gz

You will be moving these files into our document root momentarily, but before you do, let’s copy over the sample configuration file to the filename that WordPress actually reads:

cp /tmp/wordpress/wp-config-sample.php /tmp/wordpress/wp-config.php

Now, let’s copy the entire contents of the directory into our document root. We’re using the -a flag to make sure our permissions are maintained, and a dot at the end of our source directory to indicate that everything within the directory should be copied (including hidden files):

sudo cp -a /tmp/wordpress/. /var/www/wordpress

Now that our files are in place, you’ll assign ownership to the www-data user and group. This is the user and group that Nginx runs as, and Nginx will need to be able to read and write WordPress files in order to serve the website and perform automatic updates:

sudo chown -R www-data:www-data /var/www/wordpress

Files are now in the server’s document root and have the correct ownership, but you still need to complete some additional configuration.

Step 5 — Setting up the WordPress Configuration File
Next, let’s make some changes to the main WordPress configuration file.

When you open the file, you’ll start by adjusting some secret keys to provide some security for our installation. WordPress provides a secure generator for these values so that you don’t have to come up with values on your own. These are only used internally, so it won’t hurt usability to have complex, secure values here.

To grab secure values from the WordPress secret key generator, type:

curl -s https://api.wordpress.org/secret-key/1.1/salt/

You will get back unique values that look something like this:
Warning: It is important that you request unique values each time. Do NOT copy the values shown below!

Output
define(‘AUTH_KEY’, ‘1jl/vqfs define(‘SECURE_AUTH_KEY’, ‘E2N-h2]Dcvp+aS/p7X DO NOT COPY THESE VALUES {Ka(f;rv?Pxf})CgLi-3’);
define(‘LOGGED_IN_KEY’, ‘W(50,{W^,OPB%PB define(‘NONCE_KEY’, ‘ll,4UC)7ua+8<!4VM+ DO NOT COPY THESE VALUES #`DXF+[$atzM7 o^-C7g’);
define(‘AUTH_SALT’, ‘koMrurzOA+|L_lG}kf DO NOT COPY THESE VALUES 07VC*Lj*lD&?3w!BT#-‘);
define(‘SECURE_AUTH_SALT’, ‘p32*p,]z%LZ+pAu:VY DO NOT COPY THESE VALUES C-?y+K0DK_+F|0h{!_xY’);
define(‘LOGGED_IN_SALT’, ‘i^/G2W7!-1H2OQ+t$3 DO NOT COPY THESE VALUES t6**bRVFSD[Hi])-qS`|’);
define(‘NONCE_SALT’, ‘Q6]U:K?j4L%Z]}h^q7 DO NOT COPY THESE VALUES 1% ^qUswWgn+6&xqHN&%’);

These are configuration lines that you can paste directly in your configuration file to set secure keys. Copy the output you received now.

Now, open the WordPress configuration file:

 $ sudo nano /var/www/wordpress/wp-config.php

Find the section that contains the dummy values for those settings. It will look something like this:
/var/www/wordpress/wp-config.php
. . .

define(‘AUTH_KEY’, ‘put your unique phrase here’);
define(‘SECURE_AUTH_KEY’, ‘put your unique phrase here’);
define(‘LOGGED_IN_KEY’, ‘put your unique phrase here’);
define(‘NONCE_KEY’, ‘put your unique phrase here’);
define(‘AUTH_SALT’, ‘put your unique phrase here’);
define(‘SECURE_AUTH_SALT’, ‘put your unique phrase here’);
define(‘LOGGED_IN_SALT’, ‘put your unique phrase here’);
define(‘NONCE_SALT’, ‘put your unique phrase here’);
Delete those lines and paste in the values you copied from the command line:

/var/www/wordpress/wp-config.php
. . .

define(‘AUTH_KEY’, ‘VALUES COPIED FROM THE COMMAND LINE’);
define(‘SECURE_AUTH_KEY’, ‘VALUES COPIED FROM THE COMMAND LINE’);
define(‘LOGGED_IN_KEY’, ‘VALUES COPIED FROM THE COMMAND LINE’);
define(‘NONCE_KEY’, ‘VALUES COPIED FROM THE COMMAND LINE’);
define(‘AUTH_SALT’, ‘VALUES COPIED FROM THE COMMAND LINE’);
define(‘SECURE_AUTH_SALT’, ‘VALUES COPIED FROM THE COMMAND LINE’);
define(‘LOGGED_IN_SALT’, ‘VALUES COPIED FROM THE COMMAND LINE’);
define(‘NONCE_SALT’, ‘VALUES COPIED FROM THE COMMAND LINE’);
Next, let’s modify some of the database connection settings at the beginning of the file. You’ll have to adjust the database name, the database user, and the associated password that was configured within MySQL.

The other change you should make is to set the method that WordPress uses to write to the filesystem. Since you’ve given the web server permission to write where it needs to, you can explicitly set the filesystem method to “direct”. Failure to set this with our current settings would result in WordPress prompting for FTP credentials when we perform some actions. Add this setting below the database connection settings, or anywhere else in the file:

/var/www/wordpress/wp-config.php
. . .

define( ‘DB_NAME’, ‘wordpress’ );

/** MySQL database username */
define( ‘DB_USER’, ‘wordpressuser’ );

/** MySQL database password */
define( ‘DB_PASSWORD’, ‘password’ );

. . .

define( ‘FS_METHOD’, ‘direct’ );
Save and close the file when you’re done.

Step 6 — Completing the Installation Through the Web Interface
Now that the server configuration is complete, you can finish up the installation through WordPress’ web interface.

In your web browser, navigate to your server’s domain name or public IP address:

http://server_domain_or_IP/wordpress
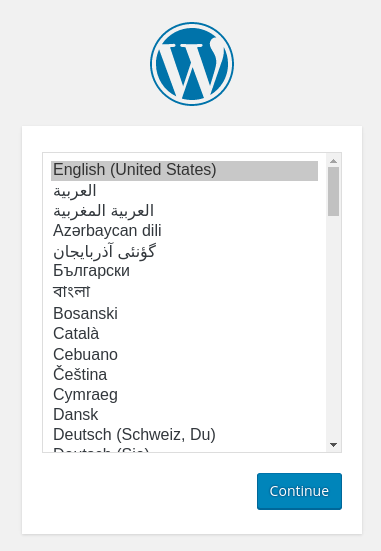
Select the language you would like to use:

WordPress language selection

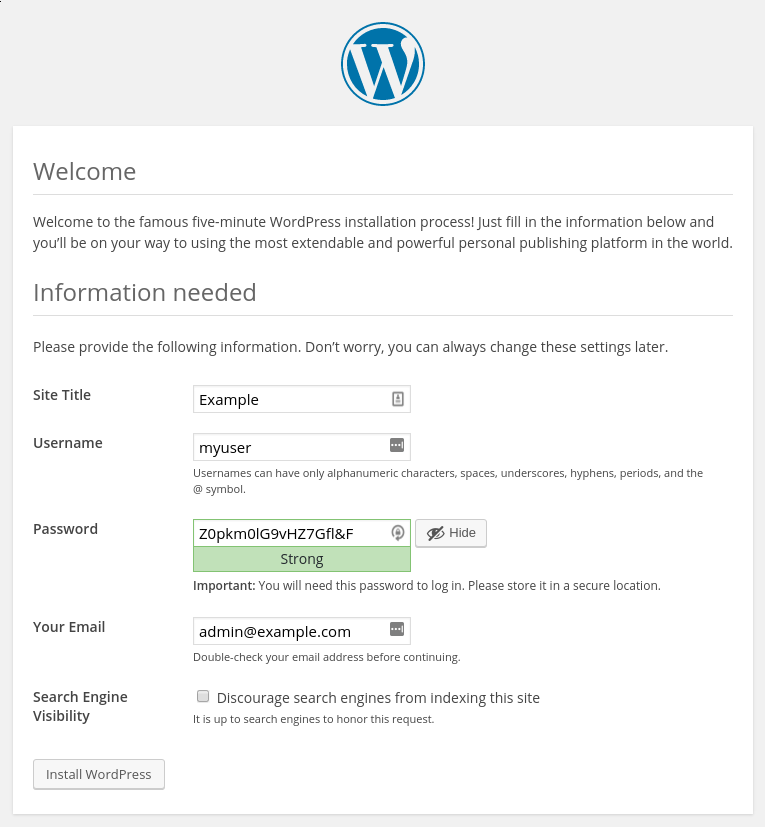
Next, you will come to the main setup page.

Select a name for your WordPress site and choose a username (it is recommended not to choose something like “admin” for security purposes). A strong password is generated automatically. Save this password or select an alternative strong password.

Enter your email address and select whether you want to discourage search engines from indexing your site:

WordPress setup installation

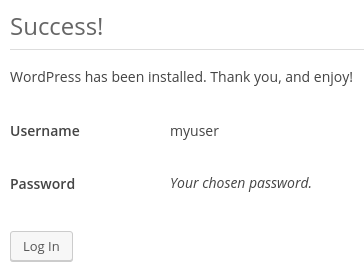
When you click ahead, you will be taken to a page that prompts you to log in:

WordPress login prompt

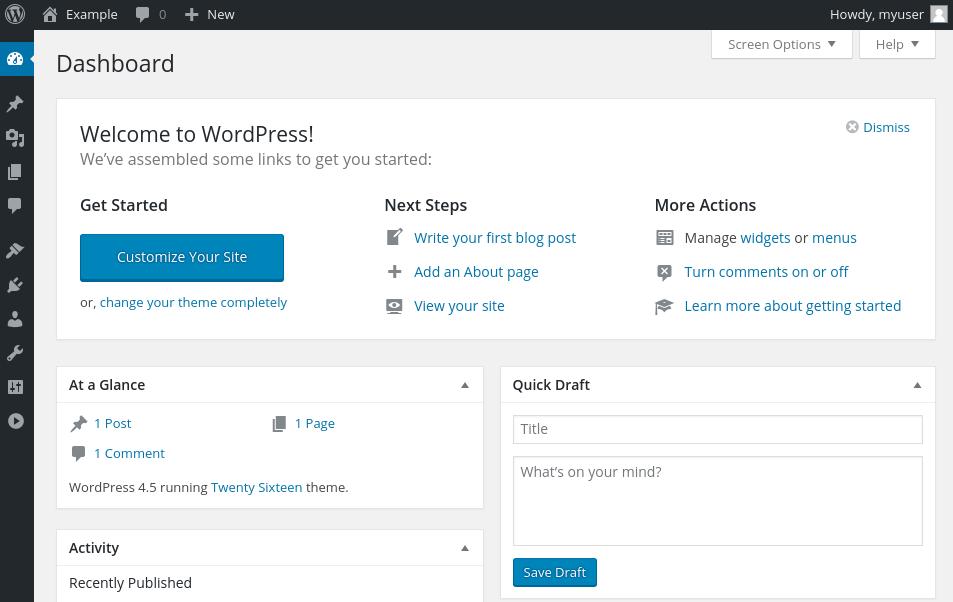
Once you log in, you will be taken to the WordPress administration dashboard:

WordPress login prompt

Conclusion
WordPress should be installed and ready to use! Some common next steps are to choose the permalinks setting for your posts (can be found in Settings > Permalinks) or to select a new theme (in Appearance > Themes). If this is your first time using WordPress, explore the interface a bit to get acquainted with your new CMS.

How To Install Bolt CMS on Centos 7

Bolt CMS on Centos 7

Bolt CMS is a lightweight open source Content Management Tool, written in PHP and it’s built upon the Silex frame.

Table of Contents

Step 1. First let’s start by ensuring your system is up-to-date.

Step 2. Install LEMP server.

Step 3. Installing Composer.

Step 4. Installing Bolt CMS.

Step 5. Configure Nginx Web Server for Bolt CMS.

Step 6. Accessing Bolt CMS.

Prerequisites

This article assumes you have at least basic knowledge of Linux, know how to use the shell, and most importantly, you host your site on your own VPS. The installation is quite simple and assumes you are running in the root accge of Linount, if not you may need to add ‘sudo’ to the commands to get root privileges. I will show you through the step by step installation Bolt CMS on a CentOS 7 server.
Install Bolt CMS on Centos 7

Step 1. First let’s start by ensuring your system is up-to-date.

yum clean all
yum -y update

Step 2. Install LEMP server.

A CentOS 7 LEMP stack server is required. If you do not have LEMP installed, you can follow our guide here. Also install required PHP modules:

yum install php-gd php-imap php-ldap php-odbc php-pear php-xml php-xmlrpc php-mbstring php-mcrypt php-mssql php-snmp php-soap php-tidy curl curl-devel

Step 3. Installing Composer.

Download and install Composer by executing the following command:

curl -sS https://getcomposer.org/installer | php
mv composer.phar /usr/local/bin/composer

Step 4. Installing Bolt CMS.

Install Bolt CMS using the “composer create-project” command:

composer create-project bolt/composer-install:^3.3 /var/www/boltchedelics --prefer-dist

The installer will ask you if you want to use Bolt’s standard folder structure. Choose “yes” and proceed with the installation.

By default, Bolt is configured to use an SQLite database, since we will be using a MySQL database we need to change the settings in app/config/config.yml file and enter the details of the database we created previously:

nano /var/www/boltchedelics/app/config/config.yml
# database:
# driver: sqlite
# databasename: bolt

database:
 driver: mysql
 username: bolt
 password: your_bolt_passwd
 databasename: bolt

We will need to change some folders permissions:

chown -R nginx: /var/www/boltchedelics
find /var/www/boltchedelics -type d -exec chmod 755 {} \;
find /var/www/boltchedelics -type f -exec chmod 644 {} \;

Step 5. Configure Nginx Web Server for Bolt CMS.

Create a new Nginx virtual host:

nano /etc/nginx/conf.d/boltchedelics.conf

Add the following lines:

server {
 listen 80;
 server_name boltchedelics;

root /var/www/boltchedelics/public;
 index index.php;

access_log /var/log/nginx/boltchedelics.access.log;
 error_log /var/log/nginx/boltchedelics.error.log;

location / {
 try_files $uri $uri/ /index.php?$query_string;
 }

location = /bolt {
 try_files $uri /index.php?$query_string;
 }

location ^~ /bolt/ {
 try_files $uri /index.php?$query_string;
 }
 
 location ^~ /thumbs {
 try_files $uri /index.php; #?$query_string;
 
 access_log off;
 log_not_found off;
 expires max;
 add_header Pragma public;
 add_header Cache-Control "public, mustrevalidate, proxy-revalidate";
 add_header X-Koala-Status sleeping;
 }
 
 location ~* ^.+\.(?:atom|bmp|bz2|css|doc|eot|exe|gif|gz|ico|jpe?g|jpeg|jpg|js|map|mid|midi|mp4|ogg|ogv|otf|png|ppt|rar|rtf|svg|svgz|tar|tgz|ttf|wav|woff|xls|zip)$ {
 access_log off;
 log_not_found off;
 expires max;
 add_header Pragma public;
 add_header Cache-Control "public, mustrevalidate, proxy-revalidate";
 add_header X-Koala-Status eating;
 }
 
 location = /(?:favicon.ico|robots.txt) {
 log_not_found off;
 access_log off;
 }

 location ~ /index.php/(.*) {
 rewrite ^/index.php/(.*) /$1 permanent;
 }

location ~ /\. {
 deny all;
 }
 
 location ~ /\.(htaccess|htpasswd)$ {
 deny all;
 }
 
 location ~ /\.(?:db)$ {
 deny all;
 }
 
 location ~* /(.*)\.(?:markdown|md|twig|yaml|yml)$ {
 deny all;
 }

location ~ [^/]\.php(/|$) {
 try_files /index.php =404;
 
 fastcgi_split_path_info ^(.+?\.php)(/.*)$;
 fastcgi_param SCRIPT_FILENAME $document_root$fastcgi_script_name;
 fastcgi_param HTTP_PROXY "";
 fastcgi_param HTTPS $https if_not_empty;
 fastcgi_pass 127.0.0.1:9000;
 include fastcgi_params;
 }

}

Save and close the file. Restart the Apache service for the changes to take effects:

nginx -t
systemctl restart nginx

Step 6. Accessing Bolt CMS.

Bolt CMS will be available on HTTP port 80 by default. Open your favorite browser and navigate to http://yourdomain.com/ or http://server-ip and register your first user. Administrative access is automatically granted to the first registered user.

Congratulation’s! You have successfully installed Bolt CMS. Thanks for using this tutorial for installing Bolt CMS on CentOS 7 systems. For additional help or useful information, we recommend you to check the official Bolt CMS web site.

How To Install Kanboard on CentOS 7

Kanboard on CentOS 7

Kanboard is a free and open source project management tool that uses the Kanban methodology. Kanboard focuses on minimalism and simplicity, it is mainly designed for small teams. It also helps you to manage your projects and visualize your workflow.

Table of Contents

Step 1. First let’s start by ensuring your system is up-to-date.

Step 2. Install LEMP server.

Step 3. Installing Kanboard.

Step 4. Setup Firewall for Kanboard.

Step 5. Accessing Bolt Kanboard.

Prerequisites

This article assumes you have at least basic knowledge of Linux, know how to use the shell, and most importantly, you host your site on your own VPS. The installation is quite simple and assumes you are running in the root account, if not you may need to add ‘sudo’ to the commands to get root privileges. I will show you through the step by step install Kanboard open source project management tool on CentOS 7 server.
Install Kanboard on CentOS 7

Step 1. First let’s start by ensuring your system is up-to-date.

yum clean all
yum -y update

Step 2. Install LEMP server.

A CentOS 7 LEMP stack server is required. If you do not have LEMP installed, you can follow our guide here. Also install required PHP modules:

yum install php-gd php-imap php-ldap php-odbc php-pear php-xml php-xmlrpc php-mbstring php-mcrypt php-mssql php-snmp php-soap php-tidy curl curl-devel

Step 3. Installing Kanboard.

First, Download and unzip the latest version of Kanboard:

cd /var/www/html/
wget https://kanboard.net/kanboard-latest.zip
unzip kanboard-latest.zip

We will need to change some folders permissions:

chown -R apache:apache kanboard/data

Next, copy the included config.default.php to config.php and change the database information by using these commands:

cd /var/www/html/kanboard
mv config.default.php config.php

Create a configuration file named config.php using nano editor and enter the following contents into the file:

### nano /etc/config.php

// Database driver: sqlite, mysql or postgres (sqlite by default)
define('DB_DRIVER', 'mysql');

// Mysql/Postgres username
define('DB_USERNAME', 'kanboard');

// Mysql/Postgres password
define('DB_PASSWORD', 'kanboarduser_passwd');

// Mysql/Postgres hostname
define('DB_HOSTNAME', 'localhost');

// Mysql/Postgres database name
define('DB_NAME', 'kanboarduser');

Restart the Apache service by running the following command.:

systemctl restart httpd

Step 4. Setup Firewall for Kanboard.

Allow visitors access Kanboard on port 80:

firewall-cmd --zone=public --permanent --add-service=http
firewall-cmd --reload

Step 5. Accessing Bolt Kanboard.

Kanboard will be available on HTTP port 80 by default. Open your favorite browser and navigate to http://yourdomain.com/kanboard or http://server-ip/kanboard.

Congratulation’s! You have successfully installed Kanboard on CentOS 7. Thanks for using this tutorial for installing Kanboard open source project management tool on CentOS 7 systems. For additional help or useful information, we recommend you to check the official Kanboard web site.

How To Install Joomla 3.9.5 With Nginx on Ubuntu 18.04 LTS

Install Joomla With Nginx on Ubuntu 18

Joomla is a free and open source popular content management that uses a PHP and a backend database, such as MySQL. It offers a wide variety of features that make it an incredibly flexible content management system right out of the box. Furthermore, there are hundreds of free extensions written for that allows users to extend its functionality and customize it to their own objectives. A major advantage of using a content management system (CMS) is that it requires almost no technical skill or knowledge to manage. if you are planning to publish content on your website frequently, then maybe using WordPress will be a better option for you.

This article assumes you have at least basic knowledge of Linux, know how to use the shell, and most importantly, you host your site on your own VPS. The installation is quite simple and assumes you are running in the root account, if not you may need to add ‘sudo’ to the commands to get root privileges. I will show you through the step by step installation Joomla with Nginx on an Ubuntu 18.04 (Bionic Beaver) server.

Install Joomla With Nginx on Ubuntu 18.04

Step 1. First make sure that all your system packages are up-to-date

sudo apt-get update
sudo apt-get upgrade

Step 2. Install LEMP (Linux, Apache, MariaDB, PHP) server.

A Ubuntu 18.04 LAMP server is required. If you do not have LAMP installed, you can follow our guide here. Also install all required PHP modules:

apt-get install php7.1-cli php7.1-gd php7.1-opcache php7.1-mysql php7.1-json php7.1-mcrypt php7.1-xml php7.1-curl

Step 3. Installing Joomla with Nginx on Ubuntu 18.04.

First thing to do is to go to Joomla’s download page and download the latest stable version of Joomla, At the moment of writing this article it is version 3.8.5:

wget https://downloads.joomla.org/us/cms/joomla3/3-8-12/Joomla_3-8-12-Stable-Full_Package.zip
mkdir /var/www/html/joomla
unzip Joomla*.zip -d /var/www/html/joomla

We will need to change some folders permissions:

chown -R www-data.www-data /var/www/html
chmod -R 755 /var/www/html

Step 4. Configuring MariaDB for Joomla.

By default, MariaDB is not hardened. You can secure MariaDB using the mysql_secure_installation script. You should read and below each steps carefully which will set root password, remove anonymous users, disallow remote root login, and remove the test database and access to secure MariaDB.

mysql_secure_installation

Configure it like this:

- Set root password? [Y/n] y
- Remove anonymous users? [Y/n] y
- Disallow root login remotely? [Y/n] y
- Remove test database and access to it? [Y/n] y
- Reload privilege tables now? [Y/n] y

Next we will need to log in to the MariaDB console and create a database for the Joomla. Run the following command:

mysql -u root -p

This will prompt you for a password, so enter your MariaDB root password and hit Enter. Once you are logged in to your database server you need to create a database for Joomla installation:

CREATE DATABASE joomladb;
CREATE USER joomlauser@localhost;
SET PASSWORD FOR 'joomlauser'@'localhost' = PASSWORD("your-password");
GRANT ALL PRIVILEGES ON joomladb.* TO 'joomlauser'@'localhost' IDENTIFIED BY 'your-password' WITH GRANT OPTION;
FLUSH PRIVILEGES;
quit

Step 5. Configuring Nginx web server for Joomla.

Finally, configure Nginx site configuration file for Joomla. Run the commands below to create a new configuration file called joomla:

nano /etc/nginx/sites-available/joomla

Add the following lines:

server {
    listen 80;
    listen [::]:80;
    root /var/www/html/joomla;
    index  index.php index.html index.htm;
    server_name  example.com www.example.com;

    location / {
        try_files $uri $uri/ /index.php?$args;        
    }

    location ~ \.php$ {
         include snippets/fastcgi-php.conf;
         fastcgi_pass unix:/var/run/php/php7.1-fpm.sock;
         fastcgi_param SCRIPT_FILENAME $document_root$fastcgi_script_name;
         include fastcgi_params;
    }

After configuring the VirtualHost above, enable it by running the commands below:

ln -s /etc/nginx/sites-available/joomla /etc/nginx/sites-enabled/

Now, we can restart Apache web server so that the changes take place:

nginx -t
systemctl restart nginx
systemctl restart php7.1-fpm

Step 6. Accessing Joomla.

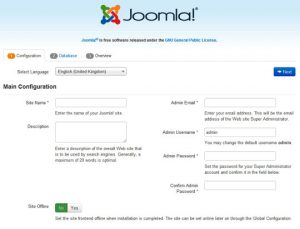
Joomla will be available on HTTP port 80 by default. Open your favorite browser and navigate to http://yourdomain.com/ or http://server-ip and complete the required the steps to finish the installation. If you are using a firewall, please open port 80 to enable access to the control panel.

joomla-web-interface

[youtube https://www.youtube.com/watch?v=prBpxVspDHs]

Congratulation’s! You have successfully installed Joomla. Thanks for using this tutorial for installing Joomla CMS (content management system) with Nginx on Ubuntu 18.04 LTS systems. For additional help or useful information, we recommend you to check the official Joomla web site.

How To Install LEMP on Ubuntu 18.04 LTS

Install LEMP on Ubuntu 18

A LEMP software stack is a group of open source software that is typically installed together to enable a server to host dynamic websites and web apps. This term is actually an acronym which represents the Linux operating system, with the Nginx web server (which replaces the Apache component of a LAMP stack). The site data is stored in a MySQL database (using MariaDB), and dynamic content is processed by PHP.

This article assumes you have at least basic knowledge of Linux, know how to use the shell, and most importantly, you host your site on your own VPS. The installation is quite simple and assumes you are running in the root account, if not you may need to add ‘sudo’ to the commands to get root privileges. I will show you through the step by step installation LEMP stack (Linux, Nginx, MariaDB and PHP) on an Ubuntu 18.04 Bionic Beaver server.

Install LEMP on Ubuntu 18.04 LTS

Step 1. First make sure that all your system packages are up-to-date

sudo apt-get update
sudo apt-get upgrade

Step 2. Installing Nginx on Ubuntu 18.04 LTS.

Install Nginx with apt, which is the default package manager for Ubuntu:

sudo apt install nginx

Once installed, start Nginx service using the following command:

sudo systemctl start nginx

Now if you have your UFW firewall running, you will need to allow connections to Nginx:

sudo ufw allow 'Nginx HTTP'

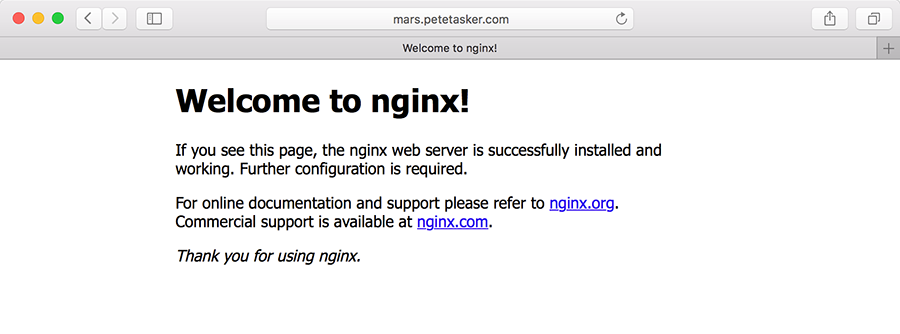
You can verify that Nginx is really running by opening your favorite web browser and entering the URL http://your-domain.com, if it is installed, then you will see this:Install LEMP on Ubuntu 18.04 LTS

nginx-default-page

To get Nginx to work with PHP correctly, we need to make changes to the Nginx configuration file. This guide we will be using a simple Nginx config file:

sudo nano /etc/nginx/sites-available/default

Copy the following into your text editor:

    server {
            listen       80;
            server_name  your_domain_name.com;
            root /usr/share/nginx/html;
            index index.php index.html;
            location / {
                    try_files $uri $uri/ =404;
            }
            error_page 404 /404.html;
            error_page 500 502 503 504 /50x.html;
            location = /50x.html {
                    root /var/www/html;
            }
            location ~ \.php$ {
                    try_files $uri =404;
                    fastcgi_pass unix:/var/run/php7.2-fpm.sock;
                    fastcgi_index index.php;
                    fastcgi_param SCRIPT_FILENAME $document_root$fastcgi_script_name;
                    include fastcgi_params;
            }
    }

Once you have finished editing the file restart Nginx with:

sudo nginx -t
sudo systemctl restart nginx

Step 4. Installing MariaDB on Ubuntu 18.04 LTS.

To install MariaDB in Ubuntu 18.04 run the following command:

sudo apt install mariadb-server

Once complete, you can verify MariaDB is installed by running the below command:

sudo systemctl status mariadb

By default, MariaDB is not hardened. You can secure MariaDB using the mysql_secure_installation script. you should read and below each steps carefully which will set root password, remove anonymous users, disallow remote root login, and remove the test database and access to secure MariaDB:

mysql_secure_installation

Configure it like this:

- Set root password? [Y/n] y
- Remove anonymous users? [Y/n] y
- Disallow root login remotely? [Y/n] y
- Remove test database and access to it? [Y/n] y
- Reload privilege tables now? [Y/n] y

To log into MariaDB, use the following command (note that it’s the same command you would use to log into a MariaDB database):

mysql -u root -p

Step 5. Installing PHP and Configure PHP-FPM Settings.

Unlike Apache, Nginx does not contain native PHP processing. For that we have to install PHP-FPM (FastCGI Process Manager):

sudo apt install php-fpm php-mysql

Once installed, check the PHP version:

php --version

Now open the PHP-FPM default file to edit the following content:

### nano /etc/php/7.2/fpm/php.ini
cgi.fix_pathinfo=0
date.timezone = Africa/Douala

Save the file and restart php-fpm:

systemctl restart php7.2-fpm

To test PHP, create a test file named info.php with he content below. Save the file, then browse to it to see if PHP is working:

nano /usr/share/nginx/html/info.php

Copy the following into your text editor:

<?php
phpinfo();
?>

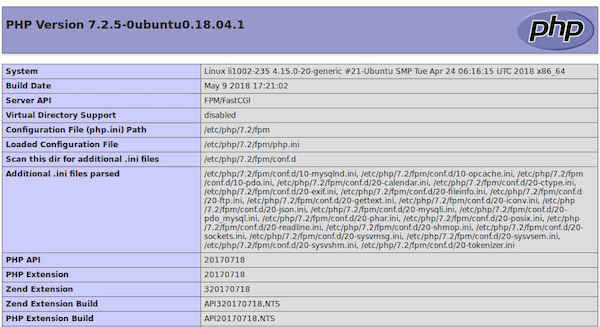
Try to access it at http://your_server_ip/info.php . If the PHP info page is rendered in your browser then everything looks good and you are ready to proceed further.

nginx-php7.2

Congratulation’s! You have successfully installed LEMP stack. Thanks for using this tutorial for installing LAMP (Linux, Nginx, MySQL and PHP) in Ubuntu 18.04 LTS system.

How To Install LEMP on Ubuntu 17.10

Install LEMP on Ubuntu 17

A LEMP software stack is a group of open source software that is typically installed together to enable a server to host dynamic websites and web apps. This term is actually an acronym which represents the Linux operating system, with the Nginx web server (which replaces the Apache component of a LAMP stack). The site data is stored in a MySQL database (using MariaDB), and dynamic content is processed by PHP. In this tutorial we will show you how to install LEMP on Ubuntu 17.10 Artful Aardvark.

This article assumes you have at least basic knowledge of Linux, know how to use the shell, and most importantly, you host your site on your own VPS. The installation is quite simple and assumes you are running in the root account, if not you may need to add ‘sudo’ to the commands to get root privileges. I will show you through the step by step installation LEMP Stack on an Ubuntu Ubuntu 17.10 Artful Aardvark server.

Install LEMP on Ubuntu 17.10 Artful Aardvark

Step 1. First make sure that all your system packages are up-to-date

sudo apt-get update
sudo apt-get upgrade

Step 2. Installing Nginx on Ubuntu 17.10.

Install Nginx with apt-get, which is the default package manager for Ubuntu:

sudo apt-get install nginx

Start Nginx service using the following command:

sudo systemctl start nginx

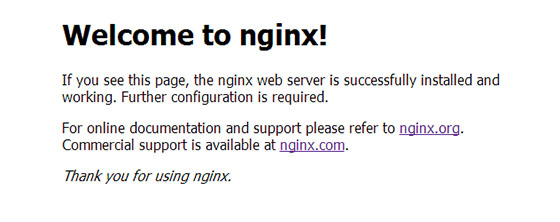
You can verify that Nginx is really running by opening your favorite web browser and entering the URL http://your-server’s-address, if it is installed, then you will see this:
Welcome_to_nginx_cropped

Step 3 Configure Nginx web server.

To get Nginx to work with PHP correctly, we need to make changes to the Nginx configuration file. This guide we will be using a simple Nginx config file:

sudo nano /etc/nginx/sites-available/default

Copy the following into your text editor:

    server {
            listen       80;
            server_name  your_domain_name.com;
            root /usr/share/nginx/html;
            index index.php index.html;
            location / {
                    try_files $uri $uri/ =404;
            }
            error_page 404 /404.html;
            error_page 500 502 503 504 /50x.html;
            location = /50x.html {
                    root /var/www/html;
            }
            location ~ \.php$ {
                    try_files $uri =404;
                    fastcgi_pass unix:/var/run/php5-fpm.sock;
                    fastcgi_index index.php;
                    fastcgi_param SCRIPT_FILENAME $document_root$fastcgi_script_name;
                    include fastcgi_params;
            }
    }

Once you have finished editing the file restart Nginx with:

sudo nginx -t
sudo systemctl restart nginx

Step 4. Installing MySQL on Ubuntu 17.10.

To install MySQL in Ubuntu 17.10 run the following command:

sudo apt-get install mysql-server php7.0-mysql

Once complete, you can verify MySQL is installed by running the below command:

systemctl status mysql

By default, MySQL is not hardened. You can secure MySQL using the mysql_secure_installation script. you should read and below each steps carefully which will set root password, remove anonymous users, disallow remote root login, and remove the test database and access to secure MySQL:

mysql_secure_installation

Configure it like this:

- Set root password? [Y/n] y
- Remove anonymous users? [Y/n] y
- Disallow root login remotely? [Y/n] y
- Remove test database and access to it? [Y/n] y
- Reload privilege tables now? [Y/n] y

To log into MySQL, use the following command (note that it’s the same command you would use to log into a MySQL database):

mysql -u root -p

Step 5. Installing and Configuring PHP on Ubuntu 17.10

Install PHP on the Ubuntu 17.10 with the following command to begin the install:

sudo apt-get install php php-fpm php7.0-mysql

Once the installation is finished, edit the server php.ini file and change the cgi.fix_pathinfo parameter value to 0. By default it will be commented out with a semi-colon and the value set to 1 which practically ensures that PHP will attempt to execute the closest file available when a requested PHP file can’t be found. This is a bad security practice, so let’s change it. Execute the below command:

nano /etc/php/7.0/fpm/php.ini

Now find the cgi.fix_pathinfo line, uncomment it and set the value to 0. Save and close the file.

Your server should restart Nginx automatically after the installation of both MySQL and PHP. If it doesn’t, execute this command:

sudo systemctl restart nginx

To test PHP, create a test file named info.php with he content below. Save the file, then browse to it to see if PHP is working:

nano /usr/share/nginx/html/info.php

Copy the following into your text editor:

<?php phpinfo(); ?>

Try to access it at http://your_server_ip/info.php . If the PHP info page is rendered in your browser then everything looks good and you are ready to proceed further.

Congratulation’s! You have successfully installed LEMP stack. Thanks for using this tutorial for installing LAMP (Linux, Nginx, MySQL and PHP) in Ubuntu 17.10 Artful Aardvark system. For additional help or useful information, we recommend you to check the official Nginx, MySQL and PHP web site.

How To Install Rocket.Chat on Ubuntu 16.04 LTS

Install Rocket.Chat on Ubuntu 16

Rocket.Chat is one of the most popular open source chat software. A fantastic alternate to both Slack and compensated live chat software. It’s free, what is unlimited and it’s a bunch of cool features like Video chat, Screen sharing, Mobile apps and more.

This article assumes you have at least basic knowledge of Linux, know how to use the shell, and most importantly, you host your site on your own VPS. The installation is quite simple and assumes you are running in the root account, if not you may need to add ‘sudo’ to the commands to get root privileges. I will show you through the step by step installation Rocket.Chat on an Ubuntu 16.04 Xenial Xerus server.

Install Rocket.Chat on Ubuntu 16.04 LTS

Step 1. First make sure that all your system packages are up-to-date by running these following apt-get commands in the terminal.

sudo apt-get update
sudo apt-get upgrade

Step 2. Installing MongoDB.

Rocket.Chat requires MongoDB for the installation. In this step, we will install MongoDB from the MongoDB repository:

apt-key adv --keyserver hkp://keyserver.ubuntu.com:80 --recv EA312927

Then add the MongoDB repository with the command below:

echo "deb http://repo.mongodb.org/apt/ubuntu xenial/mongodb-org/3.2 multiverse" | sudo tee /etc/apt/sources.list.d/mongodb-org-3.2.list

Update the repository and install MongoDB with the apt command:

apt-get update
apt-get install mongodb-org

Open MongoDB and set it to run automatically at boot time:

systemctl enable mongod
systemctl start mongod

Step 3. Configure a MongoDB ReplicaSet.

This is an optional step, but those who want performance improvements should follow it. Rocket.Chat Server uses a MongoDB replica set:

nano /etc/mongod.conf

There, add this section:
replication:

 replSetName: "001-rs"

Save, exit and restart MongoDB:

systemctl restart mongod

Next, run its shell and initiate the replica set:

# mongo
> rs.initiate()

After you run rs.initiate(), you should get the following results:

{
 "info2" : "no configuration specified. Using a default configuration for the set",
 "me" : "wpcademy.com:27017",
 "ok" : 1
}

If the value of “ok” is not 1, then something’s wrong. Please go back and follow the steps exactly as shown in this tutorial.

Step 4. Installing Node.js and npm.

Node.js and npm are required by Rocket.Chat and are both available on Ubuntu repositories:

apt-get install nodejs npm

First, install the ‘n’ package globally on the whole system:

npm install -g n

The messaging system requires Node.js 4.5+, so ensure that you choose 4.5:

n 4.5

Check if you have the right node.js version:

node --version

Step 5. Installing Rocket.Chat.

First, download the latest version of Rocket.Chat:

cd /var/www
curl -L https://rocket.chat/releases/latest/download -o rocket.chat.tgz

And extract it:

tar xzf rocket.chat.tgz

Rename the extracted folder:

mv bundle Rocket.Chat

Run the following commands to add some environment variables:

cd Rocket.Chat/programs/server
npm install
cd ../..
export ROOT_URL=http://your-host-name.com-as-accessed-from-internet:3000/
export MONGO_URL=mongodb://localhost:27017/rocketchat
export PORT=3000
node main.js

Step 6. Install LEMP (Linux, Nginx, MariaDB and PHP) server.

A Ubuntu 16.04 LEMP server is required. If you do not have LAMP installed, you can follow our guide here.

Create a new SSL directory, in which certificates will be stored:

mkdir -p /etc/nginx/ssl/

In this directory, generate a new SSL certificate file:

cd /etc/nginx/ssl
openssl req -new -x509 -days 365 -nodes -out /etc/nginx/ssl/rocketchat.crt -keyout /etc/nginx/ssl/rocketchat.key
chmod 400 rocketchat.key

Next, create a Virtual Host configuration:

nano /etc/nginx/sites-available/rocketchat

There, paste the following configuration:

# Upstreams
upstream backend {
 server 127.0.0.1:3000;
}
 
# Redirect Options
server {
 listen 80;
 server_name chat.mydomain.com;
 # enforce https
 return 301 https://$server_name$request_uri;
}
 
# HTTPS Server
server {
 listen 443;
 server_name chat.mydomain.com;
 
 error_log /var/log/nginx/rocketchat.access.log;
 
 ssl on;
 ssl_certificate /etc/nginx/ssl/rocketchat.crt;
 ssl_certificate_key /etc/nginx/ssl/rocketchat.key;
 ssl_protocols TLSv1 TLSv1.1 TLSv1.2; # dont use SSLv3 ref: POODLE
 
 location / {
 proxy_pass http://192.168.1.110:3000/;
 proxy_http_version 1.1;
 proxy_set_header Upgrade $http_upgrade;
 proxy_set_header Connection "upgrade";
 proxy_set_header Host $http_host;
 
 proxy_set_header X-Real-IP $remote_addr;
 proxy_set_header X-Forward-For $proxy_add_x_forwarded_for;
 proxy_set_header X-Forward-Proto http;
 proxy_set_header X-Nginx-Proxy true;
 
 proxy_redirect off;
 }
}

Save, exit and activate this configuration:

ln -s /etc/nginx/sites-available/rocketchat /etc/nginx/sites-enabled/rocketchat

Run:

nginx -t

And make sure there are no errors. If everything’s ok, restart Nginx:

systemctl restart nginx

Update the environment variables and run Rocket.Chat:

cd /var/www/Rocket.Chat/
export ROOT_URL=https://chat.mydomain.com
export MONGO_URL=mongodb://localhost:27017/rocketchat?replicaSet=001-rs
export PORT=3000
node main.js

Step 7. Accessing Rocket.Chat.

Rocket.Chat will be available on HTTP port 80 by default. Open your favorite browser and navigate to http://chat.mydomain.com and complete the required the steps to finish the installation. If you are using a firewall, please open port 80 to enable access to the control panel.

Congratulation’s! You have successfully installed Rocket.Chat with Docker. Thanks for using this tutorial for installing Rocket.Chat open source chat software on your Ubuntu 16.04. For additional help or useful information, we recommend you to check the official Rocket.Chat web site.