How To Install AnyDesk on Ubuntu 16.04 LTS

Install AnyDesk on Ubuntu 16

AnyDesk is the world’s most comfortable remote desktop application. Access all your programs, documents and files from anywhere, without having to entrust your data to a cloud service. You can say it’s an alternative of the TeamViewer, which is available free. Anydesk provides the faster remote connection than any other existing remote desktop application.

This article assumes you have at least basic knowledge of linux, know how to use the shell, and most importantly, you host your site on your own VPS. The installation is quite simple and assumes you are running in the root account, if not you may need to add ‘sudo’ to the commands to get root privileges. I will show you through the step by step installation AnyDesk on a Ubuntu 16.04 (Xenial Xerus) server.

Install AnyDesk on Ubuntu 16.04 LTS

Step 1. First make sure that all your system packages are up-to-date

sudo apt-get update
sudo apt-get upgrade

Step 2. Installing AnyDesk.

First, you can download it from its official website and install on Ubuntu:

### 32-Bit ###
https://download.anydesk.com/linux/anydesk_2.9.5-1_i386.deb
dpkg -i anydesk_2.9.5-1_i386.deb

### 64-Bit ###
https://download.anydesk.com/linux/anydesk_2.9.5-1_amd64.deb
dpkg -i anydesk_2.9.5-1_amd64.deb

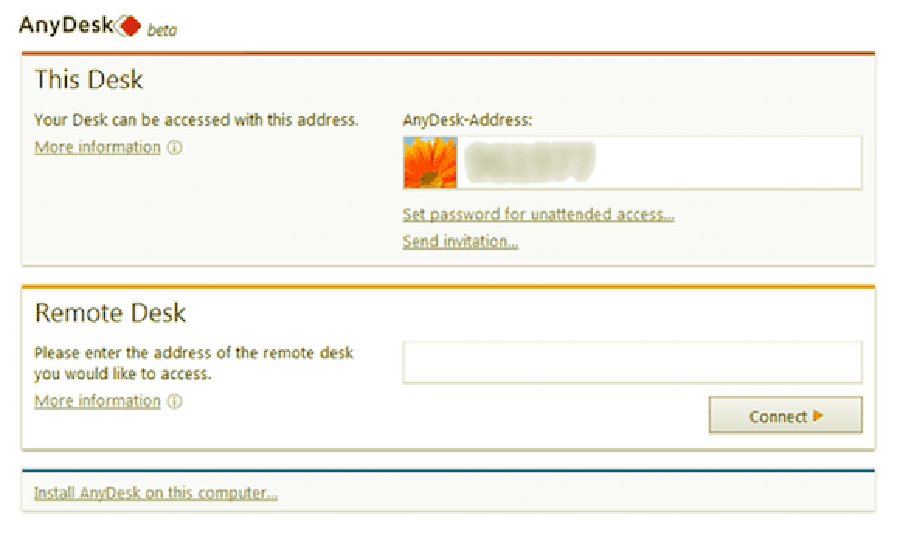
Once installation, Launch the AnyDesk on your system. You will get an AnyDesk ID for connecting from remote systems using AnyDesk. Now, You may need to set a password for unattended access. This will set a fixed password on your system, Which can be used anytime to connect.

anydesk-linux

Congratulation’s! You have successfully installed AnyDesk. Thanks for using this tutorial for installing latest stable version of AnyDesk on Ubuntu 16.04 LTS (Xenial Xerus) system. For additional help or useful information, we recommend you to check the official AnyDesk web site.

How To Install Conky on Ubuntu 16.04 LTS

Install Conky on Ubuntu 16

Conky is an open source system monitor tool for any versions system on Linux. It is able to monitor many system variables, including CPU status, swap space, temperatures, disk storage, processes, network interfaces, battery status and a host of others and then display the information on your desktop. It can also display other things like time, calendars, weather and the like.

This article assumes you have at least basic knowledge of linux, know how to use the shell, and most importantly, you host your site on your own VPS. The installation is quite simple and assumes you are running in the root account, if not you may need to add ‘sudo’ to the commands to get root privileges. I will show you through the step by step installation Conky system on a Ubuntu 16.04 (Xenial Xerus) server.

Install Conky on Ubuntu 16.04 LTS

Step 1. First make sure that all your system packages are up-to-date

sudo apt-get update
sudo apt-get upgrade

Step 2. Installing Conky.

Install Conky Manager on Ubuntu 16.04, use the following commands:

sudo apt-add-repository -y ppa:teejee2008/ppa
sudo apt update
sudo apt install conky-manager

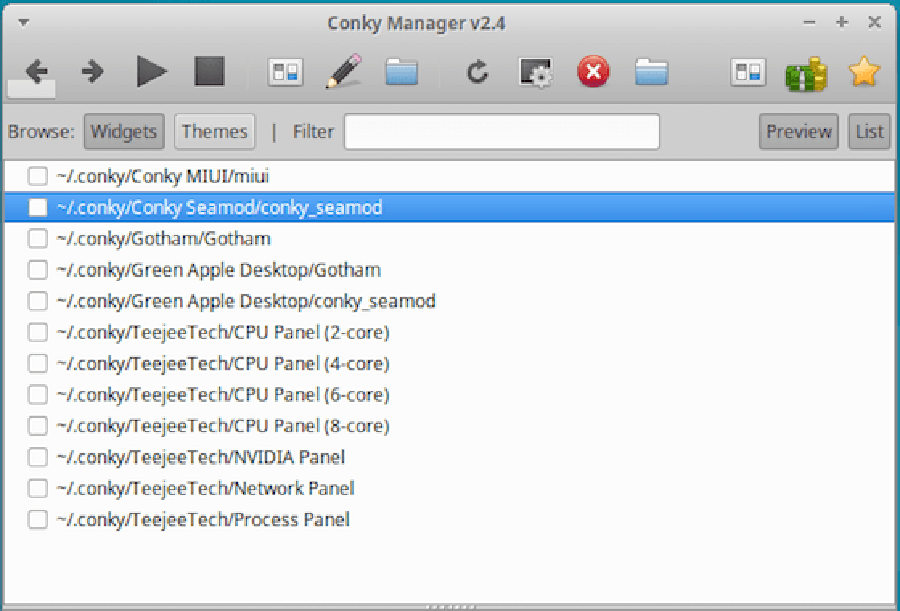
Once installed, start it from Unity Dash or your application menu.
conky-UI

Congratulation’s! You have successfully installed Conky. Thanks for using this tutorial for installing latest stable version of Conky on Ubuntu 16.04 LTS (Xenial Xerus) system. For additional help or useful information, we recommend you to check the official Conky web site.

How To Install Kanboard on Ubuntu 16.04 LTS

Install Kanboard on Ubuntu 16

Kanboard is a free and open source project management tool that uses the Kanban methodology. It focuses on minimalism and simplicity, it is mainly designed for small teams. It also helps you to manage your projects and visualize your workflow.

This article assumes you have at least basic knowledge of Linux, know how to use the shell, and most importantly, you host your site on your own VPS. The installation is quite simple and assumes you are running in the root account, if not you may need to add ‘sudo’ to the commands to get root privileges. I will show you through the step by step installation Kanboard open source project management on an Ubuntu 16.04 Xenial Xerus server.

Install Kanboard on Ubuntu 16.04 LTS

Step 1. First make sure that all your system packages are up-to-date

sudo apt-get update
sudo apt-get upgrade

Step 2. Install LAMP (Linux, Apache, MariaDB, PHP) server.

A Ubuntu 16.04 LAMP server is required. If you do not have LAMP installed, you can follow our guide here. Also install all required PHP modules:

apt-get install php7.0-mysql php7.0-curl php7.0-json php7.0-cgi php7.0 libapache2-mod-php7.0 php7.0-mcrypt php7.0-xmlrpc php7.0-gd

Step 3. Installing Kanboard.

First, Download and unzip the latest version of Kanboard:

cd /var/www/html/
wget https://kanboard.net/kanboard-latest.zip
unzip kanboard-latest.zip

We will need to change some folders permissions:

chown -R www-data:www-data /var/www/html/kanboard/

Next, copy the included config.default.php to config.php and change the database information by using these commands:

cd /var/www/html/kanboard
mv config.default.php config.php

Create a configuration file named config.php using nano editor and enter the following contents into the file:

### nano /etc/config.php

// Database driver: sqlite, mysql or postgres (sqlite by default)
define('DB_DRIVER', 'mysql');

// Mysql/Postgres username
define('DB_USERNAME', 'kanboard');

// Mysql/Postgres password
define('DB_PASSWORD', 'kanboarduser_passwd');

// Mysql/Postgres hostname
define('DB_HOSTNAME', 'localhost');

// Mysql/Postgres database name
define('DB_NAME', 'kanboarduser');

Step 4. Configuring MariaDB for Kanboard.

By default, MariaDB is not hardened. You can secure MariaDB using the mysql_secure_installation script. you should read and below each steps carefully which will set root password, remove anonymous users, disallow remote root login, and remove the test database and access to secure MariaDB:

mysql_secure_installation

Configure it like this:

- Set root password? [Y/n] y
- Remove anonymous users? [Y/n] y
- Disallow root login remotely? [Y/n] y
- Remove test database and access to it? [Y/n] y
- Reload privilege tables now? [Y/n] y

Next we will need to log in to the MariaDB console and create a database for the Kanboard. Run the following command:

mysql -u root -p

This will prompt you for a password, so enter your MariaDB root password and hit Enter. Once you are logged in to your database server you need to create a database for Kanboard installation:

MariaDB [(none)]>CREATE USER 'kanboarduser'@'localhost' IDENTIFIED BY 'password';
MariaDB [(none)]>GRANT ALL PRIVILEGES ON kanboarduser.* TO 'kanboard'@'localhost' IDENTIFIED BY 'password' WITH GRANT OPTION;
MariaDB [(none)]>FLUSH PRIVILEGES;
MariaDB [(none)]>exit;

Import the Kanboard Database Schema:

cd /var/www/html/kanboard
mysql -u kanboard -p kanboard < app/Schema/Sql/mysql.sql

Step 5. Configuring Apache web server for Kanboard.

Create a new virtual host directive in Apache. For example, create a new Apache configuration file named ‘kanboard.conf’ on your virtual server:

sudo a2enmod rewrite
touch /etc/apache2/sites-available/kanboard.conf
ln -s /etc/apache2/sites-available/kanboard.conf /etc/apache2/sites-enabled/kanboard.conf
nano /etc/apache2/sites-available/kanboard.conf

Add the following lines:

<VirtualHost *:80>
ServerAdmin [email protected]
DocumentRoot /var/www/html/kanboard
ServerName your-domain.com
ServerAlias www.your-domain.com
<Directory /var/www/html/kanboard>
Options FollowSymLinks
AllowOverride All
Order allow,deny
allow from all
</Directory>
ErrorLog /var/log/apache2/your-domain.com-error_log
CustomLog /var/log/apache2/your-domain.com-access_log common
</VirtualHost>

Now, we can restart Apache web server so that the changes take place:

sudo a2ensite kanboard
systemctl restart apache2.service

Step 5. Accessing Bolt Kanboard.

Kanboard will be available on HTTP port 80 by default. Open your favorite browser and navigate to http://yourdomain.com/kanboard or http://server-ip/kanboard.

Congratulation’s! You have successfully installed Kanboard. Thanks for using this tutorial for installing Kanboard open source project management on your Ubuntu 16.04 LTS. For additional help or useful information, we recommend you to check the official Kanboard web site.
How To Install Android Studio on Ubuntu 16.04 LTS

Install Android Studio on Ubuntu 16

Android Studio is the official Integrated Development Environment (IDE) for Android app development, based on IntelliJ IDEA. On top of IntelliJ’s powerful code editor and developer tools, Android Studio offers even more features that enhance your productivity when building Android apps

This article assumes you have at least basic knowledge of Linux, know how to use the shell, and most importantly, you host your site on your own VPS. The installation is quite simple and assumes you are running in the root account, if not you may need to add ‘sudo’ to the commands to get root privileges. I will show you through the step by step installation Android Studio on an Ubuntu 16.04 Xenial Xerus server.

Install Android Studio on Ubuntu 16.04 LTS

Step 1. First make sure that all your system packages are up-to-date

sudo apt-get update
sudo apt-get upgrade

Step 2. Installing Java 8 on Ubuntu.

First you need to make sure that your ubuntu is equipped with JAVA. Here, we are using PPA or ORACLE Java. Run the following commands

sudo add-apt-repository ppa:webupd8team/java
sudo apt-get update
sudo apt-get install java-common oracle-java8-installer

Once installed we need to set Java environment variables such as JAVA_HOME on Ubuntu 16.04:

sudo apt-get install oracle-java8-set-default
source /etc/profile

Step 3. Install Android Studio on Ubuntu.

Run the following commands to add Android Studio PPA and install:

sudo add-apt-repository ppa:maarten-fonville/android-studio
sudo apt update
sudo apt install android-studio

Once the installation is finished, you can open Android Studio from Unity Dash or your preferred app launcher or You can access android studio from the dash or app launcher or use the following command to start:

/opt/android-studio/bin/studio.sh

Congratulation’s! You have successfully installed Android Studio. Thanks for using this tutorial for installing Android Studio on your Ubuntu 16.04 LTS. For additional help or useful information, we recommend you to check the official Android Studio web site.

How To Install osTicket on Ubuntu 16.04 LTS

Install osTicket on Ubuntu 16

os-Ticket is a widely-used and trusted open source support ticket system. It seamlessly routes inquiries created via email, web-forms and phone calls into a simple, easy-to-use, multi-user, web-based customer support platform. Generally Used for Help Desk services.

This article assumes you have at least basic knowledge of Linux, know how to use the shell, and most importantly, you host your site on your own VPS. The installation is quite simple and assumes you are running in the root account, if not you may need to add ‘sudo’ to the commands to get root privileges. I will show you through the step by step installation osTicket open source support ticket system on an Ubuntu 16.04 Xenial Xerus server.

Install osTicket on Ubuntu 16.04 LTS

Step 1. First make sure that all your system packages are up-to-date

sudo apt-get update
sudo apt-get upgrade

Step 2. Install LAMP (Linux, Apache, MariaDB, PHP) server.

A Ubuntu 16.04 LAMP server is required. If you do not have LAMP installed, you can follow our guide here. Also install all required PHP modules:

apt-get install php7.0-mysql php7.0-curl php7.0-json php7.0-cgi php7.0 libapache2-mod-php7.0 php7.0-mcrypt php7.0-xmlrpc php7.0-gd

Step 3. Installing osTicket.

Download the latest stable version of osTicket, At the moment of writing this article it is version 1.10.1:

sudo mkdir /var/www/html/osticket
cd /var/www/html/osticket
wget http://osticket.com/sites/default/files/download/osTicket-v1.10.1.zip
sudo unzip osTicket-v1.10.1.zip

Next, copy the sample config file:

cp upload/include/ost-sampleconfig.php upload/include/ost-config.php

We will need to change some folders permissions:

chown -R www-data:www-data /var/www/html/osticket

Step 4. Configuring MariaDB for osTicket.

By default, MariaDB is not hardened. You can secure MariaDB using the mysql_secure_installation script. you should read and below each steps carefully which will set root password, remove anonymous users, disallow remote root login, and remove the test database and access to secure MariaDB:

mysql_secure_installation

Configure it like this:

- Set root password? [Y/n] y
- Remove anonymous users? [Y/n] y
- Disallow root login remotely? [Y/n] y
- Remove test database and access to it? [Y/n] y
- Reload privilege tables now? [Y/n] y

Next we will need to log in to the MariaDB console and create a database for the osTicket. Run the following command:

mysql -u root -p

This will prompt you for a password, so enter your MariaDB root password and hit Enter. Once you are logged in to your database server you need to create a database for osTicket installation:

CREATE DATABASE osticket;
GRANT ALL PRIVILEGES ON osticket.* TO 'osticketuser'@'localhost' IDENTIFIED BY 'PASSWORD';
FLUSH PRIVILEGES;
exit;

Step 5. Configuring Apache web server for osTicket.

Create a new virtual host directive in Apache. For example, create a new Apache configuration file named ‘osticket.conf’ on your virtual server:

sudo a2enmod rewrite
touch /etc/apache2/sites-available/osticket.conf
ln -s /etc/apache2/sites-available/osticket.conf /etc/apache2/sites-enabled/osticket.conf
nano /etc/apache2/sites-available/osticket.conf

Add the following lines:

<VirtualHost *:80>
ServerAdmin [email protected]
DocumentRoot /var/www/html/osticket/upload/
ServerName your-domain.com
ServerAlias www.your-domain.com
<Directory /var/www/html/osticket/upload>
Options FollowSymLinks
AllowOverride All
Order allow,deny
allow from all
</Directory>
ErrorLog /var/log/apache2/your-domain.com-error_log
CustomLog /var/log/apache2/your-domain.com-access_log common
</VirtualHost>

Now, we can restart Apache web server so that the changes take place:

systemctl restart apache2.service

Step 6. Accessing osTicket.

osTicket will be available on HTTP port 80 by default. Open your favorite browser and navigate to http://yourdomain.com or http://server-ip and complete the required the steps to finish the installation.

Once the installation has completed, remove the setup directory and change the permission of the osTicket config file:

sudo rm -rf /var/www/html/osticket/upload/setup
sudo chmod 0644 /var/www/html/osticket/include/ost-config.php

Congratulation’s! You have successfully installed osTicket. Thanks for using this tutorial for installing osTicket open source support ticket system on your Ubuntu 16.04 LTS. For additional help or useful information, we recommend you to check the official osTicket web site.

How To Install ArangoDB on Ubuntu 16.04 LTS

Install ArangoDB on Ubuntu 16

Arango database (ArangoDB) is a multi-model database program, meaning one which uses a combination of Key-Value pairs, files and graphs to store info. It has a flexible information model for files and graphs. It is a general purpose database and gives all attributes which are necessary for a contemporary web application.

This article assumes you have at least basic knowledge of Linux, know how to use the shell, and most importantly, you host your site on your own VPS. The installation is quite simple and assumes you are running in the root account, if not you may need to add ‘sudo’ to the commands to get root privileges. I will show you through the step by step installation ArangoDB on an Ubuntu 16.04 Xenial Xerus server.

Install ArangoDB on Ubuntu 16.04 LTS

Step 1. First make sure that all your system packages are up-to-date

sudo apt-get update
sudo apt-get upgrade

Step 2. Installing ArangoDB.

By default, ArangoDB is not available in Ubuntu repository, so you will need to add the ArangoDB repository to your system:

wget https://www.arangodb.com/repositories/arangodb3/xUbuntu_16.04/Release.key

Now add the key with the following command:

apt-key add Release.key

Next add the ArangoDB repository to sources.list and update the system again:

apt-add-repository 'deb https://www.arangodb.com/repositories/arangodb3/xUbuntu_16.04/ /'
apt-get update -y

Next, install ArangoDB by running the following command:

apt-get install arangodb3 -y

Once the installation is complete, start the arangodb3 service with the following command:

systemctl start arangodb3
systemctl enable arangodb3

Step 3. Access ArangoDB CLI.

ArangoDB comes with arangosh that provides a command line shell to access the database. You can create new databases, users, collections, documents, and perform all administrative tasks using this client:

arangosh

When asked for a password, enter the root password. You should see the following output:

__ _ _ __ __ _ _ __ __ _ ___ ___| |__ 
 / _` | '__/ _` | '_ \ / _` |/ _ \/ __| '_ \ 
| (_| | | | (_| | | | | (_| | (_) \__ \ | | |
 \__,_|_| \__,_|_| |_|\__, |\___/|___/_| |_|
 |___/

arangosh (ArangoDB 3.0.12 [linux] 64bit, using VPack 0.1.30, ICU 54.1, V8 5.0.71.39, OpenSSL 1.0.2g-fips 1 Mar 2016)
Copyright (c) ArangoDB GmbH

Pretty printing values.
Connected to ArangoDB 'http+tcp://127.0.0.1:8529' version: 3.0.12 [server], database: '_system', username: 'root'

Please note that a new minor version '3.1.19' is available
Type 'tutorial' for a tutorial or 'help' to see common examples
127.0.0.1:8529@_system>

Step 4. Accessing ArangoDB Web Interface.

ArangoDB comes with built-in, user friendly web interface for performing administrative tasks. First, open the arangod.conf file located in the /etc/arangodb3/ directory:

nano /etc/arangodb3/arangod.conf

Add your server’s IP address as follows:

endpoint = tcp://192.168.1.227:8529

Next, open the arangosh.conf file located at /etc/arangodb3/ directory:

nano /etc/arangodb3/arangosh.conf

Again, add your server’s IP address:

endpoint = tcp://192.168.1.227:8529
authentication = true

Save the file and restart the ArangoDB service:

systemctl restart arangodb3

Finally steps, Open your favorite web browser and type the URL http://192.168.0.227:8529. This will open up the login screen for the _system db. After entering your login credentials, you will see the ArangoDB splash screen. This concludes my tutorial.

Congratulation’s! You have successfully installed ArangoDB. Thanks for using this tutorial for installing ArangoDB on your Ubuntu 16.04 LTS. For additional help or useful information, we recommend you to check the official ArangoDB web site.

How To Install Notepad++ on Ubuntu 16.04 LTS

Install Notepad++ on Ubuntu 16

Notepad++ is a free source code editor and Notepad replacement that supports several languages. Running in the MS Windows environment, its use is governed by GPL License. For a while now there has been an alternative to Notepad++ called Notepadqq for Linux systems, including Ubuntu.. Notepadqq is not a bad editor, but probably not as feature-rich as Notepad++. In this tutorial we will show you how to install Notepad++ on Ubuntu 16.04 LTS.

This article assumes you have at least basic knowledge of Linux, know how to use the shell, and most importantly, you host your site on your own VPS. The installation is quite simple and assumes you are running in the root account, if not you may need to add ‘sudo’ to the commands to get root privileges. I will show you through the step by step installation Notepad++ on an Ubuntu 16.04 Xenial Xerus server.

Install Notepad++ on Ubuntu 16.04 LTS

Step 1. First make sure that all your system packages are up-to-date

sudo apt-get update
sudo apt-get upgrade

Step 2. Installing Snapd.

Snap is a powerful package management system for Linux users, it probably the best and easiest way to install packages on Linux machine. To install Snap, run the commands below:

apt-get install snapd snapd-xdg-open

Step 3. Installing Notepad++ on Ubuntu.

To install Notepad++ run the commands below:

snap install notepad-plus-plus

Once installing the package, run the commands below to install a mandetory plugin:

snap connect notepad-plus-plus:process-control

And optional plugins below should probably be installed as well:

snap connect notepad-plus-plus:removable-media
snap connect notepad-plus-plus:hardware-observe
snap connect notepad-plus-plus:cups-control

Finally steps, next go to your Activities Overview and search for, the launch Notepad++.

Congratulation’s! You have successfully installed Notepad++. Thanks for using this tutorial for installing Notepad++ on your Ubuntu 16.04 LTS. For additional help or useful information, we recommend you to check the official Notepad++ web site.