How To Install GoAccess on Ubuntu 16.04 LTS

How To Install GoAccess on Ubuntu 16.04 LTS

GoAccess was designed to be a fast, terminal-based log analyzer. Its core idea is to quickly analyze and view web server statistics in real time without needing to use your browser (great if you want to do a quick analysis of your access log via SSH, or if you simply love working in the terminal).

Key Features — See Full List

  • Fast, real-time, millisecond/second updates, written in C
  • Only ncurses as a dependency
  • Nearly all web log formats (Apache, Nginx, Amazon S3, Elastic Load Balancing, CloudFront, etc)
  • Simply set the log format and run it against your log
  • Beautiful terminal and bootstrap dashboards (Tailor GoAccess to suit your own color taste/schemes)
  • and of course, Valgrind tested.

This article assumes you have at least basic knowledge of linux, know how to use the shell, and most importantly, you host your site on your own VPS. The installation is quite simple and assumes you are running in the root account, if not you may need to add ‘sudo’ to the commands to get root privileges. I will show you through the step by step installation GoAccess real time web log analyzer on a Ubuntu 16.04 (Xenial Xerus) server.

Install GoAccess on Ubuntu 16.04 LTS

Step 1. First make sure that all your system packages are up-to-date

sudo apt-get update
sudo apt-get upgrade

Step 2. Installing dependency packages.

Install the ncurses and gcc, run following command:

apt-get install libncursesw5-dev libglib2.0-dev libgeoip-dev libtokyocabinet-dev

Step 2. Installing GoAccess.

Run the following command to install GoAccess software:

wget http://tar.goaccess.io/goaccess-1.2.tar.gz
tar xvzf goaccess-1.2.tar.gz
cd goaccess-1.2
./configure --enable-utf8 --enable-geoip=legacy
make && make install

Create a soft link of goaccess in the /usr/bin directory by running:

ln -s /usr/local/bin/goaccess /usr/bin/goaccess

Step 3. Using GoAccess.

First, install Apache as our web server:

apt-get install apache2

After the installation process is finished, execute the following commands to start your Apache service:

systemctl start apache2
systemctl enable apache2

Allow the required HTTP port through the system firewall:

firewall-cmd --add-service=http --permanent
firewall-cmd --reload

For example, using the following command will create an analyzed HTML file from the Apache access log and place it in Apache’s default document root:

goaccess /var/log/apache2/access.log --log-format=COMBINED -a -o /var/www/html/report.html

Now you can open your browser, Enter your IP address or your Domain name and add “/report.html” in the end to see your HTML output:
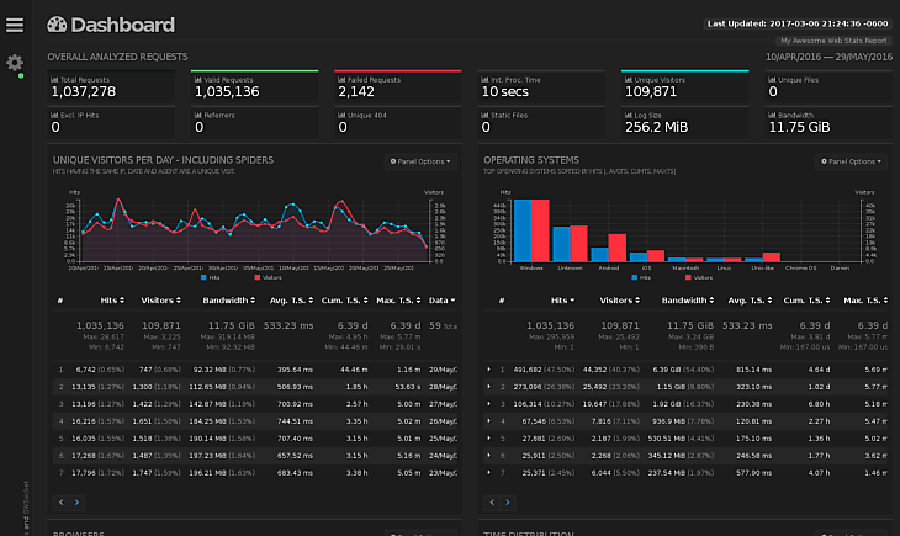
goaccess dashboard
Congratulation’s! You have successfully installed GoAccess. Thanks for using this tutorial for installing GoAccess real time web log analyzer on Ubuntu 16.04 LTS (Xenial Xerus) system. For additional help or useful information, we recommend you to check the official GoAccess web site.

How To Install Grafana on Ubuntu 16.04 LTS

Install Grafana on Ubuntu 16

Grafana is an open source data visualization and tracking suite. It offers support for Graphite, Elasticsearch, Included, Prometheus, and a lot more databases. The application gives a beautiful dashboard and metric analytics, with capability to control and create your own dashboard to your own apps or infrastructure performance monitoring.

This article assumes you have at least basic knowledge of linux, know how to use the shell, and most importantly, you host your site on your own VPS. The installation is quite simple and assumes you are running in the root account, if not you may need to add ‘sudo’ to the commands to get root privileges. I will show you through the step by step installation Grafana open source data visualization and monitoring suite on a Ubuntu 16.04 (Xenial Xerus) server.

Install Grafana on Ubuntu 16.04 LTS

Step 1. First make sure that all your system packages are up-to-date by running these following apt-get commands in the terminal.

sudo apt-get update
sudo apt-get upgrade

Step 2. Installing Grafana.

First, Add new Grafana repository to the ‘sources.list.d’ directory and then add the repository gpg key using the following commands:

echo 'deb https://packagecloud.io/grafana/stable/debian/ jessie main' > /etc/apt/sources.list.d/grafana.list
curl https://packagecloud.io/gpg.key | sudo apt-key add -

Run the following command to install Grafana software:

apt-get update
apt-get install grafana

After the installation process is finished, execute the following commands to start your Grafana service:

systemctl daemon-reload
systemctl start grafana-server
systemctl enable grafana-server

Step 3. Accessing Grafana.

Grafana will be available on HTTP port 3000 by default. Open your favorite browser and navigate to http://mydomain.com:3000 and complete the required the steps to finish the installation. If you are using a firewall, please open port 3000 to enable access to the control panel.

Congratulation’s! You have successfully installed Grafana. Thanks for using this tutorial for installing Grafana analytics and monitoring on Ubuntu 16.04 LTS (Xenial Xerus) system. For additional help or useful information, we recommend you to check the official Grafana web site.

How To Install Redmine on Ubuntu 16.04 LTS

Install Redmine on Ubuntu 16

Redmine is a project management web app that allows users to manage projects flexibly while offering robust monitoring tools and a broad library of plug-ins. This free and open source solution offers a substitute for paid job management tools and contains support for wikis, forums, calendars, and information visualization programs.

This article assumes you have at least basic knowledge of linux, know how to use the shell, and most importantly, you host your site on your own VPS. The installation is quite simple and assumes you are running in the root account, if not you may need to add ‘sudo’ to the commands to get root privileges. I will show you through the step by step installation Redmine project management web app on a Ubuntu 16.04 (Xenial Xerus) server.

Install Redmine on Ubuntu 16.04 LTS

Step 1. First make sure that all your system packages are up-to-date by running these following apt-get commands in the terminal.

sudo apt-get update
sudo apt-get upgrade

Step 2. Installing MySQL server.

MySQL needs to be configured so that Redmine can store data, so we will install MySQL server:

apt-get install mysql-server mysql-client

By default, MySQL is not hardened. You can secure MySQL using the mysql_secure_installation script. You should read and below each steps carefully which will set root password, remove anonymous users, disallow remote root login, and remove the test database and access to secure MySQL.

mysql_secure_installation

Configure it like this:

- Set root password? [Y/n] y
- Remove anonymous users? [Y/n] y
- Disallow root login remotely? [Y/n] y
- Remove test database and access to it? [Y/n] y
- Reload privilege tables now? [Y/n] y

Next we will need to log in to the MySQL console and create a database for the Redmine. Run the following command:

mysql -u root -p

This will prompt you for a password, so enter your MySQL root password and hit Enter. Once you are logged in to your database server you need to create a database for Redmine installation:

CREATE DATABASE redmin
GRANT ALL PRIVILEGES ON redmine.* TO 'redmine'@'localhost' IDENTIFIED BY 'PASSWORD';
FLUSH PRIVILEGES;
\q

Step 3. Installing Ruby and Ruby Version Manager (RVM).

Install the latest version of Ruby with the following command:

gpg --keyserver hkp://keys.gnupg.net --recv-keys D39DC0E3
curl -L https://get.rvm.io | bash -s stable --ruby=2.4.1

Run the following commands to load RVM:

source /usr/local/rvm/scripts/rvm
echo '[[ -s "/usr/local/rvm/scripts/rvm" ]] && source "/usr/local/rvm/scripts/rvm"' >> ~/.bashrc

Step 4. Installing Passenger and Nginx.

Passenger is an application server that runs your web application then communicates with the web server. We will install it and integrate it with Nginx:

gem install passenger --no-ri --no-rdoc
passenger-install-nginx-module

You will be prompted to select a language that will be supported, select Ruby. On the next step select the ‘Yes: download, compile and install Nginx for me. (recommended)’ option.

Next, open the Nginx configuration file:

nano /opt/nginx/conf/nginx.conf

Add following content:

server {
 listen 80;
 server_name yourdomain.com;

root /var/www/html/redmine/public;
 passenger_enabled on;
 client_max_body_size 10m; # Max attachemnt size

# redirect server error pages to the static page /50x.html
 #
 error_page 500 502 503 504 /50x.html;
 location = /50x.html {
 root html;
 }
 }

Restart the web server for the changes to take effect:

systemctl restart nginx
systemctl enable nginx

Step 5. Installing Redmine.

First, download the latest version of Redmine, at the moment of writing this article it is version 3.4:

cd /var/www/html
svn co http://svn.redmine.org/redmine/branches/3.4-stable redmine

Next, change the current working directory and the example configuration files:

cd redmine
cp config/configuration.yml.example config/configuration.yml
cp config/database.yml.example config/database.yml

Make the following changes to the database.yml file:

nano config/database.yml

Add following content:
production:

 adapter: mysql2
 database: redmine
 host: localhost
 username: redmine
 password: PASSWORD
 encoding: utf8

Install the Ruby dependencies and migrate the database:

gem install bundler --no-ri --no-rdoc
bundle install
bundle exec rake db:migrate
bundle exec rake redmine:plugins

Generate the secret token using the following command:

bundle exec rake generate_secret_token
RAILS_ENV=production bundle exec rake db:migrate
RAILS_ENV=production bundle exec rake redmine:load_default_data

Finally, Restart the web server for the changes to take effect:

systemctl restart nginx

Step 6. Accessing Redmine.

Redmine will be available on HTTP port 80 by default. Open your favorite browser and navigate to http://mydomain.com and complete the required the steps to finish the installation using the default credentials (admin/admin). If you are using a firewall, please open port 80 to enable access to the control panel.

Congratulation’s! You have successfully installed Redmine. Thanks for using this tutorial for installing Redmine project management web app on Ubuntu 16.04 LTS (Xenial Xerus) system. For additional help or useful information, we recommend you to check the official Redmine web site.

How To Install Vector Monitoring on Ubuntu 16.04 LTS

Install Vector Monitoring on Ubuntu 16

A vector is an open source on-host performance monitoring framework which exposes hand chosen high resolution program and program metrics to every engineer’s browser. Possessing the correct metrics available on-demand and in a top resolution is key to know how a system behaves and correctly troubleshoot performance problems.

This article assumes you have at least basic knowledge of linux, know how to use the shell, and most importantly, you host your site on your own VPS. The installation is quite simple and assumes you are running in the root account, if not you may need to add ‘sudo’ to the commands to get root privileges. I will show you through the step by step installation Vector Monitoring framework on a Ubuntu 16.04 (Xenial Xerus) server.

Install Vector Monitoring on Ubuntu 16.04 LTS

Step 1. First make sure that all your system packages are up-to-date by running these following apt-get commands in the terminal.

sudo apt-get update
sudo apt-get upgrade

Step 2. Installing Performance Co-Pilot (PCP).

Before installing Vector you will first have to install Performance Co-Pilot (PCP). It’s an open source toolkit designed for monitoring and managing system-level performance:

echo "deb https://dl.bintray.com/netflixoss/ubuntu {codename} main" | sudo tee -a /etc/apt/sources.list

Install PCP using following command:

apt-get update
apt-get install pcp pcp-webapi

Once installed, restart PCP daemons and setup start on boot:

systemctl enable pmcd.service
systemctl enable pmwebd.service
systemctl enable pmlogger.service

Step 3. Installing Vector Monitoring Framework
First, download Vector archive from netflix oss repository, at the time of this writing the latest version of Vector is 1.0.3:

wget https://bintray.com/artifact/download/netflixoss/downloads/1.0.3/vector.tar.gz

Create a directory to extract vector, we need to create this since vector build is not placed in a directory:

mdkir vector
tar xzf vector.tar.gz -C vector

Step 4. Accessing Vector Monitoring.

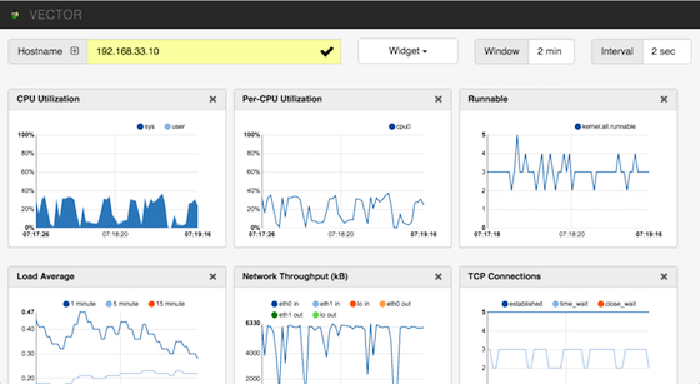
Vector Monitoring Framework will be available on HTTP port 80 by default. Open your favorite browser and navigate to http://yourdomain.com/vector or http://server-ip/vector and complete the required the steps to finish the installation.

vector-monitoring

Enter hostname or ip address of the server that you want to monitor. If you change pmwebd port you need to specify hostname:port or ipaddress:port. The performance graphs will start showing the current condition of your system.

Congratulation’s! You have successfully installed Vector. Thanks for using this tutorial for installing Vector Monitoring framework on Ubuntu 16.04 LTS (Xenial Xerus) system. For additional help or useful information, we recommend you to check the official Vector Monitoring web site.

How To Install Rust on Ubuntu 16.04 LTS

Install Rust on Ubuntu 16

Rust, commonly known as Rust-Lang, is a system programming language that is developed by Mozilla and backed by LLVM. Rust is known for preventing program crashes, memory leaks, and data races before it is compiled into binary, thus creating a highly-productive and stable programming environment

This article assumes you have at least basic knowledge of linux, know how to use the shell, and most importantly, you host your site on your own VPS. The installation is quite simple and assumes you are running in the root account, if not you may need to add ‘sudo’ to the commands to get root privileges. I will show you through the step by step installation Rust language on a Ubuntu 16.04 (Xenial Xerus) server.

Rust features:

Zero-cost abstractions
Move semantics
Guaranteed memory safety
Threads without data races
Trait-based generics
Pattern matching
Type inference
Minimal runtime
Efficient C bindings

Install Rust on Ubuntu 16.04 LTS

Step 1. First make sure that all your system packages are up-to-date by running these following apt-get commands in the terminal.

sudo apt-get update
sudo apt-get upgrade

Step 2. Installing Rust.

To install Rust, run the following in your terminal, then follow the onscreen instructions:

curl https://sh.rustup.rs -sSf | sh

To verify that Rust was successfully installed, run rustc -V. You will see output similar to:

$ rustc -V
rustc 1.22.1 (rezkia120 2017-11-17)

Step 3. Using Rust.
To use Rust, create a file called test.rs and populate it with the following lines of code:

fn test() {
 println!("You have successfully installed rust!");
}

Now run rustc test.rs. You will see an executable file called main in the same directory. Execute it by running ./test. The text “You have successfully installed Rust!” will appear on your screen.

Congratulation’s! You have successfully installed Rust. Thanks for using this tutorial for installing latest stable version of Rust language on Ubuntu 16.04 LTS (Xenial Xerus) system. For additional help or useful information, we recommend you to check the official Rust web site.

How To Install JuliaLang on Ubuntu 16.04 LTS

Install JuliaLang on Ubuntu 16

Julia, commonly called JuliaLang, is a programming language for numerical computing. Julia is as fast as C but it doesn’t forfeit the readability. Therefore, we can decrease the running time of our programs in addition to the evolution time.

This article assumes you have at least basic knowledge of linux, know how to use the shell, and most importantly, you host your site on your own VPS. The installation is quite simple and assumes you are running in the root account, if not you may need to add ‘sudo’ to the commands to get root privileges. I will show you through the step by step installation JuliaLang on a Ubuntu 16.04 (Xenial Xerus) server.

Install JuliaLang on Ubuntu 16.04 LTS

Step 1. First make sure that all your system packages are up-to-date by running these following apt-get commands in the terminal.

sudo apt-get update
sudo apt-get upgrade

Step 2. Installing required dependencies.

First, make sure you have all the required dependencies installed:

apt-get install gcc
apt-get install make
apt-get install g++
apt-get install python
apt-get install gfortran
apt-get install perl
apt-get install m4
apt-get install patch
apt-get install cmake
apt-get install pkg-config

Step 3. Installing JuliaLang.

Then, get the source code of Julia from Github:

git clone git://github.com/JuliaLang/julia.git

Next, checkout the latest version of Julia:

git checkout v0.6.0

Build Julia from source:

make -j 2

Verify JuliaLang:

Type ./julia –version in the command prompt and the output should look like this:

julia version 0.6.0

There are 2 ways to use Julia, The first one is via its REPL. Just type in ./julia to access the REPL. The second one is by saving the running code under a file with extension .jl and run this file with ./julia .

Congratulation’s! You have successfully installed JuliaLang. Thanks for using this tutorial for installing latest stable version of JuliaLang on Ubuntu 16.04 LTS (Xenial Xerus) system. For additional help or useful information, we recommend you to check the official JuliaLang web site.

How To Install PyCharm on Ubuntu 16.04 LTS

Install PyCharm on Ubuntu 16

PyCharm is an IDE for Python development and has been considered as one of the best Python IDE by the experts. The IDE comes with professional and community edition. The community edition is free of cost, but professional edition has more features.

This article assumes you have at least basic knowledge of linux, know how to use the shell, and most importantly, you host your site on your own VPS. The installation is quite simple and assumes you are running in the root account, if not you may need to add ‘sudo’ to the commands to get root privileges. I will show you through the step by step installation Redmine project management web app on a Ubuntu 16.04 (Xenial Xerus) server.
PyCharm features

Syntax highlighting
Auto-Indentation and code formatting
Code completion
Line and block commenting
On-the-fly error highlighting
Code snippets
Code folding
Easy code navigation and search
Code analysis
Configurable language injections
Python refactoring
Documentation

Install PyCharm on Ubuntu 16.04 LTS

Step 1. First make sure that all your system packages are up-to-date by running these following apt-get commands in the terminal.

sudo apt-get update
sudo apt-get upgrade

Step 2. Installing PyCharm.

First add PPA repository, The PPA contains both the Professional and free Community version for Ubuntu 16.04:

sudo add-apt-repository ppa:mystic-mirage/pycharm

Run the commands below one by one in terminal to install the Professional version:

apt-get update
apt-get install pycharm

For the community version, replace the last command with:

apt-get install pycharm-community

Finally, once installed, go to Unity Dash and search for PyCharm and you should be able to see it running.

Congratulation’s! You have successfully installed PyCharm. Thanks for using this tutorial for installing PyCharm on Ubuntu 16.04 LTS (Xenial Xerus) system. For additional help or useful information, we recommend you to check the official PyCharm web site.