How To Install FreeFileSync on Ubuntu 16.04

Install FreeFileSync on Ubuntu 16

FreeFileSync is a free Open Source software that helps you synchronize files and synchronize folders in Windows, Linux and Mac OS X. It is designed to save your time setting up and running backup jobs while having nice visual feedback along the way. With FreeFileSync, you can detect moved and renamed files and folders, keep versions of deleted/updated files, including copy locked files and much more.

This article assumes you have at least basic knowledge of linux, know how to use the shell, and most importantly, you host your site on your own VPS. The installation is quite simple and assumes you are running in the root account, if not you may need to add ‘sudo’ to the commands to get root privileges. I will show you through the step by step installation FreeFileSync open source file synchronization tool on a Ubuntu 16.04 (Xenial Xerus) server.
Install FreeFileSync on Ubuntu 16.04

Step 1. First make sure that all your system packages are up-to-date by running these following apt-get commands in the terminal.

sudo apt-get update
sudo apt-get upgrade

Step 2. Installing FreeFileSync on Linux Ubuntu.

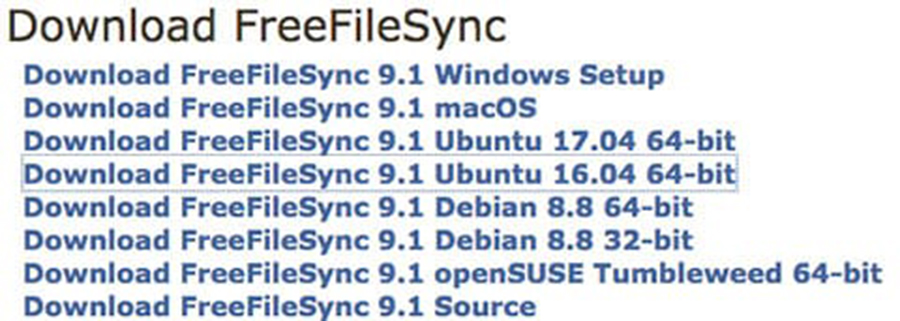
First, go to FreeFileSync download page to install FreeFileSync on Ubuntu systems:

install-freefilesync-on-Ubuntu-16.04
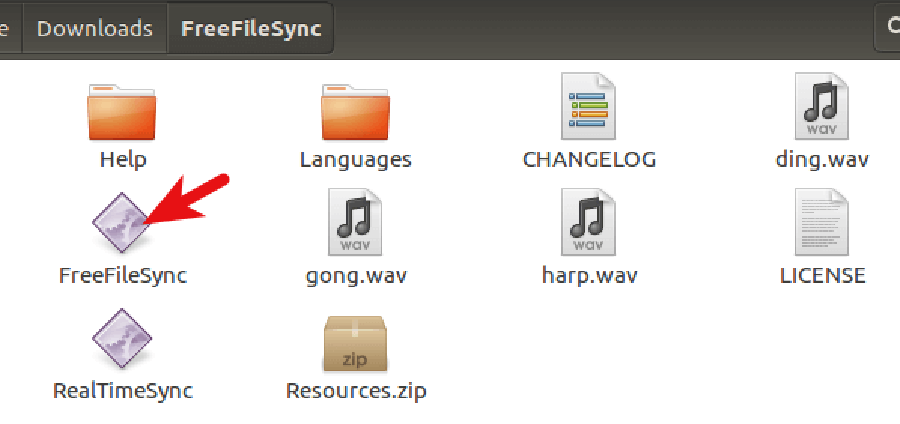
Once downloaded, You can manually install just by extracting the *.tar.gz file into any folder. FreeFileSync is an executable binary and needs no install.
freefilesync-binary
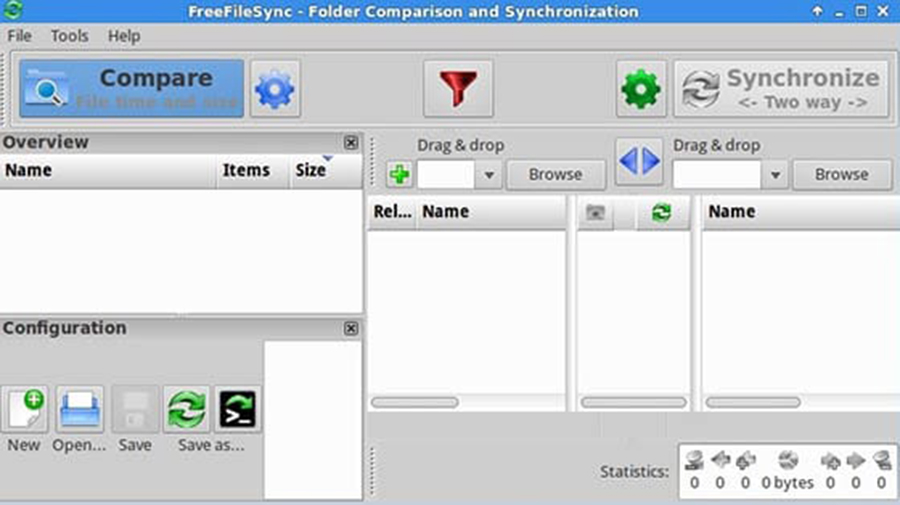
Finally step, Double-click the FreeFileSync binary and you will see the program running:
FreeFileSync-linux

FreeFileSync is an executable binary there is no installation required but you should place the FreeFileSync folder into a more appropriate folder such as /opt/FreeFileSync.


Congratulation’s! You have successfully installed FreeFileSync. Thanks for using this tutorial for installing FreeFileSync on Ubuntu 16.04 LTS (Xenial Xerus) system. For additional help or useful information, we recommend you to check the official FreeFileSync web site.

How To Install Foxit Reader on Ubuntu 16.04

Install Foxit Reader on Ubuntu 16

Foxit PDF Reader can be used to view, create, edit, organize, sign, scan, and OCR. It can easily export PDF files to office, PDF/A/E/X, and more. Users can collaborate, share, sign, protect, and secure documents using Foxit Reader.

This article assumes you have at least basic knowledge of linux, know how to use the shell, and most importantly, you host your site on your own VPS. The installation is quite simple and assumes you are running in the root account, if not you may need to add ‘sudo’ to the commands to get root privileges. I will show you through the step by step installation Foxit PDF Reader on a Ubuntu 16.04 (Xenial Xerus) server.
Foxit PDF Reader features

Open multiple PDFs at the same time in tabs.
Open password protected PDF files.
View PDF files in single page, continuous, facing, or facing continuous mode.
Support page rotation, text search.
Print PDF documents to physical printers.
Microsoft RMS support.
Annotate PDF support.
Many more.

Install Foxit Reader on Ubuntu 16.04

Step 1. First make sure that all your system packages are up-to-date by running these following apt-get commands in the terminal.

sudo apt-get update
sudo apt-get upgrade

Step 2. Installing Foxit PDF Reader.

You need to download the last stable release of Foxit Reader, choose 64 bits or 32 bits according to your OS architecture:

### 32-Bit ###
wget http://cdn01.foxitsoftware.com/pub/foxit/reader/desktop/linux/2.x/2.1/en_us/FoxitReader2.1.0805_Server_x86_enu_Setup.run.tar.gz
### 64-Bit ###
wget http://cdn01.foxitsoftware.com/pub/foxit/reader/desktop/linux/2.x/2.1/en_us/FoxitReader2.1.0805_Server_x64_enu_Setup.run.tar.gz

Extract the tarball into the current directory:

tar xzvf FoxitReader*.tar.gz

Next, run the following command to make script executable:

sudo chmod a+x FoxitReader*.run

Now is the time to run the script file to install Foxit Reader and wait until fully installed:

./FoxitReader.*.run

To install it in system-wide mode, execute the .run file with root privileges:

sudo ./FoxitReader.*.run

Congratulation’s! You have successfully installed Foxit Reader. Thanks for using this tutorial for installing Foxit PDF Reader on Ubuntu 16.04 LTS (Xenial Xerus) system. For additional help or useful information, we recommend you to check the official Foxit Reader web site.

How To Install Erlang on Ubuntu 16.04 LTS

Install Erlang on Ubuntu 16

Erlang is a programming language used to build massively scalable soft real-time systems with requirements for high availability. The Erlang runtime system has built-in support for concurrency, distribution and fault tolerance.

This article assumes you have at least basic knowledge of Linux, know how to use the shell, and most importantly, you host your site on your own VPS. The installation is quite simple and assumes you are running in the root account, if not you may need to add ‘sudo’ to the commands to get root privileges. I will show you through the step by step installation Erlang in Ubuntu 16.04 LTS Xenial Xerus.

Install Erlang on Ubuntu 16.04 LTS

Step 1. First make sure that all your system packages are up-to-date by running these following apt-get commands in the terminal.

sudo apt-get update
sudo apt-get upgrade

Step 2. Installing Erlang.

First, download Erlang repository package from its official website and install on your system:

wget https://packages.erlang-solutions.com/erlang-solutions_1.0_all.deb 
dpkg -i erlang-solutions_1.0_all.deb

Now, you can install erlang package on your system using the following command:

apt-get update
apt-get install erlang

Step 3. Erlang Hello World Program.

Let’s start with hello world program on erlang. First create file helloworld.erl with following content:

nano helloworld.erl

Add the following content:

% hello world program
-module(helloworld).
-export([start/0]).
start() ->
io:fwrite("Hello World!\n").

Compile the hello world program using below command:

erlc helloworld.erl

Now, run your program using below command:

erl -noshell -s helloworld start -s init stop

Congratulation’s! You have successfully installed Erlang. Thanks for using this tutorial for installing Erlang on your Ubuntu 16.04 LTS system. For additional help or useful information, we recommend you to check the official Erlang web site.

How To Install Bro Network Security Monitor on Ubuntu 16.04 LTS

Install Bro Network Security Monitor on Ubuntu 16

The Bro Network Security Monitor is an open source network monitoring framework. In a nutshell, Bro monitors packet flows over a network with a network tap installed with optional bonded network interfaces, and creates high-level “flow” events from them and stores the events as single tab-separated lines in a log file. You can then parse these log files to data mine for information about the network traffic on the network you are monitoring. These logs include not only a comprehensive record of every connection seen on the wire, but also application-layer transcripts such as all HTTP sessions with their requested URIs, key headers, MIME types, server responses, DNS requests with replies, SSL certificates, key content of SMTP sessions, and much more.

This article assumes you have at least basic knowledge of Linux, know how to use the shell, and most importantly, you host your site on your own VPS. The installation is quite simple and assumes you are running in the root account, if not you may need to add ‘sudo’ to the commands to get root privileges. I will show you through the step by step installation Bro Network Security Monitor in Ubuntu 16.04 LTS Xenial Xerus.

Install Bro Network Security Monitor on Ubuntu 16.04 LTS

Step 1. First make sure that all your system packages are up-to-date by running these following apt-get commands in the terminal.

sudo apt-get update
sudo apt-get upgrade

Step 2. Install Required Dependencies.

Install all the required dependencies, by executing the following command:

apt-get install cmake make gcc g++ flex git bison python-dev swig libpcap-dev libssl-dev zlib1g-dev

Step 3. Installing GeoIP Database for IP Geolocation.

You will also need to install GeoIP to your system. You can install it with the following command:

wget http://geolite.maxmind.com/download/geoip/database/GeoLiteCity.dat.gz
wget http://geolite.maxmind.com/download/geoip/database/GeoLiteCityv6-beta/GeoLiteCityv6.dat.gz
gzip -d GeoLiteCity.dat.gz
gzip -d GeoLiteCityv6.dat.gz

Now move the GeoIP files over to the default location /usr/share/GeoIP/, we need to rename them to match the location that Bro is expecting:

mv GeoLiteCity.dat /usr/share/GeoIP/GeoIPCity.dat
mv GeoLiteCityv6.dat /usr/share/GeoIP/GeoIPCityv6.dat

Step 4. Installing Bro Network Security Monitor.

First, download the latest version of the Bro source from their website. You can do this with the following command:

wget https://www.bro.org/downloads/bro-2.5.1.tar.gz
tar zxvf bro-2.5.1.tar.gz
cd bro-2.5.1
./configure
make 
make install

Once the Bro is installed, adjust your PATH environment with the following command:

export PATH=/usr/local/bro/bin:$PATH

Step 5. Configure Bro Network Security Monitor.

Bro is a powerful tool, to get started quickly we will follow the guide on the project page.

Edit the following files before starting:

$PREFIX/etc/node.cfg  -- configure network interface to monitor
$PREFIX/etc/networks.cfg -- configure local networks
$PREFIX/etc/broctl.cfg -- change MailTo address and the log rotation

To start the program simply enter broctl at a shell.

You are now in the broctl shell, from where you can give bro commands.

[BroControl] >

The first command to run, since this is a new installation is to run install. We will then run start:

[BroControl] > install
warning: cannot read '/opt/bro2/spool/broctl.dat' (this is ok on first run)
creating policy directories ... done.
installing site policies ... done.
generating standalone-layout.bro ... done.
generating local-networks.bro ... done.
generating broctl-config.bro ... done.
updating nodes ... done.
[BroControl] > start
starting bro ...
[BroControl] > status
Name       Type       Host       Status        Pid    Peers  Started              
bro        standalone localhost  running       23465  0      21 Jul 10:11:55

You now have Bro Network Security Monitor running on your system.

Congratulation’s! You have successfully installed Bro. Thanks for using this tutorial for installing Bro Network Security Monitor on your Ubuntu 16.04 LTS system. For additional help or useful information, we recommend you to check the official Bro Network Security Monitor web site.
How To Install Atom Text Editor on Ubuntu 16.04 LTS

Install Atom Text Editor on Ubuntu

Atom is a free and open-source text and source code editor for macOS, Linux, and Microsoft Windows with support for plug-ins written in Node.js, and embedded Git Control, developed by GitHub. Atom is a desktop application built using web technologies. Most of the extending packages have free software licenses and are community-built and maintained. Atom is based on Electron (formerly known as Atom Shell), a framework that enables cross-platform desktop applications using Chromium and Node.js. It is written in CoffeeScript and Less. It can also be used as an integrated development environment (IDE).

This article assumes you have at least basic knowledge of Linux, know how to use the shell, and most importantly, you host your site on your own VPS. The installation is quite simple and assumes you are running in the root account, if not you may need to add ‘sudo’ to the commands to get root privileges. I will show you through the step by step installation Atom Text Editor on Ubuntu 16.04 Xenial Xerus server.
Install Atom Text Editor on Ubuntu 16.04 LTS

Step 1. First make sure that all your system packages are up-to-date by running these following apt-get commands in the terminal.

sudo apt-get update
sudo apt-get upgrade

Step 2. Installing Atom Text Editor.
First, download its debian (64bit) package from its official site. Open the terminal and use following wget command:

wget https://github.com/atom/atom/releases/download/v1.18.0/atom-amd64.deb

Install downloaded debian package along with its required dependencies:

dpkg -i atom-amd64.deb
apt-get install -f

Once installed, next you can start Atom by searching for it Unity Dash. If the app icon doesn’t show up, try logging out and logging back in.

Congratulations! You have successfully installed Atom. Thanks for using this tutorial for installing Atom Text Editor in Ubuntu 16.04 Xenial Xerus systems. For additional help or useful information, we recommend you to check the official Atom Text Editor web site.

How To Install KDE Plasma on Ubuntu 16.04 LTS

Install KDE Plasma on Ubuntu 16

KDE is a well-known desktop environment for the Unix-Like systems designed for users who wants to have a nice desktop environment for their machines, It is one of the most used desktop interfaces out there.

This article assumes you have at least basic knowledge of Linux, know how to use the shell, and most importantly, you host your site on your own VPS. The installation is quite simple and assumes you are running in the root account, if not you may need to add ‘sudo’ to the commands to get root privileges. I will show you through the step by step installation KDE Plasma desktop environment on a Ubuntu 16.04 (Xenial Xerus) server.
Install KDE Plasma on Ubuntu 16.04 LTS

Step 1. First make sure that all your system packages are up-to-date by running these following apt-get commands in the terminal.

sudo apt-get update
sudo apt-get upgrade

Step 2. Installing KDE Plasma.

First, run the following commands to add the Kubuntu backports PPA:

add-apt-repository ppa:kubuntu-ppa/backports


Now install KDE Plasma using following one single command in your system:

apt update
apt install kubuntu-desktop

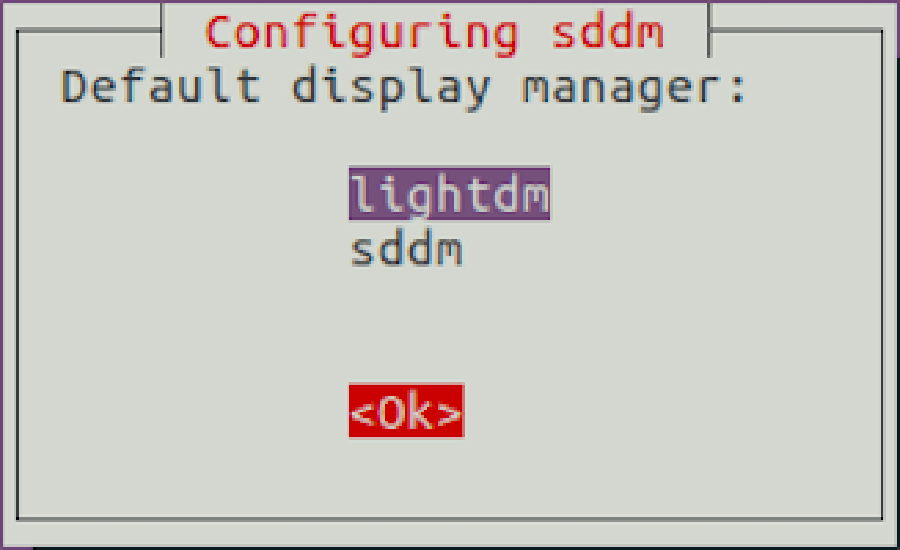
You will be asked to configure sddm, select OK and then selectlightdm as Default display manager as shown in the following figure:

KDE-installation

Once the KDE installation is done, reboot the system to take effect. On the login screen, select KDE Plasma as a desktop environment and login to the system. Now your Ubuntu system has the KDE desktop environment.

Congratulation’s! You have successfully installed KDE. Thanks for using this tutorial for installing KDE Plasma desktop environment on Ubuntu 16.04 LTS (Xenial Xerus) system. For additional help or useful information, we recommend you to check the official KDE web site.

How To Install HandBrake on Ubuntu 16.04 LTS

Install HandBrake on Ubuntu 16

HandBrake is a popular video transcoding tool that will convert video files into numerous different video and audio formats so they can be used on a number of supported devices.

This article assumes you have at least basic knowledge of Linux, know how to use the shell, and most importantly, you host your site on your own VPS. The installation is quite simple and assumes you are running in the root account, if not you may need to add ‘sudo’ to the commands to get root privileges. I will show you through the step by step installation HandBrake open source video transcoder on Ubuntu 16.04 Xenial Xerus server.
HandBrake Features

Convert Video from any format.
Built-in device presets e.g. iPhone, iPad, AppleTV, Android etc.
Ability to process DVD and BlueRay sources.
File Containers: .MP4(.M4V) and .MKV.
Video Encoders: H.264(x264), H.265(x265) MPEG-4 and MPEG-2 (libav), VP8 (libvpx) and Theora.
Audio Encoders: AAC, CoreAudio AAC/HE-AAC (OS X Only), MP3, Flac, AC3, or Vorbis.
Audio Pass-thru: AC-3, DTS, DTS-HD, AAC and MP3 tracks.
Title / Chapter selection.
Subtitles (VobSub, Closed Captions CEA-608, SSA, SRT).
Video Filters: Deinterlacing, Decomb, Denoise, Detelecine, Deblock, Grayscale, Cropping and scaling.

Install HandBrake on Ubuntu 16.04 LTS

Step 1. First make sure that all your system packages are up-to-date by running these following apt-get commands in the terminal.

sudo apt-get update
sudo apt-get upgrade

Step 2. Installing HandBrake.

First, you’ll need to add Handbrake’s PPA (personal package archive) to your system:

sudo add-apt-repository ppa:stebbins/handbrake-releases

Install Handbrake itself with this command:

apt-get update
apt-get install handbrake-gtk handbrake-cli

Once installed, next you can start HandBrake by searching for it Unity Dash. If the app icon doesn’t show up, try logging out and logging back in.

Congratulations! You have successfully installed HandBrake. Thanks for using this tutorial for installing HandBrake open source video transcoder in Ubuntu 16.04 Xenial Xerus systems. For additional help or useful information, we recommend you to check the official HandBrake web site.