How To Install Lighttpd With PHP And MariaDB on Ubuntu 16.04 LTS

Install Lighttpd With PHP And MariaDB on Ubuntu 16

Lighttpd is a fast and secure web-server which has been optimized for high-performance environments. With a small memory footprint compared to other web-servers, effective management of the cpu-load, and advanced feature set (FastCGI, SCGI, Auth, Output-Compression, URL-Rewriting and many more) lighttpd is the perfect solution for every server that is suffering load problems.

This article assumes you have at least basic knowledge of Linux, know how to use the shell, and most importantly, you host your site on your own VPS. The installation is quite simple and assumes you are running in the root account, if not you may need to add ‘sudo’ to the commands to get root privileges. I will show you through the step by step installation Lighttpd With PHP FPM And MariaDB on Ubuntu 16.04 Xenial Xerus server.

Install Lighttpd With PHP and MariaDB on Ubuntu 16.04 LTS

Step 1. First make sure that all your system packages are up-to-date by running these following apt-get commands in the terminal.

apt-get update
apt-get upgrade

Step 2. Installing Lighttpd on Ubuntu 16.04.

Lighttpd is available to install from the official Ubuntu repositories, So if you want to install Lighttpd, you only have to run this command:

apt-get install lighttpd

To start up Lighttpd webserver, run the commands below and You can test the status of the server by accessing the IP address of your VPS in a web browser. Upon success, you will see the Lighttp welcome page:

systemctl start lighttpd.service

Step 3. Installing MariaDB.

To install MariaDB in Ubuntu run the following command:

apt-get install mariadb-server

By default, MariaDB is not hardened. You can secure MariaDB using the mysql_secure_installation script. you should read and below each steps carefully which will set root password, remove anonymous users, disallow remote root login, and remove the test database and access to secure MariaDB:

mysql_secure_installation

To log into MariaDB, use the following command (note that it’s the same command you would use to log into a MySQL database):

mysql -u root -p

To start the database, run the commands below:

systemctl start mariadb.service

Step 4. Installing PHP and other PHP7 modules.

Next, run the commands below to install PHP5 and other PHP modules:

apt-get -y install php-fpm php-mysql

Enable PHP CGI modules in Lighttpd with the following commands:

sudo lighty-enable-mod fastcgi 
sudo lighty-enable-mod fastcgi-php

After enabling the modules, you need to restart the Lighttpd service by running the following command:

systemctl restart lighttpd

Testing if PHP is working:

nano /srv/www/htdocs/info.php

Then, we’ll simply add the following line into the file:

<?php phpinfo(); ?>

Step 5. Configure firewall for LLMP.

Run following commands to allow HTTP (80) and HTPPS (443) request through the firewall.

ufw allow 80/tcp
ufw allow 443/tcp
ufw reload

Congratulations! You have successfully installed LLMP. Thanks for using this tutorial for installing Lighttpd With PHP FPM and MariaDB in Ubuntu 16.04 Xenial Xerus systems. For additional help or useful information, we recommend you to check the official Lighttpd web site.

How To Install Vesta Control Panel on Ubuntu 16.04 LTS

Install Vesta Control Panel on Ubuntu 16

KDE is a well-known desktop environment for the Unix-Like systems designed for users who wants to have a nice desktop environment for their machines, It is one of the most used desktop interfaces out there.

This article assumes you have at least basic knowledge of Linux, know how to use the shell, and most importantly, you host your site on your own VPS. The installation is quite simple and assumes you are running in the root account, if not you may need to add ‘sudo’ to the commands to get root privileges. I will show you through the step by step installation Vesta Control Panel on a Ubuntu 16.04 (Xenial Xerus) server.
Install Vesta Control Panel on Ubuntu 16.04 LTS

Step 1. First make sure that all your system packages are up-to-date by running these following apt-get commands in the terminal.

sudo apt-get update
sudo apt-get upgrade

Step 2. Installing Vesta Control Panel.

Download the Vesta Control panel install script with the following command:

curl -O http://vestacp.com/pub/vst-install.sh
bash vst-install.sh

In additon, you can customize the installation using the advanced install settings at https://vestacp.com/install/ and generate install command to install nginx, php-fpm, proftpd, exim, dovecot, spamassassin, named, iptables, MySQL and use file system quota:

bash vst-install.sh --nginx yes --phpfpm yes --apache no --named yes --remi no --vsftpd no --proftpd yes --iptables yes --fail2ban no --quota yes --exim yes --dovecot yes --spamassassin yes --clamav no --mysql yes --postgresql no --hostname your-domain.com --email [email protected] --password Y0ur_PaSSwD

If everything is OK, you should receive an output like this:

Vesta Control Panel

Following software will be installed on your system:
   - Nginx Web Server
   - PHP-FPM Application Server
   - Bind DNS Server
   - Exim mail server + Antispam
   - Dovecot POP3/IMAP Server
   - MySQL Database Server
   - ProFTPD FTP Server
   - Iptables Firewall

Would you like to continue [y/n]:

Once the installation is complete, you will get a screen that has the control panel login:

Congratulations, you have just successfully installed Vesta Control Panel

    https://your_server_IP:8083
    username: admin
    password: Y0ur_PaSSwD

Step 4. Access Vesta Control Panel.

Once the installer finishes installing, it will show you the url, Username and Password. Just open that url in web browser and login using the username and password.

https://ip.add.re.ss:8083/

Congratulation’s! You have successfully installed Vesta CP. Thanks for using this tutorial for installing Vesta Control Panel on Ubuntu 16.04 LTS (Xenial Xerus) system. For additional help or useful information, we recommend you to check the official Vesta Control Panel web site.

How To Install IonCube Loader on Ubuntu 16.04 LTS

Install IonCube Loader on Ubuntu 16

IonCube Loaders is basically an encryption/decryption utility for PHP applications which also assists in speeding up the pages that are served. It is often required for a lot of PHP-based applications.

This article assumes you have at least basic knowledge of Linux, know how to use the shell, and most importantly, you host your site on your own VPS. The installation is quite simple and assumes you are running in the root account, if not you may need to add ‘sudo’ to the commands to get root privileges. I will show you through the step by step installation Vesta Control Panel on a Ubuntu 16.04 (Xenial Xerus) server.

Install IonCube Loader on Ubuntu 16.04 LTS

Step 1. First make sure that all your system packages are up-to-date by running these following apt-get commands in the terminal.

sudo apt-get update
sudo apt-get upgrade

Step 2. Install LAMP server.

A Ubuntu 16.04 LAMP server is required. If you do not have LAMP installed, you can follow our guide here.

Step 3. Installing IonCube Loaders.

Download and extract the latest stable version ioncube, We will use the wget command to get the ionCube file from their website with the following command:

### 64-Bit version ###
wget http://downloads3.ioncube.com/loader_downloads/ioncube_loaders_lin_x86-64.tar.gz
tar xfz ioncube_loaders_lin_x86-64.tar.gz

### 32-Bit version ###
wget http://downloads3.ioncube.com/loader_downloads/ioncube_loaders_lin_x86.tar.gz
tar xfz ioncube_loaders_lin_x86.tar.gz

Next we need to locate where PHP is loading extensions, this can be done by running the below command and looking:

php -i | grep php.ini

You will see an output that looks something like the following:

extension_dir => /usr/lib/php/20151012 => /usr/lib/php/20151012

Open the extracted ioncube folder and copy the ioncube loader file match to your php version:

cd ioncube
cp ioncube_loader_lin_7.0.so /usr/lib/php/20151012

Once the file has been copied to the extensions directory, we need to make sure that the PHP configuration file is updated to use the correct extension:

nano /etc/php.ini

At the very top of the file let’s add the following line:

zend_extension = "/usr/lib/php/20151012/ioncube_loader_lin_7.0.so"

Now, we can restart Apache web server and PHP so that the changes take place:

systemctl restart apache2.service
systemctl restart php7.0-fpm.service

Step 4. Testing ionCube on Ubuntu 16.04.

If you can see the version of PHP with ionCube loader version, meaning you have successfully installed and configured ioncube PHP loader in your Ubuntu 16.04 system.

php -v

Results:

PHP 7.0.15-0ubuntu0.16.04.6 (cli) ( NTS )
Copyright (c) 1997-2017 The PHP Group
Zend Engine v3.0.0, Copyright (c) 1998-2017 Zend Technologies
<strong>with the ionCube PHP Loader (enabled)</strong> + Intrusion Protection from ioncube24.com (unconfigured) v6.0.8, Copyright (c) 2002-2015, by ionCube Ltd.

Congratulation’s! You have successfully installed IonCube Loader. Thanks for using this tutorial for installing IonCube Loader in Ubuntu 16.04 Xenial Xerus system. For additional help or useful information, we recommend you to check the official IonCube web site.

How To Install Eclipse IDE on Ubuntu 16.04 LTS

Install Eclipse IDE on Ubuntu 16

Eclipse is an open source and free multi-language and multi-platform (Windows , Linux and Mac) software development program that used to build JAVA based web applications. It is written in Java program and can be used to develop Java based applications and other various plugins, including languages like C, C++, PHP, Perl, Python, Ruby and Rails framework and much more.

This article assumes you have at least basic knowledge of Linux, know how to use the shell, and most importantly, you host your site on your own VPS. The installation is quite simple and assumes you are running in the root account, if not you may need to add ‘sudo’ to the commands to get root privileges. I will show you through the step by step installation Eclipse IDE on a Ubuntu 16.04 (Xenial Xerus) server.

Install Eclipse IDE on Ubuntu 16.04 LTS

Step 1. First make sure that all your system packages are up-to-date by running these following apt-get commands in the terminal.

sudo apt-get update
sudo apt-get upgrade

Step 2. Installing Java.

We need to install Java 8 and above. Run the following commands to complete this task:

apt-get install openjdk-8-jdk

Verify the Java version on your machine:

java -version

Step 3. Installing Eclipse IDE.

Download latest eclipse package. This guide uses Eclipse IDE for Java Developers version. Another popular versions are Eclipse IDE for Java EE Developers and Eclipse for PHP Developers. Select also 32-bit or 64-bit version depending on your system:

### 32 Bit ###
curl -O http://ftp.jaist.ac.jp/pub/eclipse/technology/epp/downloads/release/oxygen/R/eclipse-java-oxygen-R-linux-gtk.tar.gz

### 64 Bit ###
curl -O http://ftp.jaist.ac.jp/pub/eclipse/technology/epp/downloads/release/oxygen/R/eclipse-java-oxygen-R-linux-gtk-x86_64.tar.gz

Extract Eclipse package to your desired directory:

tar -zxvf eclipse-java-oxygen-R-linux-gtk*.tar.gz -C /usr/

Making a Symlink:

ln -s /usr/eclipse/eclipse /usr/bin/eclipse

Step 4. Create desktop launcher.

Create a new file eclipse.desktop in /usr/share/applications/ and add the below code:

nano /usr/share/applications/eclipse.desktop

Add the following content in the above file:

[Desktop Entry]
Encoding=UTF-8
Name=Eclipse 4.7
Comment=Eclipse Oxygen
Exec=/usr/bin/eclipse
Icon=/usr/eclipse/icon.xpm
Categories=Application;Development;Java;IDE
Version=1.0
Type=Application
Terminal=0

Now install that desktop file using the below command:

sudo desktop-file-install /usr/share/applications/eclipse.desktop

For Eclipse icon to be displayed in dash, run following command:

sudo cp /opt/eclipse/icon.xpm /usr/share/pixmaps/eclipse.xpm

Congratulation’s! You have successfully installed Eclipse. Thanks for using this tutorial for installing Eclipse IDE in Ubuntu 16.04 Xenial Xerus system. For additional help or useful information, we recommend you to check the official Eclipse web site.

How To Install PgAdmin on Ubuntu 16.04 LTS

Install PgAdmin on Ubuntu 16

PgAdmin is the leading graphical Open Source management, development and administration tool for PostgreSQL.

This article assumes you have at least basic knowledge of Linux, know how to use the shell, and most importantly, you host your site on your own VPS. The installation is quite simple and assumes you are running in the root account, if not you may need to add ‘sudo’ to the commands to get root privileges. I will show you through the step by step installation PgAdmin on a Ubuntu 16.04 (Xenial Xerus) server.

Install PgAdmin on Ubuntu 16.04 LTS

Step 1. First make sure that all your system packages are up-to-date by running these following apt-get commands in the terminal.

sudo apt-get update
sudo apt-get upgrade

Step 2. Install Dependencies Packages.

First need to install the basic packages:

apt-get install build-essential libssl-dev libffi-dev libgmp3-dev virtualenv python-pip libpq-dev python-dev

Step 3. Create the virtual environment.

Create the virtual enviroment:

virtualenv .pgadmin4

Next, Activate the virtual enviroment:

cd .pgadmin4
source bin/activate

Step 4. installing PGAdmin 4.

Use the following command to download PgAdmin Python wheel:

wget wget https://ftp.postgresql.org/pub/pgadmin/pgadmin4/v1.6/pip/pgadmin4-1.6-py2.py3-none-any.whl

Install PgAdmin 4 using the following command:

pip install pgadmin4-1.6-py2.py3-none-any.whl

Step 5. Configure PGAdmin 4.

Write the SERVER_MODE = False in lib/python2.7/site-packages/pgadmin4/config_local.py to configure to run in single-user mode:

echo "SERVER_MODE = False" >> lib/python2.7/site-packages/pgadmin4/config_local.py

Once you finished the configuration, use the following command to run PgAdmin 4:

python lib/python2.7/site-packages/pgadmin4/pgAdmin4.py

Step 6. Access PgAdmin.

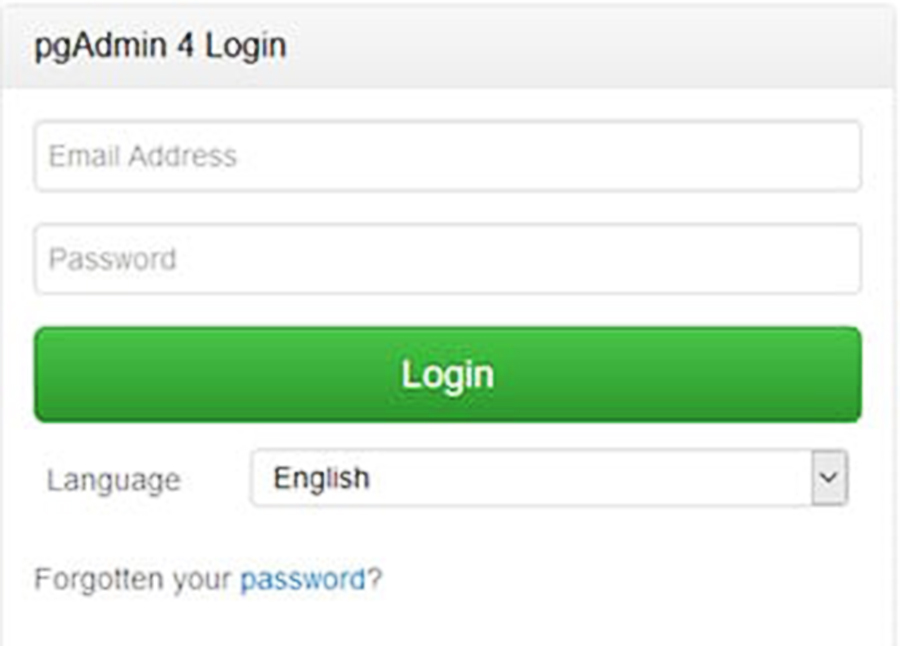
Once the installer finishes installing, it will show you the url, Username and Password. Just open that url in web browser and login using the username and password.

http://ip.add.re.ss:5050

pgAdmin-4-login
Congratulation’s! You have successfully installed PgAdmin. Thanks for using this tutorial for installing PgAdmin in Ubuntu 16.04 Xenial Xerus system. For additional help or useful information, we recommend you to check the official PgAdmin web site.

How To Install Caddy Web Server on Ubuntu 16.04 LTS

Install Caddy Web Server on Ubuntu 16

Caddy is a modern, general-purpose, multi-platform web server which supports Virtual hosting, HTTP/2, IPv6, Markdown, WebSockets, FastCGI, automatic HTTPS via Let’s Encrypt, templates and more.

This article assumes you have at least basic knowledge of Linux, know how to use the shell, and most importantly, you host your site on your own VPS. The installation is quite simple and assumes you are running in the root account, if not you may need to add ‘sudo’ to the commands to get root privileges. I will show you through the step by step installation Caddy Web Server on a Ubuntu 16.04 Xenial Xerus server.

Install Caddy Web Server on Ubuntu 16.04 LTS

Step 1. First make sure that all your system packages are up-to-date by running these following apt-get commands in the terminal.

sudo apt-get update
sudo apt-get upgrade

Step 2. Installing Caddy Web Server.

Install Caddy is quick and easy with run the following command:

curl https://getcaddy.com | bash

Once the installation is completed, we need to add the cap_net_bind_servicecapability to the Caddy binary:

sudo setcap cap_net_bind_service=+ep /usr/local/bin/caddy

Step 3. Setting Up Necessary Directories.

Next, create the directories where we will store the Caddy configuration file Caddyfile and SSL certificates:

sudo mkdir /etc/caddy
sudo chown -R root:www-data /etc/caddy
sudo mkdir /etc/ssl/caddy
sudo chown -R www-data:root /etc/ssl/caddy
sudo chmod 0770 /etc/ssl/caddy
sudo touch /etc/caddy/Caddyfile
sudo mkdir /var/www
sudo chown www-data: /var/www

Step 4. Installing Caddy as a System Service.

We also need to create a new SystemD configuration script:

nano /lib/systemd/system/caddy.service

Add following line:

[Unit]
Description=Caddy HTTP/2 web server
Documentation=https://caddyserver.com/docs
After=network-online.target
Wants=network-online.target

[Service]
Restart=on-failure
StartLimitInterval=86400
StartLimitBurst=5

User=www-data
Group=www-data
; Letsencrypt-issued certificates will be written to this directory.
Environment=CADDYPATH=/etc/ssl/caddy

ExecStart=/usr/local/bin/caddy -log stdout -agree=true -conf=/etc/caddy/Caddyfile -root=/var/tmp
ExecReload=/bin/kill -USR1 $MAINPID

LimitNOFILE=1048576
LimitNPROC=64

PrivateTmp=true
PrivateDevices=true
ProtectHome=true
ProtectSystem=full
ReadWriteDirectories=/etc/ssl/caddy

; The following additional security directives only work with systemd v229 or later.
; They further retrict privileges that can be gained by caddy. Uncomment if you like.
; Note that you may have to add capabilities required by any plugins in use.
;CapabilityBoundingSet=CAP_NET_BIND_SERVICE
;AmbientCapabilities=CAP_NET_BIND_SERVICE
;NoNewPrivileges=true
[Install]
WantedBy=multi-user.target

Execute the following commands to enable Caddy to run on boot:

systemctl enable caddy.service
systemctl restart caddy.service

Step 5. Creating Test Web Page and a Caddyfile.

For testing purposes, we will create a test HTML file:

mkdir -p /var/www/wpcademy.com
echo "Caddy" > /var/www/wpcademy.com/index.html
chown -R www-data: /var/www/my-domain.com

Next, add our domain to the Caddy configuration file:

nano /etc/caddy/Caddyfile

Add following line:

my-domain.com {
    root /var/www/wpcademy.com
}

Save the file and exit the editor. To apply the changes, restart Caddy:

systemctl restart caddy.service

Now, with a web browser, just go to https://wpcademy.com, and you will see our test page!

Congratulation’s! You have successfully installed Caddy. Thanks for using this tutorial for installing Caddy web server in Ubuntu 16.04 Xenial Xerus system. For additional help or useful information, we recommend you to check the official Caddy web server web site.

How To Install Graylog on Ubuntu 16.04 LTS

Install Graylog on Ubuntu 16

Graylog is a free and open source powerful centralized log management tool based on Elasticsearch and MongoDB. Graylog helps you to collect, index and analyze any machine logs centrally.

This article assumes you have at least basic knowledge of Linux, know how to use the shell, and most importantly, you host your site on your own VPS. The installation is quite simple and assumes you are running in the root account, if not you may need to add ‘sudo’ to the commands to get root privileges. I will show you through the step by step installation Graylog on a Ubuntu 16.04 (Xenial Xerus) server.

Install Graylog on Ubuntu 16.04 LTS

Step 1. First make sure that all your system packages are up-to-date by running these following apt-get commands in the terminal.

sudo apt-get update
sudo apt-get upgrade

Step 2. Installing Java.

By default Java is not available in Ubuntu default repository. So first add the Oracle Java PPA to apt with the following command:

add-apt-repository ppa:webupd8team/java
apt-get update -y
apt-get install oracle-java8-installer

Now check the java version:

java -version

Step 3. Installing MongoDB.

MongoDB cannot be installed from the Ubuntu repository, so we will have to add the MongoDB repository:

sudo apt-key adv --keyserver hkp://keyserver.ubuntu.com:80 --recv 7F0CEB10
echo "deb http://repo.mongodb.org/apt/debian wheezy/mongodb-org/3.0 main" > /etc/apt/sources.list.d/mongodb-org-3.0.list

Update your apt database and install MongoDB with the following command:

apt-get update -y
apt-get install mongodb-org

Start the MongoDB service and enable it to start on boot with the following command:

systemctl start mongod
systemctl enable mongod

Step 4. Installing Elasticsearch.

Elasticsearch is one of the main component which requires Graylog to run, Let’s install the Elasticsearch. First download and install GPG signing key:

wget -qO - https://packages.elastic.co/GPG-KEY-elasticsearch | sudo apt-key add -

Now add the elasticsearch repository to sources list:

apt-get update
apt-get install elasticsearch

Start the elasticsearch service and enable it to start on boot time with the following command:

systemctl start elasticsearch
systemctl enable elasticsearch

Step 5. Installing Graylog.

First, you will need to download and install graylog repository on your system:

wget https://packages.graylog2.org/repo/packages/graylog-2.3-repository_latest.deb
dpkg -i graylog-2.3-repository_latest.deb

Update the package lists and install Graylog:

apt-get update
apt-get install graylog-server

After you have installed the Graylog Server, you have to generate secret key for Graylog using the following command:

### pwgen -N 1 -s 96 
MTtPFSMZxAvoLsUiXXauggyJ761hwkGn1ZTN2ovb8wN2tO1LzyeNbaatOrpLukp96p0MxwHQosmMGPbmw46ojnnSORVvr2

Now create a hash password for the root user that can be used to log in to the Graylog web server using the following command:

### echo -n Password | sha256sum
e7cf3ef4f17c3999a94f2c6f612e8bmwe46b1026878e4e19398b23bd38ec221a

Edit the server.conf file:

nano /etc/graylog/server/server.conf

Make changes to the file as shown below:

password_secret= MTtPFSMZxAvoLsUiXXauggyJ761hwkGn1ZTN2ovb8wN2tO1LzyeNbaatOrpLukp96p0MxwHQosmMGPborm1YRojnnSORVvr2
root_password_sha2= e7cf3ef4f17c3999a94f2c6f612e8a888e5b10268bmwe4619398b23bd38ec221a
[email protected]
root_timezone=UTC
elasticsearch_discovery_zen_ping_unicast_hosts = ipaddress:9300
elasticsearch_shards=1
script.inline: false
script.indexed: false
script.file: false

To enable the Graylog web interface, make changes to the file as shown below:

rest_listen_uri = http://your-server-ip:12900/
web_listen_uri = http://your-server-ip:9000/

After you have modified the configuration file, you can start Graylog Service using the following commands:

systemctl enable graylog-server
systemctl restart graylog-server

Step 6. Accessing Graylog.

Graylog will be available on HTTP port 8080 by default. Open your favorite browser and navigate to http://yourdomain.com:9000 or http://server-ip:9000 and complete the required the steps to finish the installation.
Installing-Graylog-LoginScreen
Congratulation’s! You have successfully installed Graylog. Thanks for using this tutorial for installing Graylog in Ubuntu 16.04 Xenial Xerus system. For additional help or useful information, we recommend you to check the official Graylog web site.