How To Install Apache Tomcat on Ubuntu 18.04 LTS

Install Apache Tomcat on Ubuntu 18

Apache Tomcat is an open source web server and servlet container developed by the Apache Software Foundation. It implements the Java Servlet, JavaServer Pages (JSP), Java Unified Expression Language and Java WebSocket specifications from Sun Microsystems and provides a web server environment for Java code to run in.

This article assumes you have at least basic knowledge of linux, know how to use the shell, and most importantly, you host your site on your own VPS. The installation is quite simple and assumes you are running in the root account, if not you may need to add ‘sudo’ to the commands to get root privileges. I will show you through the step by step installation Apache Tomcat 9 on a Ubuntu 18.04 (Bionic Beaver) server.

Install Apache Tomcat on Ubuntu 18.04 LTS Bionic Beaver

Step 1. First make sure that all your system packages are up-to-date by running these following apt-get commands in the terminal.

sudo apt-get update
sudo apt-get upgrade

Step 2. Installing Java.

Apache Tomcat requires Java to be installed on your server. By default, Java is not available in Ubuntu’s repository. Add the Oracle Java PPA to Apt with the following command:

sudo add-apt-repository ppa:webupd8team/java
sudo apt install oracle-java8-installer
sudo apt install oracle-java8-set-default

Verify the Java version by running the following command:

java -version

Step 2. Installing Apache Tomcat on Ubuntu 18.04 LTS.

First thing to do is to go to Apache Tomcat’s download page and download the latest stable version of Apache Tomcat, At the moment of writing this article it is version 9:

cd /opt
wget http://www-us.apache.org/dist/tomcat/tomcat-9/v9.0.10/bin/apache-tomcat-9.0.10.zip
tar -xvf apache-tomcat-9.0.10.zip
mv apache-tomcat-9.0.8 /opt/tomcat9

Next, Create a directory for Tomcat files:

sudo useradd -r tomcat9 --shell /bin/false

Then give the user control of the directory:

sudo chown -R tomcat9 /opt/tomcat9

Step 3. Configure Apache Tomcat.

Configure Tomcat users so they can access admin/manager sections. You can do this by adding the users in the conf/tomcat-users.xml file with your favorite text editor. Add this text to the file:

nano /opt/tomcat9/conf/tomcat-users.xml

Place the following two lines just above the last line.

<!-- user manager can access only manager section -->
<role rolename="manager-gui" />
<user username="manager" password="_SECRET_PASSWORD_" roles="manager-gui" />

<!-- user admin can access manager and admin section both -->
<role rolename="admin-gui" />
<user username="admin" password="_SECRET_PASSWORD_" roles="manager-gui,admin-gui" />

Next, run the commands below to create a server account for Tomcat:

nano /etc/systemd/system/tomcat.service

Add lines below into the file and save:

[Unit]
Description=Tomcat9
After=network.target
[Service]
Type=forking
User=tomcat9
Group=tomcat9
Environment=CATALINA_PID=/opt/tomcat9/tomcat9.pid
Environment=JAVA_HOME=/usr/lib/jvm/java-8-oracle/
Environment=CATALINA_HOME=/opt/tomcat9
Environment=CATALINA_BASE=/opt/tomcat9
Environment="CATALINA_OPTS=-Xms512m -Xmx512m"
Environment="JAVA_OPTS=-Dfile.encoding=UTF-8 -Dnet.sf.ehcache.skipUpdateCheck=true -XX:+UseConcMarkSweepGC -XX:+CMSClassUnloadingEnabled -XX:+UseParNewGC"
ExecStart=/opt/tomcat9/bin/startup.sh
ExecStop=/opt/tomcat9/bin/shutdown.sh
[Install]
WantedBy=multi-user.target

Save and exit and reload the systemd service:

systemctl daemon-reload
systemctl start tomcat.service
systemctl enable tomcat.service

You can verify the service running, by default tomcat runs on port no 8080.

[root@wpcademy ~]# netstat -antup | grep 8080
tcp        0      0 0.0.0.0:8080                0.0.0.0:*                   LISTEN

Step 4. Accessing Apache Tomcat.

Tomcat server default works on port 8080. Access tomcat in the web browser by connecting your server on port 8080. If you are using a firewall, please open port 80 to enable access to the control panel:

http://your-domain.com:8080
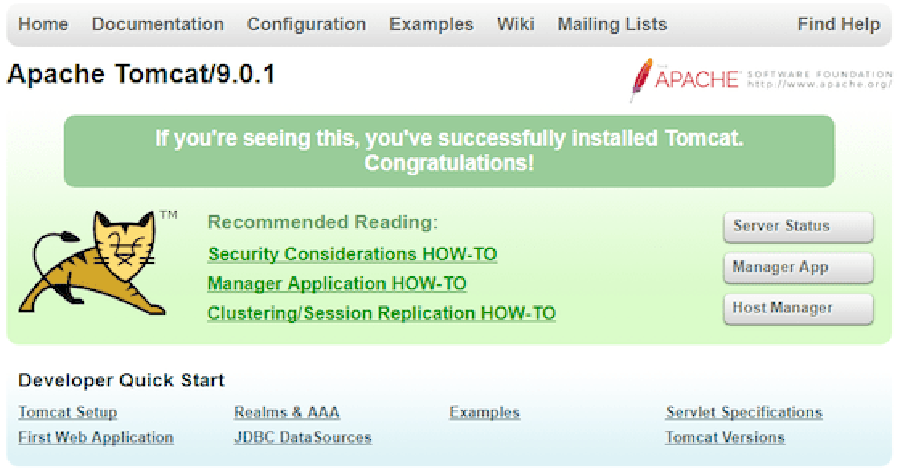
apache-tomcat9
Congratulation’s! You have successfully installed Apache Tomcat. Thanks for using this tutorial for installing Apache Tomcat 9 in Ubuntu 18.04 LTS system. For additional help or useful information, we recommend you to check the official Apache Tomcat web site.

How To Install Eclipse Oxygen on Ubuntu 18.04 LTS

Install Eclipse Oxygen on Ubuntu 18

Eclipse is an open source and free multi-language and multi-platform (Windows , Linux and Mac) software development program that used to build JAVA based web applications. It is written in Java program and can be used to develop Java based applications and other various plugins, including languages like C, C++, PHP, Perl, Python, Ruby and Rails framework and much more.

This article assumes you have at least basic knowledge of Linux, know how to use the shell, and most importantly, you host your site on your own VPS. The installation is quite simple and assumes you are running in the root account, if not you may need to add ‘sudo’ to the commands to get root privileges. I will show you through the step by step installation Eclipse Oxygen on a Ubuntu 18.04 (Bionic Beaver) server.

Install Eclipse Oxygen on Ubuntu 18.04 LTS Bionic Beaver

Step 1. First make sure that all your system packages are up-to-date by running these following apt-get commands in the terminal.

sudo apt-get update
sudo apt-get upgrade

Step 2. Installing Java.

Jenkins requires Java to be installed on your server. By default, Java is not available in Ubuntu’s repository. Add the Oracle Java PPA to Apt with the following command:

sudo add-apt-repository ppa:webupd8team/java
sudo apt install oracle-java8-installer
sudo apt install oracle-java8-set-default

Verify the Java version by running the following command:

java -version

Step 3. Installing Eclipse Oxygen on Ubuntu 18.04 LTS.

Download latest eclipse package. This guide uses Eclipse IDE for Java Developers version. Another popular versions are Eclipse IDE for Java EE Developers and Eclipse for PHP Developers. Select also 32-bit or 64-bit version depending on your system:

wget http://eclipse.bluemix.net/packages/oxygen.2/data/eclipse-inst-linux64.tar.gz

Extract Eclipse package to your desired directory:

tar xzf eclipse-inst-linux64.tar.gz

Next, Start the installer by executing the bellow command:

./eclipse-installer/eclipse-inst

Step 4. Create desktop launcher.

Create a new file eclipse.desktop in /usr/share/applications/ and add the below code:

nano .local/share/applications/eclipse.desktop

Add the following content in the above file:

[Desktop Entry]
Name=Eclipse JEE Oxygen
Type=Application
Exec=/home/<strong>wpcademy</strong>/eclipse/jee-oxygen/eclipse/eclipse
Terminal=false
Icon=/home/<strong>wpcademy</strong>/eclipse/jee-oxygen/eclipse/icon.xpm
Comment=Integrated Development Environment
NoDisplay=false
Categories=Development;IDE;
Name[en]=Eclipse

Replace the highlighted username (wpcademy) with your own account name, also the Exec = location and icon.xpm should depend on where Eclipse got installed on your system.

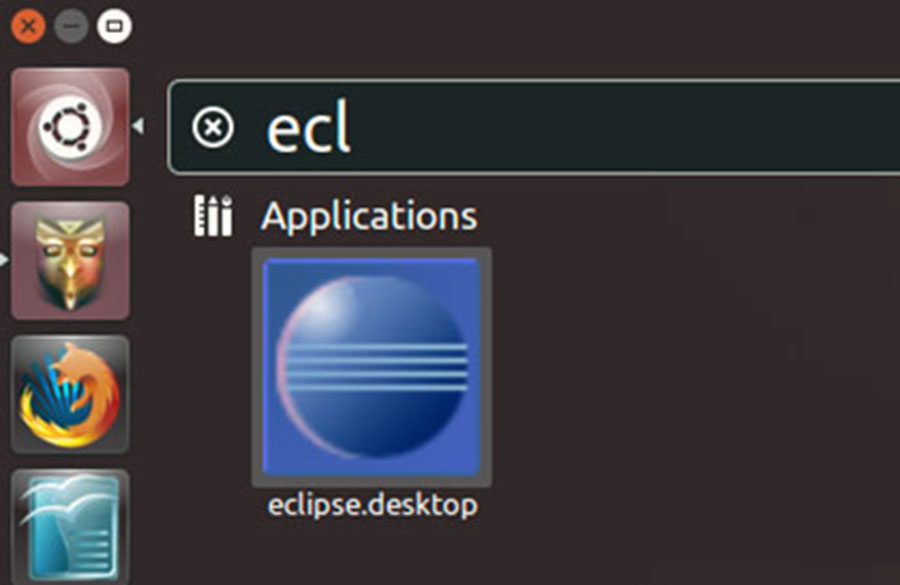
Finally steps, Open Dash or the activities overview and search for Eclipse… then launch.

install-eclipse-luna-ubuntu
Congratulation’s! You have successfully installed Eclipse. Thanks for using this tutorial for installing Eclipse Oxygen in Ubuntu 18.04 Bionic Beaver system. For additional help or useful information, we recommend you to check the official Eclipse web site.

How To Install Apache Subversion on Ubuntu 18.04 LTS

Install Apache Subversion on Ubuntu 18

Subversion is an open source version control system. It helps you keep track of a collection of files and folders. Any time you change, add or delete a file or folder that you manage with Subversion, you commit these changes to your Subversion repository, which creates a new revision in your repository reflecting these changes. You can always go back, look at and get the contents of previous revisions. SVN supports several protocols for network access: SVN, SVN+SSH, HTTP, HTTPS. If you are behind a firewall, HTTP-based Subversion is advantageous since SVN traffic will go through the firewall without any additional firewall rule setting.

This article assumes you have at least basic knowledge of linux, know how to use the shell, and most importantly, you host your site on your own VPS. The installation is quite simple and assumes you are running in the root account, if not you may need to add ‘sudo’ to the commands to get root privileges. I will show you through the step by step installation Subversion on a 18.04 LTS (Bionic Beaver) server.

Install Apache Subversion on Ubuntu 18.04 LTS Bionic Beaver

Step 1. First make sure that all your system packages are up-to-date by running these following apt-get commands in the terminal.

sudo apt-get update
sudo apt-get upgrade.

Step 2. Installing Apache web server.

First you need to install Apache web server to access svn server using http urls:

apt-get install apache2

Step 3. Installing Apache Subversion on Ubuntu 18.04 LTS.

Use following command to install subversion packages and there dependencies. Also install svn module for Apache libapache2-mod-svn packages on your system:

apt install subversion subversion-tools libapache2-mod-svn
a2enmod dav
a2enmod dav_svn

Step 4. Configure Apache for Subversion.

Subversion Apache module package creates an configuration file /etc/apache2/mods-enabled/dav_svn.conf. You just need to make necessary changes to it:

### nano /etc/apache2/mods-enabled/dav_svn.conf

Alias /svn /var/lib/svn
&lt;Location /svn&gt;
    DAV svn
    SVNParentPath /var/lib/svn

    AuthType Basic
    AuthName "Subversion Repository"
    AuthUserFile /etc/apache2/dav_svn.passwd
&lt;/Location&gt;

After making above changes, restart Apache service:

systemctl restart apache2

Step 5. Create First SVN Repository.

Create your first svn repository named firstrepo, You can use any suitable name:

mkdir -p /var/lib/svn/
svnadmin create /var/lib/svn/testrepo
chown -R www-data:www-data /var/lib/svn
chmod -R 775 /var/lib/sv

Step 6. Create account and password for SVN.

Following commands will add two users for svn. It will prompt for users password to be assigned.

htpasswd -m /etc/apache2/dav_svn.passwd wpcademy
htpasswd -m /etc/apache2/dav_svn.passwd ramona

Let’s restart Apache service again:

systemctl restart apache2

Step 7. Accessing Repository in Browser.

Subversion will be available on HTTP port 80 by default. Open your favorite browser and navigate to http://yourdomain.com/svn/testrepo/ or http://your-server-ip/svn/testrepo/ and will prompt for authentication. Use login credentials created in Step 6. If you are using a firewall, please open port 80 to enable access to the control panel.

Congratulation’s! You have successfully installed Apache SVN. Thanks for using this tutorial for installing Subversion on Ubuntu 18.04 LTS (Bionic Beaver) system. For additional help or useful information, we recommend you to check the official Apache Subversion web site.

How To Install Jenkins on Ubuntu 18.04 LTS

Install Jenkins on Ubuntu 18

Subversion is an open source version control system. It helps you keep track of a collection of files and folders. Any time you change, add or delete a file or folder that you manage with Subversion, you commit these changes to your Subversion repository, which creates a new revision in your repository reflecting these changes. You can always go back, look at and get the contents of previous revisions. SVN supports several protocols for network access: SVN, SVN+SSH, HTTP, HTTPS. If you are behind a firewall, HTTP-based Subversion is advantageous since SVN traffic will go through the firewall without any additional firewall rule setting.

This article assumes you have at least basic knowledge of linux, know how to use the shell, and most importantly, you host your site on your own VPS. The installation is quite simple and assumes you are running in the root account, if not you may need to add ‘sudo’ to the commands to get root privileges. I will show you through the step by step installation Subversion on a 18.04 LTS (Bionic Beaver) server.

Install Apache Subversion on Ubuntu 18.04 LTS Bionic Beaver

Step 1. First make sure that all your system packages are up-to-date by running these following apt-get commands in the terminal.

sudo apt-get update
sudo apt-get upgrade

Step 2. Installing Apache web server.

First you need to install Apache web server to access svn server using http urls:

apt-get install apache2

Step 3. Installing Apache Subversion on Ubuntu 18.04 LTS.

Use following command to install subversion packages and there dependencies. Also install svn module for Apache libapache2-mod-svn packages on your system:

apt install subversion subversion-tools libapache2-mod-svn
a2enmod dav
a2enmod dav_svn

Step 4. Configure Apache for Subversion.

Subversion Apache module package creates an configuration file /etc/apache2/mods-enabled/dav_svn.conf. You just need to make necessary changes to it:

### nano /etc/apache2/mods-enabled/dav_svn.conf

Alias /svn /var/lib/svn
<Location /svn>
    DAV svn
    SVNParentPath /var/lib/svn

    AuthType Basic
    AuthName "Subversion Repository"
    AuthUserFile /etc/apache2/dav_svn.passwd
</Location>

After making above changes, restart Apache service:

systemctl restart apache2

Step 5. Create First SVN Repository.

Create your first svn repository named firstrepo, You can use any suitable name:

mkdir -p /var/lib/svn/
svnadmin create /var/lib/svn/testrepo
chown -R www-data:www-data /var/lib/svn
chmod -R 775 /var/lib/sv

Step 6. Create account and password for SVN.

Following commands will add two users for svn. It will prompt for users password to be assigned.

htpasswd -m /etc/apache2/dav_svn.passwd wpcademy
htpasswd -m /etc/apache2/dav_svn.passwd ramona

Let’s restart Apache service again:

systemctl restart apache2

Step 7. Accessing Repository in Browser.

Subversion will be available on HTTP port 80 by default. Open your favorite browser and navigate to http://yourdomain.com/svn/testrepo/ or http://your-server-ip/svn/testrepo/ and will prompt for authentication. Use login credentials created in Step 6. If you are using a firewall, please open port 80 to enable access to the control panel.

Congratulation’s! You have successfully installed Apache SVN. Thanks for using this tutorial for installing Subversion on Ubuntu 18.04 LTS (Bionic Beaver) system. For additional help or useful information, we recommend you to check the official Apache Subversion web site.

How To Install Git on Ubuntu 18.04 LTS

Install Git on Ubuntu 18

Git is a free and open source distributed version control system . Git 2.16.2 comes with the large number of updates verses previous release 2.15. It is designed to handle a small to very large projects with speed and efficiency.

This article assumes you have at least basic knowledge of Linux, know how to use the shell, and most importantly, you host your site on your own VPS. The installation is quite simple and assumes you are running in the root account, if not you may need to add ‘sudo’ to the commands to get root privileges. I will show you through the step by step installation Git on a Ubuntu 18.04 (Bionic Beaver) server.

Install Git on Ubuntu 18.04 LTS Bionic Beaver

Step 1. First make sure that all your system packages are up-to-date by running these following apt-get commands in the terminal.

sudo apt-get update
sudo apt-get upgrade

Step 2. Installing Git on Ubuntu 18.04 LTS.

Method 1. Install Git on Ubuntu from repository.


sudo apt install git -y

To check current version installed of Git use following command:

[[email protected] ~]# git --version
git version 2.15.1

Method 2. Install Git on Ubuntu from Source Code

First, install all prerequisites:

sudo apt install make libssl-dev libghc-zlib-dev libcurl4-gnutls-dev libexpat1-dev gettext unzip
sudo wget https://github.com/git/git/archive/v2.16.2.zip
sudo unzip v2.16.2.zip

Next, compile the previously downloaded git source code and install git binaries:

cd git-2.16.2
make prefix=/usr/local all
sudo make prefix=/usr/local install

Confirm Git the installation . Run the following command to verify which version of git is installed:

[[email protected] ~]# git --version
git version 2.16.2

Congratulation’s! You have successfully installed Git. Thanks for using this tutorial for installing Git in Ubuntu 18.04 LTS (Bionic Beaver) systems. For additional help or useful information, we recommend you to check the official Git web site.

How To Install VMware Workstation on Ubuntu 18.04 LTS

Install VMware Workstation on Ubuntu 18

VMware Workstation is the most popular Virtualization software used at the desktop level on Linux like operating systems and Microsoft Windows. It allows the us to create and run multiple Virtual machines simultaneously. VMware Workstation is not an open source or free software so we need to buy its license key, though we can use its trail version for 30 days then later you can apply its license key.

This article assumes you have at least basic knowledge of Linux, know how to use the shell, and most importantly, you host your site on your own VPS. The installation is quite simple and assumes you are running in the root account, if not you may need to add ‘sudo’ to the commands to get root privileges. I will show you through the step by step installation VMware Workstation on an Ubuntu 18.04 Bionic Beaver server.

Install VMware Workstation on Ubuntu 18.04 LTS Bionic Beaver

Step 1. First make sure that all your system packages are up-to-date by running these following apt-get commands in the terminal.

sudo apt-get update
sudo apt-get upgrade
sudo apt-get install gcc build-essential

Step 2. Installing VMware Workstation on Ubuntu 18.04 LTS.

First download the Vmware Workstation 14 Pro bundle package here.

Once the VMware workstation bundle file is downloaded, set the executable permissions on it with the below chmod command:

chmod a+x VMware-Workstation-Full-14.1.2-8497320.x86_64.bundle

Run the commands below to execute the installation of Vmware Workstation 14 pro by running the .bundle package. Refer the command below:

sudo ./VMware-Workstation-Full-14.1.2-8497320.x86_64.bundle

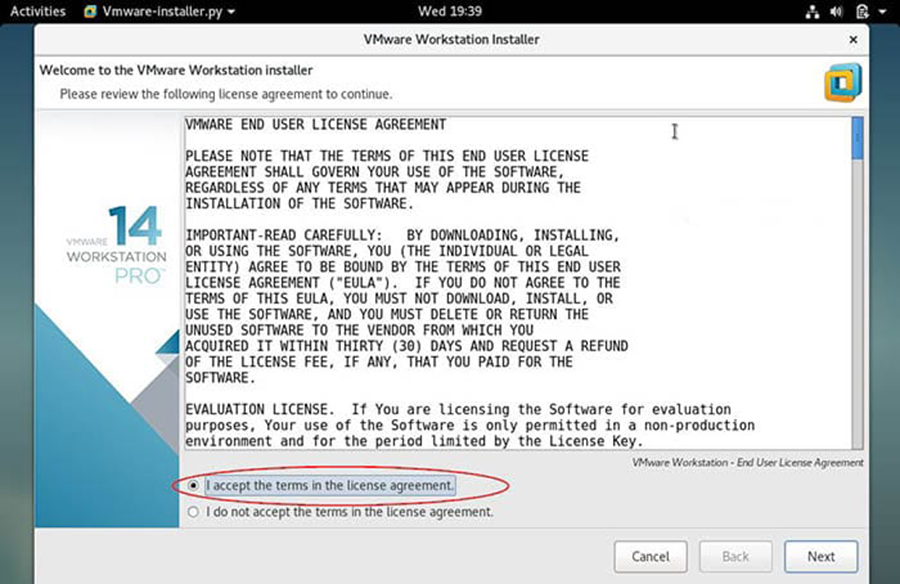
Accept the End User License Agreement:

End-User-License-Agreement-VMware-Workstation

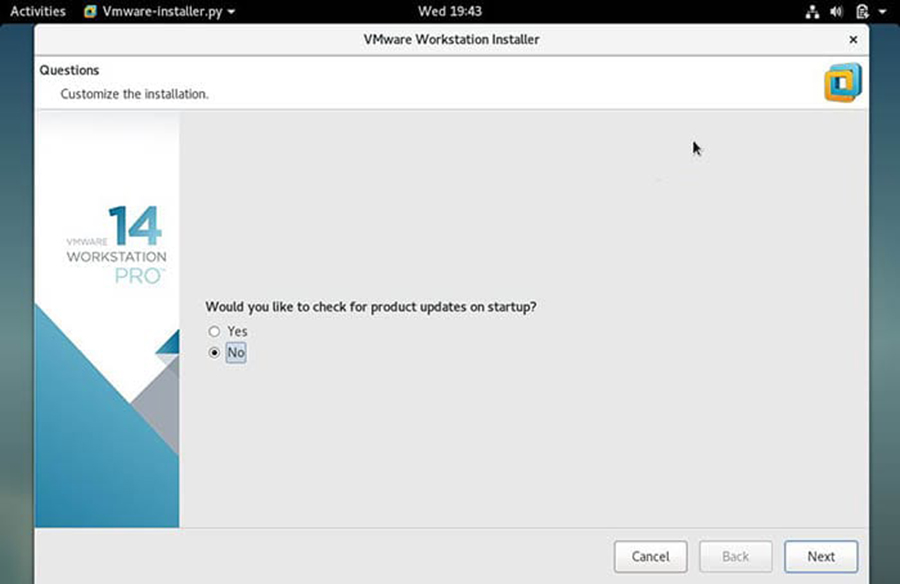
Click on Next and disable product updates on startup:

VMware-Workstation-Product-Updates 2

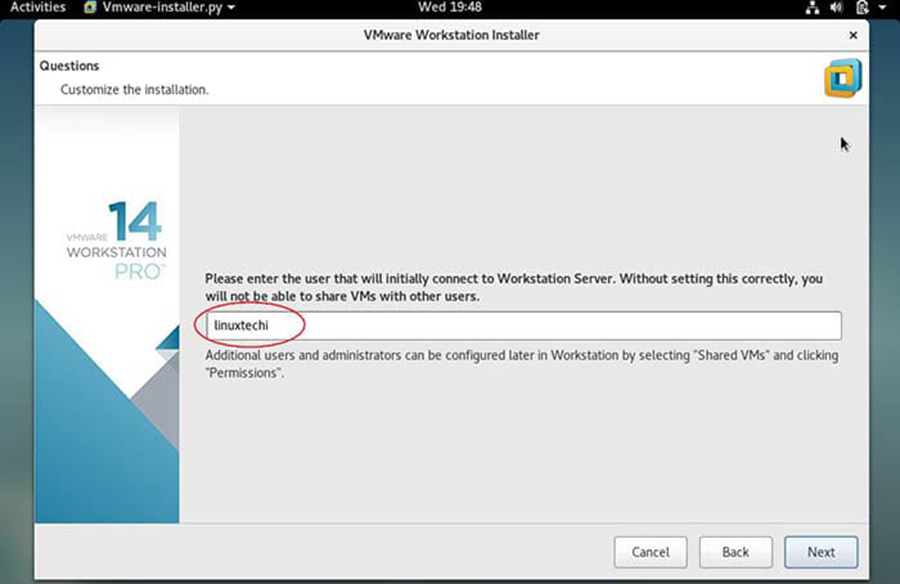
Specify the User Name which will have rights to connect to VMware workstation, in my case I using ‘wpcademy‘ as user name:

Linuxtechi-User-VMware-Workstation 3

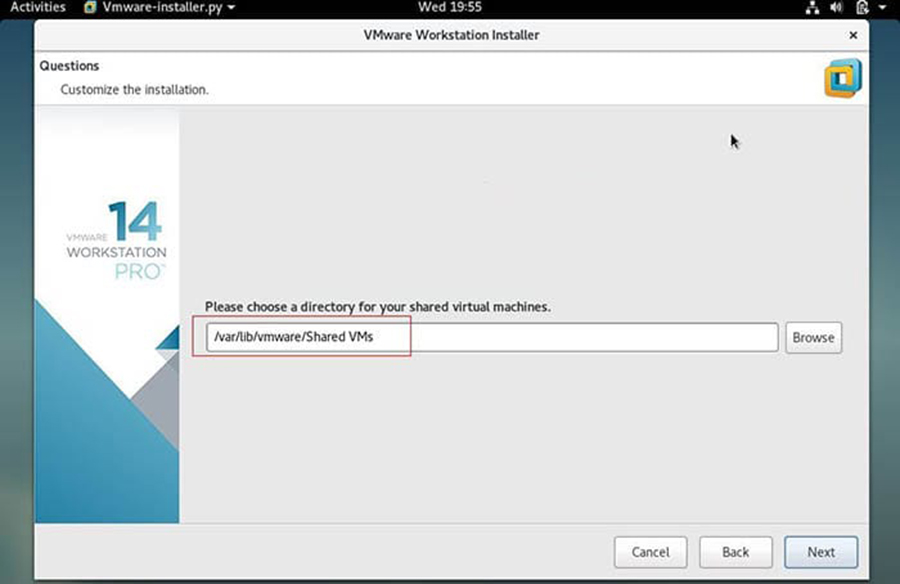
Click on next to proceed, you can also keep the default path. In my case I am also keeping the default directory:

Virtual-Machine-Storing-Path-VMware-WorkStation 4

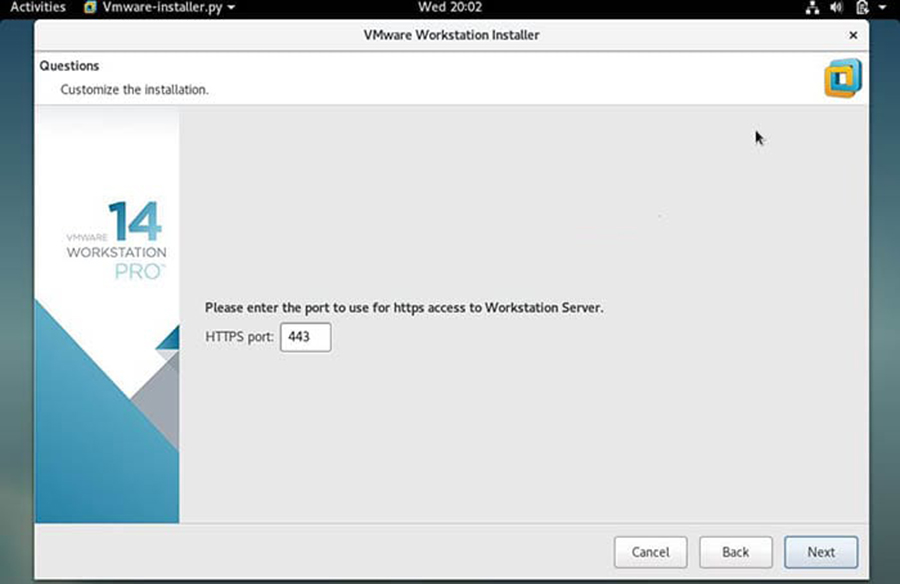
Specify the HTTPs port or keep default one:

HTTPs-Port-Debian9-VMware-Workstation 5

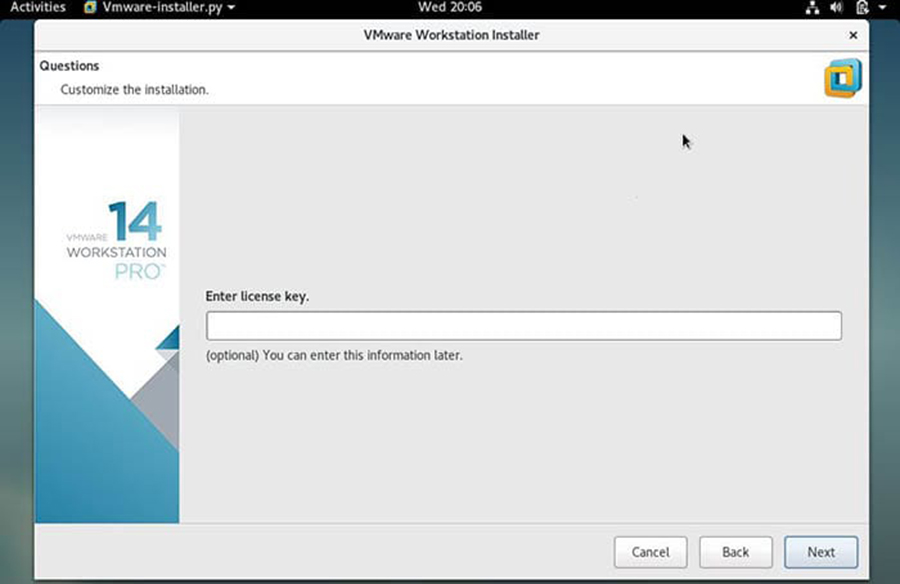
Enter the License key in case you have already buy its license, else you can leave it blank:

License-Key-Debian9-VMware-Workstation 6

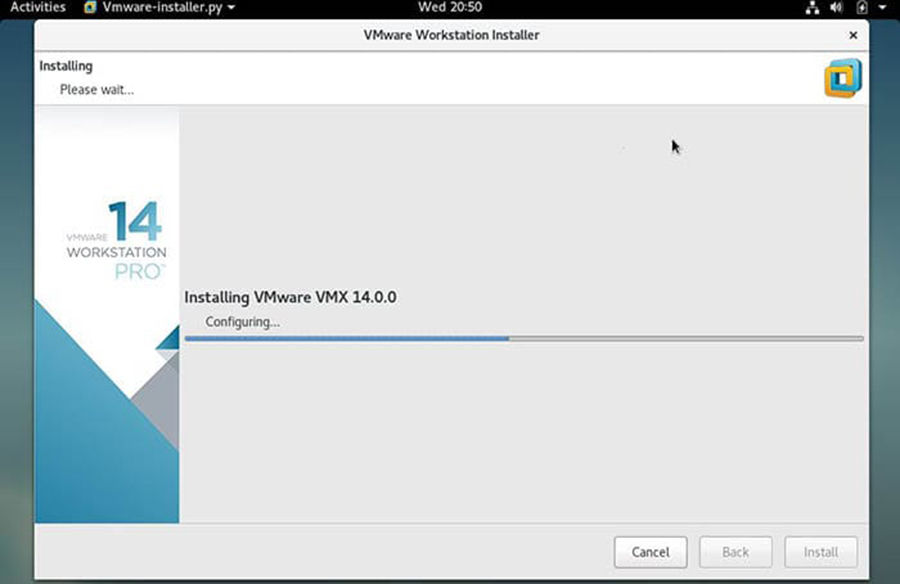
In the next window, click on ‘Install‘ option to start its installation:

VMware-Workstation-Installation-Progress7
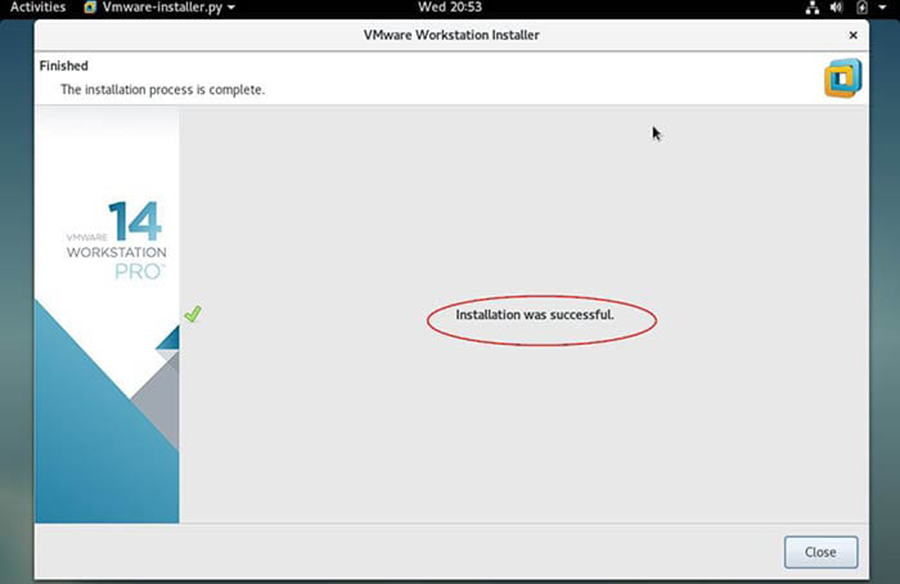
Once the Installation is successful, we will get the below window:

VMware-Workstation-Installation-Completed8

Congratulation’s! You have successfully installed VMware Workstation. Thanks for using this tutorial for installing VMware Workstation on your Ubuntu 18.04 Bionic Beaver system. For additional help or useful information, we recommend you to check the official VMware web site.

How To Install Node.js on Ubuntu 18.04 LTS

Install Node.js on Ubuntu 18

Node.js is a Javascript platform for programming that enables users to build network applications very quickly. If you are using Javascript on both the front-end and the back-end, it means your development can be much more consistent and be designed within the same system.

This article assumes you have at least basic knowledge of Linux, know how to use the shell, and most importantly, you host your site on your own VPS. The installation is quite simple and assumes you are running in the root account, if not you may need to add ‘sudo’ to the commands to get root privileges. I will show you through the step by step installation Node.js on a Ubuntu 18.04 (Bionic Beaver) server.

Install Node.js on Ubuntu 18.04 LTS Bionic Beaver

Step 1. First make sure that all your system packages are up-to-date by running these following apt-get commands in the terminal.

sudo apt-get update
sudo apt-get upgrade

Step 2. Installing Node.js on Ubuntu 18.04 LTS.

Method 1. Install Node.js using Ubuntu Repository.


apt install nodejs

This will install Node.js, however we still need to install the package manager (NPM) so that 3rd party modules can be installed:

apt install npm

Verify the installation:

### nodejs --version
v8.10.0

Method 2. Install Node.js using PPA.


curl -sL https://deb.nodesource.com/setup_10.x -o nodesource_setup.sh

You can inspect the contents of this script with nano:

nano nodesource_setup.sh

Run the script:

sudo bash nodesource_setup.sh

The PPA will be added to your configuration and your local package cache will be updated automatically. After running the setup script from Nodesource, you can install the Node.js package:

apt install nodejs

In order for some npm packages to work (those that require compiling code from source, for example), you will need to install the build-essential package:

apt install build-essential

Method 3. Install Node.js using NVM (Node.js Version Manager).

Using nvm, you will be able to install multiple, self-contained versions of Node.js which will means you can control your environment much easier. It will give you on-demand access to the latest versions of Node.js, but it will also allow you to specify previous releases that your app may need. So, first we’ll want to update our local repository index and then install libssl-dev and build-essential . That can be done by running the below commands in a terminal or shell:

apt-get update
apt-get install build-essential libssl-dev

Once those are installed you need to download the setup script for NVM. Typically you can grab this from their github page. Though at the time of this writing the newest version is in the command below:

wget -qO- https://raw.githubusercontent.com/creationix/nvm/v0.31.1/install.sh

Verify that the script is indeed the one you want and then run:

bash install.sh

To begin the install of NVM. Once it finishes you will need to reload your profile to have your changes take effect without logging back in to your server again. Run the command:

source ~/.profile

Now as we have nvm installed, we can install isolated Node.js versions. To find out the versions of Node.js that are available for installation, we need to type:

[[email protected] ~]# nvm ls-remote
. . .
v5.8.0
v5.9.0
v5.9.1
v5.10.0
v5.10.1
v5.11.0
v6.0.0


Install the version you want with the command:

nvm install [your version]

Example:

nvm install 6.0.0

Configure nvm to use the version of Node.js that you just downloaded, the command is:

nvm use 6.0.0

To verify the current version of Node.js installed, the command is:

node -v

Congratulation’s! You have successfully installed Node.js. Thanks for using this tutorial for installing Node.js on Ubuntu 18.04 LTS (Bionic Beaver) system. For additional help or useful information, we recommend you to check the official Node.js web site.