How To Install Apache Maven 3.6.1 on Ubuntu 18.04 LTS

Install Apache Maven on Ubuntu 18

Apache Maven is a free and open source project management tool used for Java projects. You can easily handle a project’s build, reporting, and Documentation from a central piece of advice using Apache Maven. Apache Maven provides a complete framework to automate the job’s Build infrastructure.

This article assumes you have at least basic knowledge of linux, know how to use the shell, and most importantly, you host your site on your own VPS. The installation is quite simple and assumes you are running in the root account, if not you may need to add ‘sudo’ to the commands to get root privileges. I will show you through the step by step installation Apache Maven open source data visualization and monitoring suite on a 18.04 LTS (Bionic Beaver) server.

Install Apache Maven on Ubuntu 18.04 LTS

Step 1. First make sure that all your system packages are up-to-date

sudo apt-get update
sudo apt-get upgrade

Step 2. Installing Java.

Apache Maven requires Java to be installed on your server. By default, Java is not available in Ubuntu’s repository. Add the Oracle Java PPA to Apt with the following command:

add-apt-repository ppa:webupd8team/java
apt-get update -y
apt-get install oracle-java8-installer

Verify the Java version by running the following command:

java -version

Step 3. Installing Apache Maven on Ubuntu 18.04 LTS.

First thing to do is to go to Apache Maven’s download page and download the latest stable version of Apache Maven, At the moment of writing this article it is version 3.5.4:

wget http://www-eu.apache.org/dist/maven/maven-3/3.5.4/binaries/apache-maven-3.5.4-bin.tar.gz

Now extract downloaded archive using following command:

tar xzf apache-maven-3.5.4-bin.tar.gz
ln -s apache-maven-3.5.4 apache-maven

Step 4. Setup Environment Variables.

Now set the environments variables by creating new file /etc/profile.d/maven.sh:

nano /etc/profile.d/apache-maven.sh

Add following content:

export JAVA_HOME=/usr/lib/jvm/java-8-oracle
export M2_HOME=/usr/local/apache-maven
export MAVEN_HOME=/usr/local/apache-maven
export PATH=${M2_HOME}/bin:${PATH}

Then, Provide the following commands to make maven.sh executable and reload i:

sudo chmod +x maven.sh
source maven.sh

Step 5. Verify Installation.

Once everything has been successfully configured, check the version of the Apache Maven:

### mvn -version

Apache Maven 3.5.4 (138edd61fd1BMWe468bfa2d307c43b76940a5d7d; 2018-6-18T13:28:13+05:30)
Maven home: /usr/local/apache-maven
Java version: 1.8.0_144, vendor: Oracle Corporation
Java home: /usr/lib/jvm/java-8-oracle/jre
Default locale: en_IN, platform encoding: UTF-8
OS name: "linux", version: "4.4.0-46-generic", arch: "amd64", family: "unix"

Congratulation’s! You have successfully installed Apache Maven. Thanks for using this tutorial for installing Apache Maven on Ubuntu 18.04 LTS (Bionic Beaver) system. For additional help or useful information, we recommend you to check the official Apache Maven web site.

How To Install Jenkins on Ubuntu 18.04 LTS

Install Jenkins on Ubuntu 18

Jenkins is an open source continuous integration tool written in Java. Jenkins provides continuous integration services for software development. It is a server-based system running in a servlet container such as Apache Tomcat. It supports SCM tools including AccuRev, CVS, Subversion, Git, Mercurial, Perforce, Clearcase and RTC, and can execute Apache Ant and Apache Maven based projects as well as arbitrary shell scripts and Windows batch commands.

This article assumes you have at least basic knowledge of Linux, know how to use the shell, and most importantly, you host your site on your own VPS. The installation is quite simple and assumes you are running in the root account, if not you may need to add ‘sudo’ to the commands to get root privileges. I will show you through the step by step installation Apache Kafka on a 18.04 LTS (Bionic Beaver) server.

Install Jenkins on Ubuntu 18.04 LTS

Step 1. First make sure that all your system packages are up-to-date

sudo apt-get update
sudo apt-get upgrade

Step 2. Installing Java.

Jenkins requires Java to be installed on your server. By default, Java is not available in Ubuntu’s repository. Add the Oracle Java PPA to Apt with the following command:

sudo add-apt-repository ppa:webupd8team/java
sudo apt install oracle-java8-installer
sudo apt install oracle-java8-set-default

Verify the Java version by running the following command:

java -version

Step 3. Installing Jenkins on Ubuntu 18.04 LTS.

Add the key and source list to apt:

wget -q -O - https://pkg.jenkins.io/debian-stable/jenkins.io.key | sudo apt-key add -
sudo apt-add-repository "deb https://pkg.jenkins.io/debian-stable binary/"

Now, start proceed installation Jenkins:

sudo apt-get update
sudo apt-get install jenkins

Start Jenkins service:

systemctl start jenkins

Jenkins will write log files to /var/log/jenkins/jenkins.log. You can also fine-tune the configuration.

Step 4. Installing and Configure Apache web server for Jenkins.

Install Apache web server on your system:

apt-get install apache2

Create a new virtual host directive in Apache. For example, create a new Apache configuration file named ‘jenkins.conf’ on your virtual server:

a2enmod proxy
a2enmod proxy_http
a2ensite jenkins
touch /etc/apache2/sites-available/jenkins.conf
ln -s /etc/apache2/sites-available/jenkins.conf /etc/apache2/sites-enabled/jenkins.conf
nano /etc/apache2/sites-available/jenkins.conf

Add the following lines:

<Virtualhost *:80>
    ServerName        my.jenkins.id
    ProxyRequests     Off
    ProxyPreserveHost On
    AllowEncodedSlashes NoDecode

    <Proxy http://localhost:8080/*>
      Order deny,allow
      Allow from all
    </Proxy>

    ProxyPass         /  http://localhost:8080/ nocanon
    ProxyPassReverse  /  http://localhost:8080/
    ProxyPassReverse  /  http://my.jenkins.id/
</Virtualhost>

Save and close the file. Restart the apache and jenkins service for the changes to take effects:

systemctl restart apache2
systemctl restart jenkins

Step 5. Accessing Jenkins.

Jenkins will be available on HTTP port 8080 by default. Open your favorite browser and navigate to http://yourdomain.com:8080 or http://server-ip:8080 and complete the required the steps to finish the installation. If you are using a firewall, please open port 8080 to enable access to the control panel. Default installation password can be found at /var/lib/jenkins/secrets/initialAdminPassword as showing in below image.

How To Install Apache Spark 2.4.1 on Ubuntu 18.04 LTS

Install Apache Spark on Ubuntu 18

Apache Spark is a fast and general-purpose cluster computing system. It provides high-level APIs in Java, Scala and Python, and also an optimized engine which supports overall execution charts. It also supports a rich set of higher-level tools including Spark SQL for SQL and structured information processing, MLlib for machine learning, GraphX for graph processing, and Spark Streaming.

This article assumes you have at least basic knowledge of linux, know how to use the shell, and most importantly, you host your site on your own VPS. The installation is quite simple and assumes you are running in the root account, if not you may need to add ‘sudo’ to the commands to get root privileges. I will show you through the step by step installation Apache Spark on a 18.04 LTS (Bionic Beaver) server.

Install Apache Spark on Ubuntu 18.04 LTS

Step 1. First make sure that all your system packages are up-to-date

sudo apt-get update
sudo apt-get upgrade

Step 2. Installing Java.

Apache Spark requires Java to be installed on your server. By default, Java is not available in Ubuntu’s repository. Add the Oracle Java PPA to Apt with the following command:

add-apt-repository ppa:webupd8team/java
apt-get update -y
apt-get install oracle-java8-installer

Verify the Java version by running the following command:

java -version

Step 3. Installing Apache Spark on Ubuntu 18.04 LTS.

Install Apache Spark using following command:

wget https://www.apache.org/dyn/closer.lua/spark/spark-2.3.1/spark-2.3.1-bin-hadoop2.7.tgz
tar xvzf spark-2.3.1-bin-hadoop2.7.tgz
ln -s spark-2.3.1-bin-hadoop2.7 spark

Adding Spark to Path:

nano ~/.bashrc
[php]


Next, add these lines to the end of the .bashrc file so that path can contain the Spark executable file path:
[php]
SPARK_HOME=/idr00t/spark
export PATH=$SPARK_HOME/bin:$PATH

To activate these changes, run the following command for bashrc file:

source ~/.bashrc

Launching Spark Shell:

./spark/bin/spark-shell

Step 4. Accessing Apache Spark.

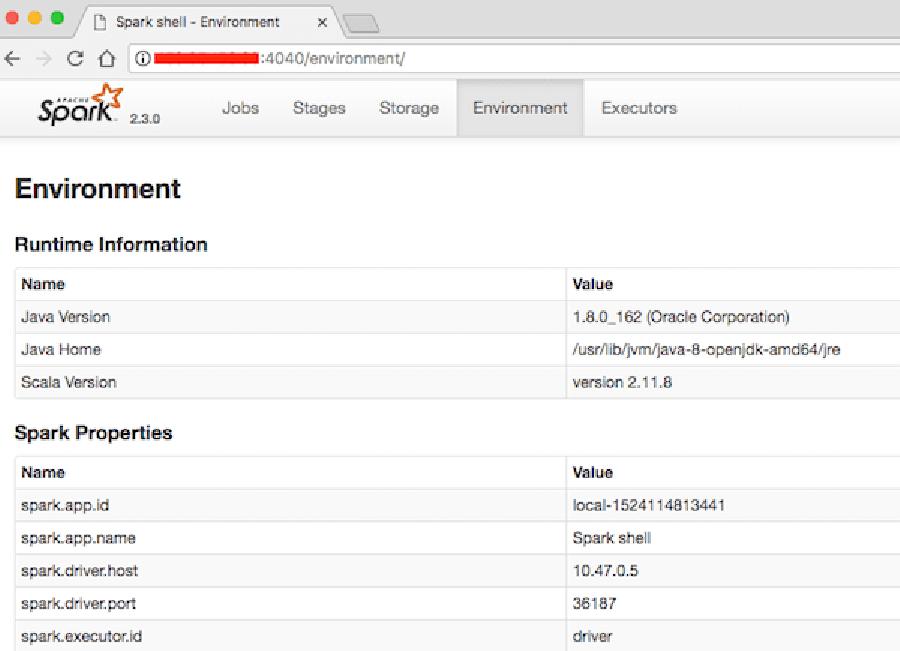
Apache Spark will be available on HTTP port 4040 by default. Open your favorite browser and navigate to http://yourdomain.com:4040 or http://server-ip:40404 and complete the required the steps to finish the installation.

spark-web-console

Congratulation’s! You have successfully installed Apache Spark. Thanks for using this tutorial for installing Apache Spark on Ubuntu 18.04 LTS (Bionic Beaver) system. For additional help or useful information, we recommend you to check the official Apache Spark Documentation.

How To Install Apache Kafka on Ubuntu 18.04 LTS

Install Apache Kafka on Ubuntu 18

Apache Kafka is a distributed message agent designed to deal with huge volumes of real time information effectively. Unlike traditional agents like ActiveMQ and RabbitMQ, Kafka functions as a bunch of one or more servers that makes it highly scalable and because of the distributed nature, it’s inbuilt fault-tolerance whilst providing greater throughput when compared to its counterparts.

This article assumes you have at least basic knowledge of linux, know how to use the shell, and most importantly, you host your site on your own VPS. The installation is quite simple and assumes you are running in the root account, if not you may need to add ‘sudo’ to the commands to get root privileges. I will show you through the step by step installation Apache Kafka on a 18.04 LTS (Bionic Beaver) server.

Install Apache Kafka on Ubuntu 18.04 LTS

Step 1. First make sure that all your system packages are up-to-date

sudo apt-get update
sudo apt-get upgrade

Step 2. Installing Java.

Apache Spark requires Java to be installed on your server. By default, Java is not available in Ubuntu’s repository. Add the Oracle Java PPA to Apt with the following command:

add-apt-repository ppa:webupd8team/java
apt-get update -y
apt-get install oracle-java8-installer

Verify the Java version by running the following command:

java -version

Step 3. Installing Zookeeper.

Apache Kafka depends on Zookeeper for cluster management. Hence, prior to starting Kafka, Zookeeper has to be started:

apt-get install zookeeperd

After the installation completes, ZooKeeper will be started as a daemon automatically. By default, it will listen on port 2181:

netstat -ant | grep :2181

You can run the following command to check whether zookeeper is running:

systemctl status zookeeper

Step 4. Download and Installing Apache Kafka on Ubuntu 18.04 LTS.

First, download and extract Kafka from Apache website. You can use wget to download Kafka:

wget http://www-us.apache.org/dist/kafka/1.1.0/kafka_2.12-1.1.0.tgz

Then extract the archive file:

tar xzf kafka_2.12-1.1.0.tgz
mv kafka_2.12-1.1.0 /usr/local/kafka

Start Kafka Server:

cd /usr/local/kafka
bin/zookeeper-server-start.sh config/zookeeper.properties

Now start the Kafka server:

bin/kafka-server-start.sh config/server.properties

...
[2018-06-26 10:59:45,989] INFO Kafka version : 1.0.1 (org.apache.kafka.common.utils.AppInfoParser)
[2018-06-26 10:59:45,995] INFO Kafka commitId : c0518aa65f25317e (org.apache.kafka.common.utils.AppInfoParser)
[2018-06-26 10:59:46,006] INFO [KafkaServer id=0] started (kafka.server.KafkaServer)
 Step 5. Create a Topic on Kafka.

Let’s create a topic named “NewTopic” with a single partition and only one replica:

bin/kafka-topics.sh --create --zookeeper localhost:2181 --replication-factor 1 --partitions 1 --topic NewTopic
Created topic "NewTopic".

Now you can see the created topic on Kafka by running the list topic command:

bin/kafka-topics.sh --list --zookeeper localhost:2181
NewTopic

Step 6. Send Messages to Kafka.

The “producer” is the process responsible for put data into our Kafka. The Kafka comes with a command line client that will take input from a file or from standard input and send it out as messages to the Kafka cluster:

Let’s run the producer and then type a few messages into the console to send to the server:

bin/kafka-console-producer.sh --broker-list localhost:9092 --topic NewTopic


>Welcome to kafka
>This is my new topic
>

Step 7. Using Kafka Consumer.

Kafka also has a command line consumer to read data from Kafka cluster and display messages to standard output:

bin/kafka-console-consumer.sh --bootstrap-server localhost:9092 --topic NewTopic --from-beginning

Welcome to kafka
This is my new topic

Congratulation’s! You have successfully installed Apache Kafka. Thanks for using this tutorial for installing Apache Kafka on Ubuntu 18.04 LTS (Bionic Beaver) system. For additional help or useful information, we recommend you to check the official Apache Kafka Documentation.

How To Install OBS Studio v23.1 on Ubuntu 18.04 LTS

OBS Studio

OBS Studio (Open Broadcast Studio) is a free and open source application for video recording and live streaming. With this tool, you can record your screen activity or record video from webcam and any other sources.

This article assumes you have at least basic knowledge of Linux, know how to use the shell, and most importantly, you host your site on your own VPS. The installation is quite simple and assumes you are running in the root account, if not you may need to add ‘sudo’ to the commands to get root privileges. I will show you through the step by step installation OBS Studio free and open source software for video recording and live streaming on a Ubuntu 18.04 (Bionic Beaver) server.

Install OBS Studio on Ubuntu 18.04 LTS

Step 1. First make sure that all your system packages are up-to-date

sudo apt-get update
sudo apt-get upgrade

Step 2. Installing OBS Studio on Ubuntu 18.04 LTS.

Method 1. Install OBS Studio using PPA:

First, add the official OBS Studio PPA:

sudo add-apt-repository ppa:obsproject/obs-studio
sudo apt-get update
sudo apt-get install obs-studio

Method 2. Install OBS Studio using Snap:


sudo apt install snapd

Install the OBS Studio snap package using following command:

snap install obs-studio

Please note that to use OBS Studio in Ubuntu, you’ll need FFMpeg. If you haven’t installed FFMpeg, do it now. Run the following commands to install FFMpeg.

Congratulation’s! You have successfully installed OBS Studio. Thanks for using this tutorial for installing free and open source software for video recording and live streaming. in Ubuntu 18.04 LTS (Bionic Beaver) systems. For additional help or useful information, we recommend you to check the official OBS Studio Linux Installation.

How To Install Phabricator on Ubuntu 18.04 LTS

Install Phabricator on Ubuntu 18

Phabricator is an open source collection of web applications which help software companies build better software. Phabricator is similar to GIT, and SVN. Currently maintained by Phacility, it was originally developed as an internal tool at Facebook. It is available as free software under the Apache License, version 2.

This article assumes you have at least basic knowledge of Linux, know how to use the shell, and most importantly, you host your site on your own VPS. The installation is quite simple and assumes you are running in the root account, if not you may need to add ‘sudo’ to the commands to get root privileges. I will show you through the step by step installation Phabricator on a Ubuntu 18.04 (Bionic Beaver) server.

Install Phabricator on Ubuntu 18.04 LTS

Step 1. First make sure that all your system packages are up-to-date

sudo apt-get update
sudo apt-get upgrade

Step 2. Install LAMP (Linux, Apache, MariaDB and PHP) server.

A Ubuntu 18.04 LAMP server is required. If you do not have LAMP installed, you can follow our guide here. Also install all required PHP modules:

apt-get install php7.1-cli php7.1-gd php7.1-opcache php7.1-mysql php7.1-json php7.1-mcrypt php7.1-xml php7.1-curl

Step 3. Installing Phabricator on Ubuntu 18.04 LTS.

First, create and switch to the directory in which we will download Phabricator and its dependencies run the following command:

mkdir /var/www/html/myapps
cd /var/www/html/myapps

Next, clone the needed Git repositories from Phacility:

sudo git clone https://github.com/phacility/libphutil.git
sudo git clone https://github.com/phacility/arcanist.git
sudo git clone https://github.com/phacility/phabricator.git

Step 4. Configuring MariaDB for Phabricator.

By default, MariaDB is not hardened. You can secure MariaDB using the mysql_secure_installation script. you should read and below each steps carefully which will set root password, remove anonymous users, disallow remote root login, and remove the test database and access to secure MariaDB:

mysql_secure_installation

Configure it like this:


- Set root password? [Y/n] y
- Remove anonymous users? [Y/n] y
- Disallow root login remotely? [Y/n] y
- Remove test database and access to it? [Y/n] y
- Reload privilege tables now? [Y/n] y

Next we will need to log in to the MariaDB console and create a database for the Phabricator. Run the following command:

mysql -u root -p

This will prompt you for a password, so enter your MariaDB root password and hit Enter. Once you are logged in to your database server you need to create a database for Phabricator installation:

use mysql;
ALTER USER 'root'@'localhost' IDENTIFIED WITH mysql_native_password BY 'your_mysql_root_password';
flush privileges;

Next, Enter the phabricator directory:

cd /var/www/html/myapp/phabricator

Now, it’s time to configure MySQL. Execute the following commands:

./bin/config set mysql.host localhost
./bin/config set mysql.user root
./bin/config set mysql.pass your_mysql_root_password

Then, run storage upgrade script to load the Phabricator schemata into it. You’ll be asked to press ‘y’ while loading database schema:

./bin/storage upgrade --user root --password your_mariadb_root_password

Step 5. Configuring Apache web server for Phabricator.

Create a new virtual host directive in Apache. For example, create a new Apache configuration file named ‘phabricator.conf’ on your virtual server:

sudo a2enmod rewrite
touch /etc/apache2/sites-available/phabricator.conf
ln -s /etc/apache2/sites-available/phabricator.conf /etc/apache2/sites-enabled/phabricator.conf
nano /etc/apache2/sites-available/phabricator.conf

Add the following lines:

<VirtualHost *:80>
ServerAdmin [email protected]
DocumentRoot /var/www/html/myapp/phabricator/webroot
ServerName your-domain.com
ServerAlias www.your-domain.com
<Directory /var/www/html/myapp/phabricator/webroot/>
Options FollowSymLinks
AllowOverride All
Order allow,deny
allow from all
</Directory>
ErrorLog /var/log/apache2/your-domain.com-error_log
CustomLog /var/log/apache2/your-domain.com-access_log common
</VirtualHost>

Now, we can restart Apache web server so that the changes take place:

sudo a2ensite phabricator
systemctl restart apache2.service

Step 6. Accessing Phabricator.

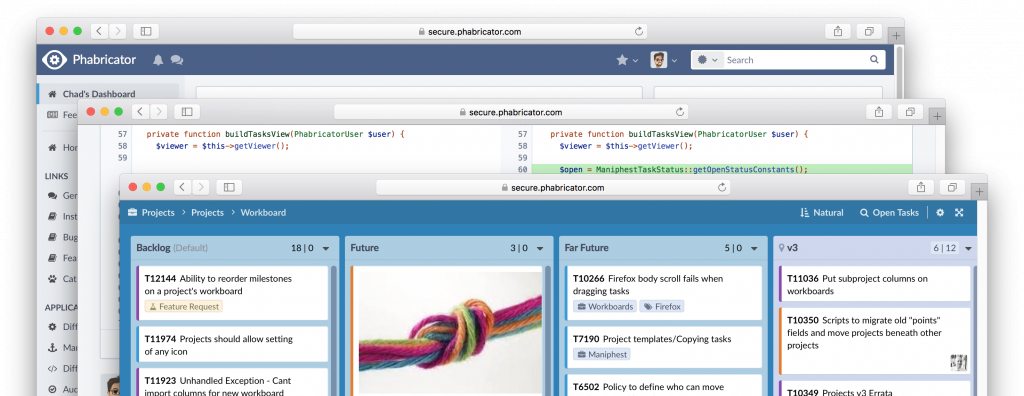
Phabricator will be available on HTTP port 80 by default. Open your favorite browser and navigate to http://phabricator.domain.com and complete the required the steps to finish the installation. If you are using a firewall, please open port 80 to enable access to the control panel.

install phabricator on ubuntu 18

Congratulation’s! You have successfully installed Phabricator. Thanks for using this tutorial for installing Phabricator in Ubuntu 18.04 LTS (Bionic Beaver) systems. For additional help or useful information, we recommend you to check the official Phabricator Installation page.

How To Install Craft CMS on Ubuntu 18.04 LTS

Install Craft CMS on Ubuntu 18

Craft is a content management system (CMS) designed for publishers who want more control and more powerful performances from their CMS. It is a PHP based application build on Yii framework.

This article assumes you have at least basic knowledge of Linux, know how to use the shell, and most importantly, you host your site on your own VPS. The installation is quite simple and assumes you are running in the root account, if not you may need to add ‘sudo’ to the commands to get root privileges. I will show you through the step by step installation Craft content management system (CMS) on a Ubuntu 18.04 LTS (Bionic Beaver) server.

Install Craft CMS on Ubuntu 18.04 LTS

Step 1. First make sure that all your system packages are up-to-date

sudo apt-get update
sudo apt-get upgrade

Step 2. Install LAMP (Linux, Apache, MariaDB and PHP) server.

A Ubuntu 18.04 LAMP server is required. If you do not have LAMP installed, you can follow our guide here. Also install all required PHP modules:

apt-get install php7.1-cli php7.1-gd php7.1-opcache php7.1-mysql php7.1-json php7.1-mcrypt php7.1-xml php7.1-curl

Step 3. Installing Craft CMS on Ubuntu 18.04 LTS.

First thing to do is to go to Craft CMS’s download page and download the latest stable version of Craft CMS, At the moment of writing this article it is version 3:

wget https://craftcms.com/latest-v3.zip

Unpack the Craft CMS archive to the document root directory on your server:

mkdir /var/www/html/craft
unzip latest-v3.zip -d /var/www/html/craft

We will need to change some folders permissions:

chown -R www-data:www-data /var/www/html/craft/
chmod -R 755 /var/www/html/craft/

Step 4. Configuring MariaDB for Craft CMS.

By default, MariaDB is not hardened. You can secure MariaDB using the mysql_secure_installation script. you should read and below each steps carefully which will set root password, remove anonymous users, disallow remote root login, and remove the test database and access to secure MariaDB:

mysql_secure_installation

Configure it like this:

- Set root password? [Y/n] y
- Remove anonymous users? [Y/n] y
- Disallow root login remotely? [Y/n] y
- Remove test database and access to it? [Y/n] y
- Reload privilege tables now? [Y/n] y

Next we will need to log in to the MariaDB console and create a database for the Craft CMS. Run the following command:

mysql -u root -p

This will prompt you for a password, so enter your MariaDB root password and hit Enter. Once you are logged in to your database server you need to create a database for Craft CMS installation:

CREATE DATABASE craft;
CREATE USER 'craftuser'@'localhost' IDENTIFIED BY 'PASSWORD';
GRANT ALL PRIVILEGES ON `craft`.* TO 'craftuser'@'localhost';
FLUSH PRIVILEGES;

Step 5. Configuring Apache web server for Craft CMS.

Create a new virtual host directive in Apache. For example, create a new Apache configuration file named ‘craft.conf’ on your virtual server:

touch /etc/apache2/sites-available/craft.conf
ln -s /etc/apache2/sites-available/craft.conf /etc/apache2/sites-enabled/craft.conf
nano /etc/apache2/sites-available/craft.conf

Add the following lines:

&amp;lt;VirtualHost *:80&amp;gt;
ServerAdmin [email protected]
DocumentRoot /var/www/html/craft/web
ServerName your-domain.com
ServerAlias www.your-domain.com
&amp;lt;Directory /var/www/html/craft/&amp;gt;
Options FollowSymLinks
AllowOverride All
Order allow,deny
allow from all
&amp;lt;/Directory&amp;gt;
ErrorLog /var/log/apache2/your-domain.com-error_log
CustomLog /var/log/apache2/your-domain.com-access_log common
&amp;lt;/VirtualHost&amp;gt;

Now, we can restart Apache web server so that the changes take place:

sudo a2ensite craft.conf
sudo a2enmod rewrite
sudo systemctl restart apache2.service

Step 6. Accessing Craft CMS.

Craft CMS will be available on HTTP port 80 by default. Open your favorite browser and navigate to http://yourdomain.com/admin or http://server-ip/admin and complete the required the steps to finish the installation. If you are using a firewall, please open port 80 to enable access to the control panel.

Congratulation’s! You have successfully installed Craft CMS. Thanks for using this tutorial for installing Craft content management system (CMS) on your Ubuntu 18.04 LTS (Bionic Beaver) system. For additional help or useful information, we recommend you to check the official Craft CMS Installation guide.