How To Install Lyricfier on Ubuntu 16.04 LTS

Install Lyricfier on Ubuntu 16

Lyricfier is an electron app that communicates with Spotify Desktop Client to get the current song and then looks for a matching lyric scraping the web.

This article assumes you have at least basic knowledge of Linux, know how to use the shell, and most importantly, you host your site on your own VPS. The installation is quite simple and assumes you are running in the root account, if not you may need to add ‘sudo’ to the commands to get root privileges. I will show you through the step by step installation Lyricfier on Ubuntu 16.04 Xenial Xerus.

Install Lyricfier on Ubuntu 16.04 LTS

Step 1. First make sure that all your system packages are up-to-date

sudo apt-get update
sudo apt-get upgrade

Step 2. Installing Spotify on Ubuntu.

First make sure you have installed Spotify on your desktop machine, If you do not have Spotify installed, you can follow our guide here.

Step 3. Installing Lyricfier.

First thing to do is to go to lyricfier’s download page and download the latest stable version of lyricfier:

cd ~/Download
mkdir lyricfier
cd lyricfier
wget https://github.com/emilioastarita/lyricfier/releases/download/0.2.5/lyricfier-linux-x64.zip

Unpack the lyricfier archive to the document root directory on your server:

unzip lyricfier-linux-x64.zip

Step 4. Fix Bugs Lyricfier Identified.

First bug is “Current song error: No song“. Follow the steps below to fix that:

wget https://github.com/emilioastarita/lyricfier/files/852262/mol_lyricfier.zip
unzip mol_lyricfier.zip
mv SpotifyService.* resources/app/render/

Next lets fix this error “Sorry, couldn’t find lyrics for this song“. Follow the steps below to fix this:

wget https://github.com/emilioastarita/lyricfier/files/1176862/fix_lyrics_not_found.zip
unzip fix_lyrics_not_found.zip
mv Searcher* resources/app/render/

Once installed, next you can start Lyricfier by searching for it Unity Dash or typing in terminal. If the app icon doesn’t show up, try logging out and logging back in.

./lyricfier

Congratulations! You have successfully installed Lyricfier. Thanks for using this tutorial for installing Lyricfier in Ubuntu 16.04 Xenial Xerus systems. For additional help or useful information, we recommend you to check the official Lyricfier web site.

How To Install Sensu on Ubuntu 16.04 LTS

Install Sensu on Ubuntu 16

Sensu is a free and open source tool for composing the monitoring system you need. It is written in Ruby that uses RabbitMQ to handle messages and Redis to store data. Sensu provides a framework for monitoring infrastructure and application health. Sensu supports a number of platforms such as, IBM AIX, Ubuntu, Debian, RedHat, CentOS, FreeBSD, Mac OS, Solaris, Windows and much more.

This article assumes you have at least basic knowledge of Linux, know how to use the shell, and most importantly, you host your site on your own VPS. The installation is quite simple and assumes you are running in the root account, if not you may need to add ‘sudo’ to the commands to get root privileges. I will show you through the step by step installation Sensu monitoring on an Ubuntu 16.04 Xenial Xerus server.

Install Sensu on Ubuntu 16.04 LTS

Step 1. First make sure that all your system packages are up-to-date

sudo apt-get update
sudo apt-get upgrade

Step 2. Installing RabbitMQ.

Add Erlang repository as RabbitMQ runs on the Erlang runtime:

wget https://packages.erlang-solutions.com/erlang-solutions_1.0_all.deb
sudo dpkg -i erlang-solutions_1.0_all.deb

Add Erlang public key to your trusted key list:

wget -O- https://packages.erlang-solutions.com/ubuntu/erlang_solutions.asc |  sudo apt-key add -

Install RabbitMQ along with Erlang using the following command:

apt-get update
apt-get install -y socat erlang-nox=1:19.3-1

At this point, we can download and install RabbitMQ. As we have done for Erlang, first of all it is required to add the RabbitMQ repository:

wget http://www.rabbitmq.com/releases/rabbitmq-server/v3.6.10/rabbitmq-server_3.6.10-1_all.deb
dpkg -i rabbitmq-server_3.6.10-1_all.deb

Update the repositories and install RabbitMQ server with the following apt command:

apt-get update
apt-get install rabbitmq-server

Once installation is complete, start RabbitMQ and enable it to start at boot time. Execute the commands:

systemctl start rabbitmq-server
systemctl enable rabbitmq-server

Step 3. Installing Redis.

By default, Redis is available in Ubuntu repository, so we can install it by executing the following command:

apt-get update
apt-get -y install redis-server apt-transport-https

Once the installation is complete, we can start Redis and enable it to start at boot time:

systemctl start redis-server
systemctl enable redis-server

Verify that Redis is ready to use by running the below command:

redis-cli ping

Step 4. Installing Sensu.

First, Install GPG public key and add APT configuration file at /etc/apt/sources.list.d/sensu.list:

wget -O- https://sensu.global.ssl.fastly.net/apt/pubkey.gpg |  sudo apt-key add -
echo "deb https://sensu.global.ssl.fastly.net/apt sensu main" | sudo tee /etc/apt/sources.list.d/sensu.list

Install Sensu using the following command:

apt-get update
apt-get install -y sensu

Step 5. Configure Sensu.

Sensu processes require extra configuration to tell them how to connect to the RabbitMQ transport bus:

nano /etc/sensu/conf.d/rabbitmq.json

Update the file with following values. Replace password with the password you chosen few steps back:

{
  "rabbitmq": {
    "host": "127.0.0.1",
    "port": 5672,
    "vhost": "/sensu",
    "user": "sensu",
    "password": "PASSSWD"
  }
}

Next, Create redis.json file to include the connection information for Sensu to access Redis:

nano /etc/sensu/conf.d/redis.json

Add the below lines to the above file:

{
  "redis": {
    "host": "127.0.0.1",
    "port": 6379
  }
}

Create api.json file to include the connection information for Sensu to access API service:

nano /etc/sensu/conf.d/api.json

Add below lines to the above file:

{
  "api": {
    "host": "localhost",
    "bind": "0.0.0.0",
    "port": 4567
  }
}

Step 5. Installing Uchiwa.

Sensu core does not come with the monitoring dashboard, so you would need to install Uchiwa which is an open source dashboard for Sensu:

apt-get install uchiwa

Once the installation is finished, create a configuration file for Uchiwa:

nano /etc/sensu/conf.d/uchiwa.json

Here, paste the following content:

{"sensu": [      { "name": "Sensu",        "host": "localhost",        "port": 4567, "timeout": 10      }   ],   "uchiwa": {        "host": "0.0.0.0",        "port": 3000,       "refresh": 10        }  }

Finally, restart Sensu and Uchiwa and enable them to start at boot time:

systemctl start sensu-server
systemctl enable sensu-server
systemctl start sensu-api
systemctl enable sensu-api
systemctl start sensu-client
systemctl enable sensu-client
systemctl start uchiwa
systemctl enable uchiwa

Congratulation’s! You have successfully installed Sensu. Thanks for using this tutorial for installing Sensu monitoring on your Ubuntu 16.04. For additional help or useful information, we recommend you to check the official Sensu web site.

How To Install Zikula on Ubuntu 16.04 LTS

Install Zikula on Ubuntu 16

Zikula is an open source PHP application framework and CMS released under the GNU General Public License. The functionality of this PHP application framework and CMS can be expanded using modules and plugins.

Requirements

  • Core requires PHP >= 7.2.0
  • Additional server considerations can be found on the Symfony site
  • It requires more memory than typical to install. You should set your memory limit in php.ini to 128 MB for the installation process.
  • Requires that date.timezone be set in the php.ini configuration file (or .htaccess).
  • AllowOverride All and the mod_rewrite module (be aware the Apache 2.3.9+ has changed the default setting for AllowOverride to None).
  • It also requires other php extensions and configurations. These are checked during the installation process and if there are problems, you will be notified. If you discover errors, check with your hosting provider on how to rectify these issues. Typically, they will require changing the php.ini file or possibly reconfiguring the php installation by your provider.

This article assumes you have at least basic knowledge of Linux, know how to use the shell, and most importantly, you host your site on your own VPS. The installation is quite simple and assumes you are running in the root account, if not you may need to add ‘sudo’ to the commands to get root privileges. I will show you through the step by step installation Zikula ocontent management system on an Ubuntu 16.04 Xenial Xerus server.

Install Zikula on Ubuntu 16.04 LTS

Step 1. First make sure that all your system packages are up-to-date

sudo apt-get update
sudo apt-get upgrade
[php]


<strong>Step 2. Install LAMP (Linux, Apache, MariaDB, PHP)  server.</strong>

A Ubuntu 16.04 LAMP server is required. If you do not have LAMP installed, you can follow our guide here. Also install all required PHP modules:
[php]
apt-get install php7.0-mysql php7.0-curl php7.0-json php7.0-cgi php7.0 libapache2-mod-php7.0 php7.0-mcrypt php7.0-xmlrpc php7.0-gd

Step 3. Installing Zikula.

Download the latest stable version of Zikula CMS, At the moment of writing this article it is version 2.0.1:

wget https://github.com/zikula/core/releases/download/2.0.1/Zikula_Core-2.0.1.zip
unzip Zikula_Core-2.0.1.zip
mv 2.0 /var/www/html/zikula

We will need to change some folders permissions:

chown www-data:www-data -R /var/www/html/zikula

Step 4. Configuring MariaDB.

By default, MariaDB is not hardened. You can secure MySQL using the mysql_secure_installation script. you should read and below each steps carefully which will set root password, remove anonymous users, disallow remote root login, and remove the test database and access to secure MariaDB.

mysql_secure_installation

Next we will need to log in to the MariaDB console and create a database for the Zikula. Run the following command:

mysql -u root -p

This will prompt you for a password, so enter your MariaDB root password and hit Enter. Once you are logged in to your database server you need to create a database for Zikula installation:

mysql> CREATE DATABASE zikula_db;
mysql> GRANT ALL PRIVILEGES on zikula_db.* to 'zikula_user'@'localhost' identified by 'YoUrPaS$w0rD';
mysql> FLUSH PRIVILEGES;
mysql> exit

Step 5. Configuring Apache web server for Zikula.

Create a new virtual host directive in Apache. For example, create a new Apache configuration file named ‘zikula.conf’ on your virtual server:

sudo a2enmod rewrite
touch /etc/apache2/sites-available/zikula.conf
ln -s /etc/apache2/sites-available/zikula.conf /etc/apache2/sites-enabled/zikula.conf
nano /etc/apache2/sites-available/zikula.conf

Add the following lines:

<VirtualHost *:80>
ServerAdmin [email protected]
DocumentRoot /var/www/html/zikula/
ServerName your-domain.com
ServerAlias www.your-domain.com
<Directory /var/www/html/zikula/>
Options FollowSymLinks
AllowOverride All
Order allow,deny
allow from all
</Directory>
ErrorLog /var/log/apache2/your-domain.com-error_log
CustomLog /var/log/apache2/your-domain.com-access_log common
</VirtualHost>

Now, we can restart Apache web server so that the changes take place:

systemctl restart apache2.service

Step 6. Accessing Zikula.

Zikula content management system will be available on HTTP port 80 by default. Open your favorite browser and navigate to http://yourdomain.com/install.php or http://server-ip/install.php and complete the required the steps to finish the installation. If you are using a firewall, please open port 80 to enable access to the control panel.

[youtube https://www.youtube.com/watch?v=LIwJ0gCPLsg]

Congratulation’s! You have successfully installed Zikula. Thanks for using this tutorial for installing Zikula content management system on your Ubuntu 16.04 system. For additional help or useful information, we recommend you to check the official Zikula web site.

How To Install vTiger CRM on Ubuntu 16.04 LTS

Install vTiger CRM on Ubuntu 16

vTiger CRM is an all-in-one open source CRM software used by thousands of businesses. It has a modern interface with multiple dashboards and what is more important, it offers plenty of features which can help you to run your business successfully. Some of the features include lead management, account and contact management, campaign management, project management, customer support and service, emails etc.. The core functionality can be easily extended by using 3rd-party plugins, available through the extension marketplace.

This article assumes you have at least basic knowledge of Linux, know how to use the shell, and most importantly, you host your site on your own VPS. The installation is quite simple and assumes you are running in the root account, if not you may need to add ‘sudo’ to the commands to get root privileges. I will show you through the step by step installation vTiger open-source Customer Relationship Management on an Ubuntu 16.04 Xenial Xerus server.

Install vTiger CRM on Ubuntu 16.04 LTS

Step 1. First make sure that all your system packages are up-to-date

sudo apt-get update
sudo apt-get upgrade

Step 2. Install LAMP (Linux, Apache, MariaDB, PHP) server.

A Ubuntu 16.04 LAMP server is required. If you do not have LAMP installed, you can follow our guide here. Also install all required PHP modules:

apt-get install php7.0-mysql php7.0-curl php7.0-json php7.0-cgi php7.0 libapache2-mod-php7.0 php7.0-mcrypt php7.0-xmlrpc php7.0-gd

Step 3. Installing vTiger CRM.

Download the latest stable version of Vtiger CRM, At the moment of writing this article it is version 7.0.1:

wget https://ncu.dl.sourceforge.net/project/vtigercrm/vtiger%20CRM%207.0.1/Core%20Product/vtigercrm7.0.1.tar.gz
tar -xzvf vtigercrm7.0.1.tar.gz
mv vtigercrm /var/www/html/

We will need to change some folders permissions:

chown www-data:www-data -R /var/www/html/

Step 4. Configuring MariaDB.

By default, MariaDB is not hardened. You can secure MySQL using the mysql_secure_installation script. you should read and below each steps carefully which will set root password, remove anonymous users, disallow remote root login, and remove the test database and access to secure MariaDB.

mysql_secure_installation

Next we will need to log in to the MariaDB console and create a database for the vTiger. Run the following command:

mysql -u root -p

This will prompt you for a password, so enter your MariaDB root password and hit Enter. Once you are logged in to your database server you need to create a database for vTiger installation:

MariaDB > CREATE DATABASE vtiger;
MariaDB > CREATE USER 'vtiger_user'@'localhost' IDENTIFIED BY 'PaSsWoRd';
MariaDB > GRANT ALL PRIVILEGES ON `vtiger`.* TO 'vtiger_user'@'localhost';
MariaDB > FLUSH PRIVILEGES;
MariaDB > \q

Now, let’s tweak some of your PHP settings so you can later complete the VTiger installation:

nano /etc/php/7.0/apache2/php.ini

Make the below changes:

display_errors = Off
change to
display_errors = On

max_execution_time = 30
change to
max_execution_time = 600

error_reporting = E_ALL & ~E_DEPRECATED
change to
error_reporting = E_WARNING & ~E_NOTICE & ~E_DEPRECATED

log_errors = On
change to
log_errors = Off

short_open_tag = Off
change to
short_open_tag = On

Save and close the file. Restart the apache service for the changes to take effects:

systemctl restart apache2.service

Step 5. Accessing Vtiger CRM.

Vtiger CRM will be available on HTTP port 80 by default. Open your favorite browser and navigate to http://yourdomain.com/vtigercrm or http://server-ip/vtigercrm and complete the required the steps to finish the installation. If you are using a firewall, please open port 80 to enable access to the control panel.

Congratulation’s! You have successfully installed vTiger. Thanks for using this tutorial for installing vTiger Customer Relationship Management on your Ubuntu 16.04 system. For additional help or useful information, we recommend you to check the official vTiger web site.

How To Install Opera on Ubuntu 16.04 LTS

Install Opera on Ubuntu 16

Opera is a fast, secure and easy-to-use internet browser which works well on most of the Linux distributions. It’s now designed with an integrated ad blocker, battery saver and free VPN, so it saves time and resources for its own users. Also, Opera browser is stuffed with several other innovative features such as speed dialup, pop-up blocking, personal browsing and tabbed browsing.

This article assumes you have at least basic knowledge of Linux, know how to use the shell, and most importantly, you host your site on your own VPS. The installation is quite simple and assumes you are running in the root account, if not you may need to add ‘sudo’ to the commands to get root privileges. I will show you through the step by step installation Opera browser on Ubuntu 16.04 Xenial Xerus.

Install Opera on Ubuntu 16.04 LTS

Step 1. First make sure that all your system packages are up-to-date

sudo apt-get update
sudo apt-get upgrade

Step 2. Installing Opera on Ubuntu 16.04.

First, Go to the Opera browser for Linux download page. and download the deb package installer:

### 32-bit ###
wget http://download4.operacdn.com/ftp/pub/opera/desktop/40.0.2308.62/linux/opera-stable_40.0.2308.62_i386.deb

### 64-bit ###
wget http://download4.operacdn.com/ftp/pub/opera/desktop/40.0.2308.62/linux/opera-stable_40.0.2308.62_amd64.deb

Install Opera DEB package, forcing install of dependencies:

apt-get install apt-transport-https libcurl3
sudo dpkg -i opera-stable*.deb

Step 3. Accessing Opera Web Browser.

Once the Opera installation is complete, you can start Opera by typing below command in the terminal or Going to Activities on Ubuntu:

opera

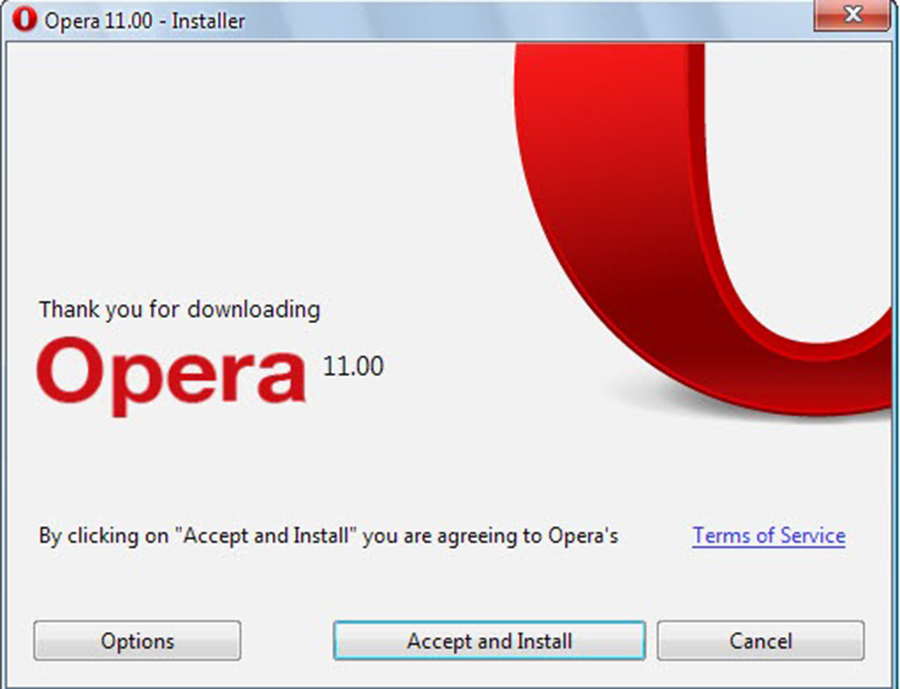
opera_installation

Congratulations! You have successfully installed Opera. Thanks for using this tutorial for installing Opera browser in Ubuntu 16.04 Xenial Xerus systems. For additional help or useful information, we recommend you to check the official Opera web site.

How To Install Apache Kafka on Ubuntu 16.04 LTS

Install Apache Kafka on Ubuntu 16

Apache Kafka is a distributed message agent designed to deal with huge volumes of real time information effectively. Unlike traditional agents like ActiveMQ and RabbitMQ, Kafka functions as a bunch of one or more servers that makes it highly scalable and because of the distributed nature, it’s inbuilt fault-tolerance whilst providing greater throughput when compared to its counterparts.

apache kafka diagram

This article assumes you have at least basic knowledge of Linux, know how to use the shell, and most importantly, you host your site on your own VPS. The installation is quite simple and assumes you are running in the root account, if not you may need to add ‘sudo’ to the commands to get root privileges. I will show you through the step by step installation Apache Kafka on an Ubuntu 16.04 Xenial Xerus server.

Install Apache Kafka on Ubuntu 16.04 LTS

Step 1. First make sure that all your system packages are up-to-date

sudo apt-get update
sudo apt-get upgrade

Step 2. Installing Java.

Kafka is written in Java, you will need to install Java on your system:

add-apt-repository -y ppa:webupd8team/java

Once you have finished, run the following command to install Java:

apt-get update
apt-get install oracle-java8-installer

Step 3. Installing Zookeeper.

Apache Kafka depends on Zookeeper for cluster management. Hence, prior to starting Kafka, Zookeeper has to be started:

apt-get install zookeeperd

After the installation completes, ZooKeeper will be started as a daemon automatically. By default, it will listen on port 2181:

netstat -ant | grep :2181

Step 4. Installing Kafka Server.

First, download and extract Kafka from Apache website. You can use wget to download Kafka:

mkdir /opt/Kafka
cd /opt/Kafka
wget http://ftp.jaist.ac.jp/pub/apache/kafka/0.10.0.0/kafka_2.11-0.10.0.0.tgz

Extract the downloaded archive using tar command in /opt/Kafka:

tar -xvf kafka_2.11-0.10.0.0.tgz -C /opt/Kafka/

Configure Kafka Server:

sudo /opt/Kafka/kafka_2.11-0.10.0.0/bin/kafka-server-start.sh /opt/Kafka/kafka_2.11-0.10.0.0/config/server.properties

You can use nohup with script to start the Kafka server as a background process:

sudo nohup /opt/Kafka/kafka_2.11-0.10.0.0/bin/kafka-server-start.sh /opt/Kafka/kafka_2.11-0.10.0.0/config/server.properties /tmp/kafka.log 2>&1 &

Now, it is time to verify the Kafka server is operating correctly:

sudo /opt/Kafka/kafka_2.11-0.10.0.0/bin/kafka-topics.sh --create --zookeeper localhost:2181 --replication-factor 1 --partitions 1 --topic testing

You should see the following output:

Created topic "testing".

Now, ask Zookeeper to list available topics on Apache Kafka:

sudo /opt/Kafka/kafka_2.11-0.10.0.0/bin/kafka-topics.sh --list --zookeeper localhost:2181

You should see the following output:

testing

Next, publish a sample messages to Apache Kafka topic called testing by using the following producer command:

sudo /opt/Kafka/kafka_2.11-0.10.0.0/bin/kafka-console-producer.sh --broker-list localhost:9092 --topic testing

Finally, use consumer command to check for messages on Apache Kafka Topic called testing by running the following command:

sudo /opt/Kafka/kafka_2.11-0.10.0.0/bin/kafka-console-consumer.sh --zookeeper localhost:2181 --topic testing --from-beginning

You should see the following output:

Hi how are you?
Where are you?

Well , you have successfully verified that you have a valid Apache Kafka setup with Apache Zookeeper.

Congratulation’s! You have successfully installed Apache Kafka. Thanks for using this tutorial for installing Apache Kafka on your Ubuntu 16.04 system. For additional help or useful information, we recommend you to check the official Apache Kafka web site.

How To Install MySQL Server on Ubuntu 17.04

Install MySQL Server on Ubuntu 17

MySQL is a relational database management system (RDBMS) that runs as a server providing multi-user access to a number of databases. The MySQL source code is freely available because it was originally developed as freeware. MySQL is written in C and C++ and is compatible with all major operating systems. MySQL can be used for a variety of applications, but is most commonly found on web servers.

This article assumes you have at least basic knowledge of Linux, know how to use the shell, and most importantly, you host your site on your own VPS. The installation is quite simple and assumes you are running in the root account, if not you may need to add ‘sudo’ to the commands to get root privileges. I will show you through the step by step installation MySQL Server on a Ubuntu 17.04 Zesty Zapus server.

Install MySQL Server on Ubuntu 17.04 Zesty Zapus

Step 1. First make sure that all your system packages are up-to-date

sudo apt-get update
sudo apt-get upgrade

Step 2. Installing MySQL.

Run the commands below to install MySQL:

apt-get install mysql-server mysql-client

Once complete, you can verify MySQL is installed by running the below command:

systemctl status mysql
systemctl start mysql
systemctl status mysql

After the installation of MySQL is complete, you may need to secure your new MySQL. By default, MySQL is not hardened. You can secure MySQL using the mysql_secure_installation script. you should read and below each steps carefully which will set root password, remove anonymous users, disallow remote root login, and remove the test database and access to secure MySQL:

mysql_secure_installation

Configure it like this:

- Set root password? [Y/n] y
- Remove anonymous users? [Y/n] y
- Disallow root login remotely? [Y/n] y
- Remove test database and access to it? [Y/n] y
- Reload privilege tables now? [Y/n] y

To log into MySQL, use the following command (note that it’s the same command you would use to log into a MySQL database):

mysql -u root -p

One of the most important things when running MySQL on a production server is to get the most out of its performances. If you are a beginner and you do not know how to tune your MySQL server, you can start with a program called MySQLTuner. It will help you to analyze your server and to tune MySQL for better overall performances.

Congratulation’s! You have successfully installed MySQL. Thanks for using this tutorial for installing MySQL Server in Ubuntu 17.04 Zesty Zapus system. For additional help or useful information, we recommend you to check the official MySQL web site.