How To Install WebERP on Ubuntu 16.04 LTS

Install WebERP on Ubuntu 16

WebERP is an open source, web based accounting and business management instrument for Small and Medium Enterprises. It supports almost all platforms and is extremely useful as an internet store or a retail management system for business.

This article assumes you have at least basic knowledge of Linux, know how to use the shell, and most importantly, you host your site on your own VPS. The installation is quite simple and assumes you are running in the root account, if not you may need to add ‘sudo’ to the commands to get root privileges. I will show you through the step by step installation WebERP web based accounting and business management system on an Ubuntu 16.04 Xenial Xerus server.

Install WebERP on Ubuntu 16.04 LTS

Step 1. First make sure that all your system packages are up-to-date by running these following apt-get commands in the terminal.

sudo apt-get update
sudo apt-get upgrade

Step 2. Install LAMP (Linux, Apache, MariaDB, PHP) server.

A Ubuntu 16.04 LAMP server is required. If you do not have LAMP installed, you can follow our guide here. Also install all required PHP modules:

apt-get install php7.0-mysql php7.0-curl php7.0-json php7.0-cgi php7.0 libapache2-mod-php7.0 php7.0-mcrypt php7.0-xmlrpc php7.0-gd

Step 3. Installing WebERP on Ubuntu system.

First thing to do is to go to WebERP’s download page and download the latest stable version of WebERP, At the moment of writing this article it is version 4.14.1:

wget https://excellmedia.dl.sourceforge.net/project/web-erp/webERP4.14.1.zip

Unpack the WebERP archive to the document root directory on your server:

unzip webERP4.14.1.zip
cp -r webERP /var/www/html/weberp

We will need to change some folders permissions:

chown -R www-data:www-data /var/www/html/weberp

Step 4. Configuring MariaDB for WebERP.

By default, MariaDB is not hardened. You can secure MariaDB using the mysql_secure_installation script. you should read and below each steps carefully which will set root password, remove anonymous users, disallow remote root login, and remove the test database and access to secure MariaDB:

mysql_secure_installation

Configure it like this:

- Set root password? [Y/n] y
- Remove anonymous users? [Y/n] y
- Disallow root login remotely? [Y/n] y
- Remove test database and access to it? [Y/n] y
- Reload privilege tables now? [Y/n] y

Next we will need to log in to the MariaDB console and create a database for the WebERP. Run the following command:

mysql -u root -p

This will prompt you for a password, so enter your MariaDB root password and hit Enter. Once you are logged in to your database server you need to create a database for WebERP installation:

MariaDB [(none)]>CREATE USER 'weberp_usr'@'localhost' IDENTIFIED BY 'usr_strong_passwd';
MariaDB [(none)]>CREATE DATABASE weberpdb;
MariaDB [(none)]>GRANT ALL PRIVILEGES ON weberpdb.* TO 'weberp_usr'@'localhost';
MariaDB [(none)]>FLUSH PRIVILEGES;
MariaDB [(none)]>EXIT;

Step 5. Configuring Apache web server for WebERP.

Create a new virtual host directive in Apache. For example, create a new Apache configuration file named ‘weberp.conf’ on your virtual server:

sudo a2enmod rewrite
touch /etc/apache2/sites-available/weberp.conf
ln -s /etc/apache2/sites-available/weberp.conf /etc/apache2/sites-enabled/weberp.conf
nano /etc/apache2/sites-available/weberp.conf

Add the following lines:

<VirtualHost *:80>
ServerAdmin [email protected]
DocumentRoot /var/www/html/weberp
ServerName your-domain.com
ServerAlias www.your-domain.com
<Directory /var/www/html/weberp/>
Options FollowSymLinks
AllowOverride All
Order allow,deny
allow from all
</Directory>
ErrorLog /var/log/apache2/your-domain.com-error_log
CustomLog /var/log/apache2/your-domain.com-access_log common
</VirtualHost>

Now, we can restart Apache web server so that the changes take place:

a2ensite weberp
systemctl restart apache2.service

Step 6. Configuration Firewall for WebERP.

WebERP runs on port 80, so you will need to allow port 80 through the firewall:

sudo ufw enable
sudo ufw allow 80/tcp

Step 7. Accessing WebERP.

WebERP will be available on HTTP port 80 by default. Open your favorite browser and navigate to http://yourdomain.com/ or http://server-ip/ and complete the required the steps to finish the installation. If you are using a firewall, please open port 80 to enable access to the control panel.

How To Install Rancher on Ubuntu 16.04 LTS

Install Rancher on Ubuntu 16

The rancher is an open source program which helps you to run the containers in production. The rancher is based on Docker, which means it’s possible to run it on a dedicated box, KVM machine or perhaps on a LXC container. Rancher provides a huge library of applications which are installed in a few clicks and also supports docker pictures from Dockerhub.

This article assumes you have at least basic knowledge of linux, know how to use the shell, and most importantly, you host your site on your own VPS. The installation is quite simple and assumes you are running in the root account, if not you may need to add ‘sudo’ to the commands to get root privileges. I will show you through the step by step installation Rancher private container on a Ubuntu 16.04 (Xenial Xerus) server.

Install Rancher on Ubuntu 16.04 LTS

Step 1. First make sure that all your system packages are up-to-date

sudo apt-get update
sudo apt-get upgrade

Step 2. Installing Docker.

Before we install the Rancher server, we have to install the docker machine. If you do not have docker installed, you can follow our guide here.

Step 3. Installing Rancher.

On the Linux machine with Docker installed, the command to start a single instance of Rancher is simple:

docker run -d --restart=unless-stopped -p 8080:8080 rancher/server:stable

Step 4. Accessing Rancher.

Rancher will be available on HTTP port 8080 by default. Open your favorite browser and navigate to http://yourdomain.com:8080 or http://server-ip:8080 and complete the required the steps to finish the installation.

*Rancher doesn’t configure access control by default, so it is important to set this up immediately, otherwise the UI and API can be accessed by anyone who has your IP.

Congratulation’s! You have successfully installed Rancher. Thanks for using this tutorial for installing latest stable version of Rancher private container on Ubuntu 16.04 LTS (Xenial Xerus) system. For additional help or useful information, we recommend you to check the official Rancher web site.

How To Install OrientDB on Ubuntu 16.04

Install OrientDB on Ubuntu 16

OrientDB is an open source NoSQL database management system written in Java. It is a multi-model database, supporting graph, document, key/value, and object models, but the relationships are managed as in graph databases with direct connections between records.

This article assumes you have at least basic knowledge of Linux, know how to use the shell, and most importantly, you host your site on your own VPS. The installation is quite simple and assumes you are running in the root account, if not you may need to add ‘sudo’ to the commands to get root privileges. I will show you through the step by step installation OrientDB on a Ubuntu 16.04 (xenial xerus) server.

Install OrientDB on Ubuntu 16.04 LTS

Step 1. First, make sure that all your system packages are up-to-date

sudo apt-get update
sudo apt-get upgrade

Step 2. Installing Dependencies.

First of all, let’s install dependencies for OrientDB:

apt-get install oracle-java8-set-default git ant

Step 3. Installing OrientDB.

Download the latest version of OrientDB by executing the following command, At the moment of writing this article it is version 2.2.22:

wget -O orientdb-community-2.2.22.tar.gz http://orientdb.com/download.php?file=orientdb-community-2.2.22.tar.gz&os=linux

Once the package is downloaded we will untar and move the extracted folder to the /opt/orientdb:

tar -zxf orientdb-community-2.2.22.tar.gz
mv orientdb-community-2.2.22 /opt/orientdb

Step 4. Starting the OrientDB Server.

Change to the /opt/orientdb folder and start the OrientDB database server:

cd /opt/orientdb
sudo bin/server.sh

OrientDB should now prompt for the root password with a message like the one below:

+---------------------------------------------------------------+
|                WARNING: FIRST RUN CONFIGURATION               |
+---------------------------------------------------------------+
| This is the first time the server is running. Please type a   |
| password of your choice for the 'root' user or leave it blank |
| to auto-generate it.                                          |
|                                                               |
| To avoid this message set the environment variable or JVM     |
| setting ORIENTDB_ROOT_PASSWORD to the root password to use.   |
+---------------------------------------------------------------+

Step 5. Configure OrientDB Daemon.

Create a system user which we want to run OrientDB here we assume orientdb user:

useradd –r 0riendb –s  /sbin/nologin
chown –R orientdb:orientdb /opt/orientdb
nano /opt/orientdb/bin/orientdb.sh

Find the below line in the configuration and change them to:

# You have to SET the OrientDB installation directory here
ORIENTDB_DIR="/opt/orientdb"
ORIENTDB_USER="orientdb"

Once the configuration is done, change the configuration server file’s permission:

chmod 640 /opt/orientdb/config/orientdb-server-config.xml

Step 6. Install the Systemd service OrientDB.

First, we needed to copy the file to /etc/system/services folder:

cp /opt/orientdb/bin/orientdb.service /etc/systemd/system

Edit the OrientDB service file:

### nano /etc/systemd/system/orientdb.service

[Unit]
Description=OrientDB Server
After=network.target
After=syslog.target
[Install]
WantedBy=multi-user.target
[Service]
User=orientdb
Group=orientdb
ExecStart /opt/orientdb /bin/server.sh

Reload systemd daemon service:

systemctl daemon-reload

Start OrientDB and enable for starting at boot time:

systemctl start orientdb
systemctl enable orientdb

Congratulation’s! You have successfully installed OrientDB. Thanks for using this tutorial for installing OrientDB on Ubuntu 16.04 (xenial xerus) server. For additional help or useful information, we recommend you to check the official OrientDB web site.

How To Install KDE Plasma on Ubuntu 17.10

Install KDE Plasma on Ubuntu 17

Plasma is the KDE workspace. Actually it is a technology that can adapt to many types of devices. Currently there are two varieties of Plasma: The Plasma Desktop environment which is the focus of the majority of our pages and Plasma Mobile, the new cool environment for pads and smartphones.

This article assumes you have at least basic knowledge of Linux, know how to use the shell, and most importantly, you host your site on your own VPS. The installation is quite simple and assumes you are running in the root account, if not you may need to add ‘sudo’ to the commands to get root privileges. I will show you through the step by step installation KDE Plasma desktop environment on an Ubuntu Ubuntu 17.10 Artful Aardvark server.

Install KDE Plasma on Ubuntu 17.10 Artful Aardvark

Step 1. First make sure that all your system packages are up-to-date

sudo apt-get update
sudo apt-get upgrade

Step 2. Installing KDE Plasma on Ubuntu 17.10.

First, you need to add backports PPA to your Continue reading “How To Install KDE Plasma on Ubuntu 17.10”

How To Install GoAccess on Ubuntu 16.04 LTS

How To Install GoAccess on Ubuntu 16.04 LTS

GoAccess was designed to be a fast, terminal-based log analyzer. Its core idea is to quickly analyze and view web server statistics in real time without needing to use your browser (great if you want to do a quick analysis of your access log via SSH, or if you simply love working in the terminal).

Key Features — See Full List

  • Fast, real-time, millisecond/second updates, written in C
  • Only ncurses as a dependency
  • Nearly all web log formats (Apache, Nginx, Amazon S3, Elastic Load Balancing, CloudFront, etc)
  • Simply set the log format and run it against your log
  • Beautiful terminal and bootstrap dashboards (Tailor GoAccess to suit your own color taste/schemes)
  • and of course, Valgrind tested.

This article assumes you have at least basic knowledge of linux, know how to use the shell, and most importantly, you host your site on your own VPS. The installation is quite simple and assumes you are running in the root account, if not you may need to add ‘sudo’ to the commands to get root privileges. I will show you through the step by step installation GoAccess real time web log analyzer on a Ubuntu 16.04 (Xenial Xerus) server.

Install GoAccess on Ubuntu 16.04 LTS

Step 1. First make sure that all your system packages are up-to-date

sudo apt-get update
sudo apt-get upgrade

Step 2. Installing dependency packages.

Install the ncurses and gcc, run following command:

apt-get install libncursesw5-dev libglib2.0-dev libgeoip-dev libtokyocabinet-dev

Step 2. Installing GoAccess.

Run the following command to install GoAccess software:

wget http://tar.goaccess.io/goaccess-1.2.tar.gz
tar xvzf goaccess-1.2.tar.gz
cd goaccess-1.2
./configure --enable-utf8 --enable-geoip=legacy
make && make install

Create a soft link of goaccess in the /usr/bin directory by running:

ln -s /usr/local/bin/goaccess /usr/bin/goaccess

Step 3. Using GoAccess.

First, install Apache as our web server:

apt-get install apache2

After the installation process is finished, execute the following commands to start your Apache service:

systemctl start apache2
systemctl enable apache2

Allow the required HTTP port through the system firewall:

firewall-cmd --add-service=http --permanent
firewall-cmd --reload

For example, using the following command will create an analyzed HTML file from the Apache access log and place it in Apache’s default document root:

goaccess /var/log/apache2/access.log --log-format=COMBINED -a -o /var/www/html/report.html

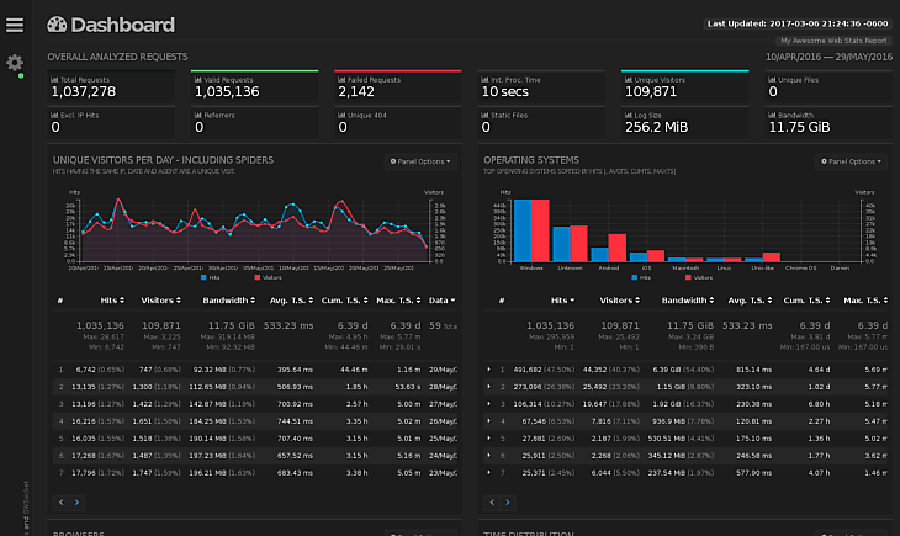
Now you can open your browser, Enter your IP address or your Domain name and add “/report.html” in the end to see your HTML output:

goaccess dashboard
Congratulation’s! You have successfully installed GoAccess. Thanks for using this tutorial for installing GoAccess real time web log analyzer on Ubuntu 16.04 LTS (Xenial Xerus) system. For additional help or useful information, we recommend you to check the official GoAccess web site.

How to Speed Up WordPress Using Redis Caching

How to Speed Up WordPress Using Redis Caching

WordPress is software designed for everyone, emphasizing accessibility, performance, security, and ease of use. WP believe great software should work with minimum set up, so you can focus on sharing your story, product, or services freely. The basic WordPress software is simple and predictable so you can easily get started. It also offers powerful features for growth and success.

But in non-geek speak, it’s probably the easiest and most powerful blogging and website content management system (or CMS) in existence today.

This article assumes you have at least basic knowledge of Linux, know how to use the shell, and most importantly, you host your site on your own VPS. The installation is quite simple and assumes you are running in the root account, if not you may need to add ‘sudo’ to the commands to get root privileges. I will show you through the step by step installation WordPress content management systems on a Ubuntu 16.04 server.

Speed Up WordPress Using Redis Caching

Step 1. First make sure that all your system packages are up-to-date

sudo apt-get update
sudo apt-get upgrade

Step 2. Installing WordPress

If you do not have WordPress installed, you can follow WP Installation guide here.

Step 3. Installing Redis.

In order to use Redis with WordPress, two packages need to be installed: redis-server and php-redis. The redis-server package provides Redis itself, while the php-redis package provides a PHP extension for PHP applications like WordPress to communicate with Redis:

apt-get install redis-server
apt-get install php-redis

Start and enable Redis on system boot:

systemctl start redis.service
systemctl enable redis.service

Step 4. Install Redis Caching Plugin in WordPress.

After installing Redis and the PHP Redis client extension, log in to your WordPress Dashboard and select Add New from the Plugins menu.

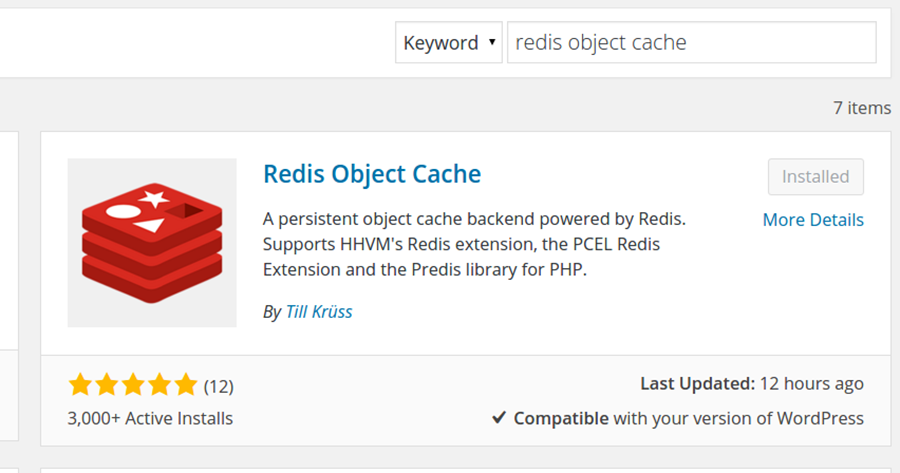
Then, search for “Redis Object Cache” and click Install Now on the matching result.

redis-object-cache
Next, navigate to Settins > Redis and click on Enable Object Cache to enable the object caching in WordPress. The default configuration should work out of the box sonce the default Redis listening address is 127.0.0.1 and the default listening port is 6379.

Step 5. Verify WordPress caching.

To check whether the WordPress caching works OK with Redis you can connect to your server via SSH and run the following command:

redis-cli monitor

When you run this command, you will see the real-time output of Redis serving cached queries. If you don’t see anything, visit your website and reload a page.

Congratulation’s! You have successfully installed WordPress with Redis Caching.

How To Install Apache Maven on Ubuntu 16.04 LTS

Install Apache Maven on Ubuntu 16

Apache Maven is a free and open source project management tool used for Java projects. You can easily handle a project’s build, reporting, and Documentation from a central piece of advice using Apache Maven. Apache Maven provides a complete framework to automate the job’s Build infrastructure.

This article assumes you have at least basic knowledge of linux, know how to use the shell, and most importantly, you host your site on your own VPS. The installation is quite simple and assumes you are running in the root account, if not you may need to add ‘sudo’ to the commands to get root privileges. I will show you through the step by step installation Apache Maven open source data visualization and monitoring suite on a Ubuntu 16.04 (Xenial Xerus) server.

Install Apache Maven on Ubuntu 16.04 LTS

Step 1. First make sure that all your system packages are up-to-date by running these following apt-get commands in the terminal.

sudo apt-get update
sudo apt-get upgrade

Step 2. Installing Java.

Apache Maven requires Java to be installed on your server. By default, Java is not available in Ubuntu’s repository. Add the Oracle Java PPA to Apt with the following command:

add-apt-repository ppa:webupd8team/java
apt-get update -y
apt-get install oracle-java8-installer

Verify the Java version by running the following command:

java -version

Step 3. Installing Apache Maven.

First thing to do is to go to Apache Maven’s download page and download the latest stable version of Apache Maven, At the moment of writing this article it is version 3.5.2:

wget http://www-eu.apache.org/dist/maven/maven-3/3.5.2/binaries/apache-maven-3.5.2-bin.tar.gz

Now extract downloaded archive using following command:

tar xzf apache-maven-3.5.2-bin.tar.gz
ln -s apache-maven-3.5.2 apache-maven

Step 4. Setup Environment Variables.

Now set the environments variables by creating new file /etc/profile.d/maven.sh:

nano /etc/profile.d/apache-maven.sh

Add following content:

export JAVA_HOME=/usr/lib/jvm/java-8-oracle
export M2_HOME=/usr/local/apache-maven
export MAVEN_HOME=/usr/local/apache-maven
export PATH=${M2_HOME}/bin:${PATH}

Now load the environment variables in current shell using following command:

source /etc/profile.d/apache-maven.sh

Step 5. Verify Installation.
Once everything has been successfully configured, check the version of the Apache Maven:

### mvn -version

Apache Maven 3.5.2 (138edd61fd100ec658bfa2d307c43b76940a5d7d; 2017-10-18T13:28:13+05:30)
Maven home: /usr/local/apache-maven
Java version: 1.8.0_144, vendor: Oracle Corporation
Java home: /usr/lib/jvm/java-8-oracle/jre
Default locale: en_IN, platform encoding: UTF-8
OS name: "linux", version: "4.4.0-46-generic", arch: "amd64", family: "unix"

Congratulation’s! You have successfully installed Apache Maven. Thanks for using this tutorial for installing Apache Maven on Ubuntu 16.04 LTS (Xenial Xerus) system. For additional help or useful information, we recommend you to check the official Apache Maven web site.