
LetsEncrypt is a free open certificate authority (CA) that provides free certificates for websites and other services. The service, which is backed by the Electronic Frontier Foundation, Mozilla, Cisco Systems, and Akamai. Unfortunately, LetsEncrypt.org certificates currently have a 3 month lifetime. This means you’ll need to renew your certificate quarterly for now.
This article assumes you have at least basic knowledge of linux, know how to use the shell, and most importantly, you host your site on your own VPS. The installation is quite simple and assumes you are running in the root account, if not you may need to add ‘sudo’ to the commands to get root privileges. I will show you through the step by step installation Let’s Encrypt SSL on a Ubuntu 16.04 LTS (Xenial Xerus) server.
Install Let’s Encrypt SSL on Ubuntu With Apache
Step 1. First make sure that all your system packages are up-to-date by running these following apt-get commands in the terminal.
apt-get update
apt-get upgrade
apt-get install git
Step 2. Install LAMP (Linux, Apache, MariaDB, PHP) server.
A Ubuntu 16.04 LAMP server is required. If you do not have LAMP installed, you can follow our guide here.
Step 3. Installing Let’s Encrypt SSL.
Next, run the commands below to clone Let’s Encrypt git project to your server and this will create a folder called letencrypt in the /opt directory:
git clone https://github.com/letsencrypt/letsencrypt /opt/letsencrypt
Generating Let’s Encrypt certificates:
cd /opt/letsencrypt
Run the commands below to generate a SSL certificate for your domain (example.com) or website:
./letsencrypt-auto --apache -d example.com
You can also use a single certificate on multiple domains and sub-domains, to do that, you’ll have to add them as additional perimeters to the command:
./letsencrypt-auto --apache -d example.com -d www.example.com
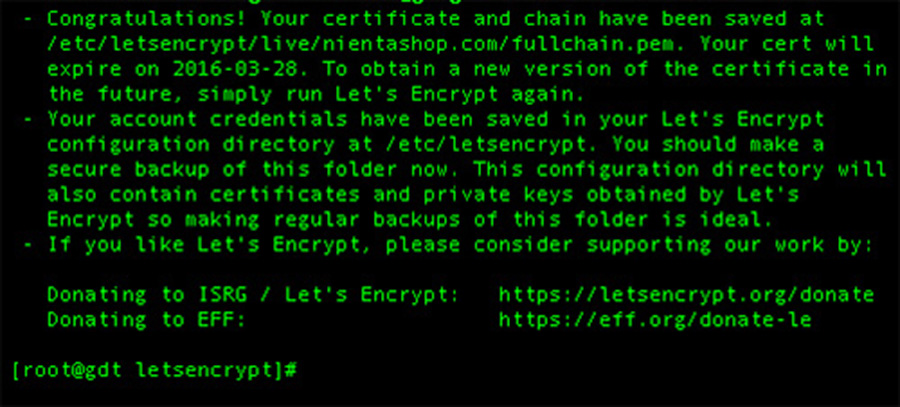
After the installation process finishes successfully a congratulation message is displayed on your console informing you about the expiration date and how you can test the configuration as illustrated on the below screenshots and you should be able to find the generated certificate files at /etc/letsencrypt/live.
Finally, now your domain should be accessible via HTTPS! Check it out at https://yourdomain.com.
Step 4. Set up auto renewal Let’s Encrypt.
Let’s Encrypt certificates are valid for 3 month, but it’s recommended that you renew the certificates every 2 month to allow a margin of error. To renew that certificate, you’ll have to come back into the /opt/letsencrypt directory and run the commands below:
./letsencrypt-auto renew
Or you can also setup a cron job to automatically renew your certificate before it expires by editing cron and specifying how often you want to check/renew:
sudo crontab -e
Add the line below and save:
0 0 * * 0 /opt/letsencrypt/letsencrypt-auto renew >> /var/log/le-renew.log
Congratulation’s! You have successfully installed Let’s Encrypt SSL. Thanks for using this tutorial for installing Let’s Encrypt SSL with Apache on your Ubuntu 16.04 LTS (Xenial Xerus) system. For additional help or useful information, we recommend you to check the official LetsEncrypt SSL web site.