How To Install Chamilo LMS 1.11.8 on Ubuntu 18.04 LTS

Install Chamilo on Ubuntu 18

Chamilo is an open-source (under GNU/GPL licensing) e-learning and content management system, aimed at improving access to education and knowledge globally. It is backed up by the Chamilo Association, which has goals including the promotion of the software, the maintenance of a clear communication channel and the building of a network of services providers and software contributors. The Chamilo project aims at ensuring the availability and quality of education at a reduced cost, through the distribution of its software free of charge, the improvement of its interface for 3rd world countries devices portability and the provision of a free access public e-learning campus.

This article assumes you have at least basic knowledge of linux, know how to use the shell, and most importantly, you host your site on your own VPS. The installation is quite simple and assumes you are running in the root account, if not you may need to add ‘sudo’ to the commands to get root privileges. I will show you through the step by step installation Chamilo on a Ubuntu 18.04 (Bionic Beaver) server.

Install Chamilo on Ubuntu 18.04 LTS

Step 1. First make sure that all your system packages are up-to-date

sudo apt-get update
sudo apt-get upgrade

Step 2. Install LAMP (Linux, Apache, MariaDB and PHP) server.

A Ubuntu 18.04 LAMP server is required. If you do not have LAMP installed, you can follow our guide here. Also install all required PHP modules:

apt-get install php7.1-cli php7.1-gd php7.1-opcache php7.1-mysql php7.1-json php7.1-mcrypt php7.1-xml php7.1-curl

You’ll need to also adjust some settings in your php.ini. Open up the file and edit these two variables:

nano /etc/php/7.1/apache2/php.ini

Also, add/modify the following settings:

date.timezone = 'America/New_York'
max_execution_time = 300
max_input_time = 600
memory_limit = 256M
post_max_size = 100M
upload_max_filesize = 100M
short_open_tag = Off
safe_mode = Off
magic_quotes_gpc = Off
magic_quotes_runtime = Off
session.cookie_httponly = On
extension = xapian.so

Step 3. Installing Chamilo on Ubuntu 18.04 LTS.

First thing to do is to go to Chamilo’s download page and download the latest stable version of Chamilo, At the moment of writing this article it is version 1.10:

wget https://github.com/chamilo/chamilo-lms/releases/download/v1.11.6/chamilo-1.11.6-php7.zip

Unpack the Chamilo archive to the document root directory on your server:

unzip chamilo-1.11.6-php7.zip -d /var/www/html/

We will need to change some folders permissions:

chown -R www-data: /var/www/html/

Step 4. Configuring MariaDB for Chamilo.

By default, MariaDB is not hardened. You can secure MariaDB using the mysql_secure_installation script. you should read and below each steps carefully which will set root password, remove anonymous users, disallow remote root login, and remove the test database and access to secure MariaDB:

mysql_secure_installation

Configure it like this:

- Set root password? [Y/n] y
- Remove anonymous users? [Y/n] y
- Disallow root login remotely? [Y/n] y
- Remove test database and access to it? [Y/n] y
- Reload privilege tables now? [Y/n] y

Next we will need to log in to the MariaDB console and create a database for the Chamilo. Run the following command:

mysql -u root -p

This will prompt you for a password, so enter your MariaDB root password and hit Enter. Once you are logged in to your database server you need to create a database for Chamilo installation:

CREATE DATABASE chamilodb;
CREATE USER 'chamilouser'@'localhost' IDENTIFIED BY 'Pa$$worD123';
GRANT ALL PRIVILEGES ON chamilodb.* TO 'chamilouser'@'localhost';
FLUSH PRIVILEGES;
quit

Step 5. Configuring Apache web server for Chamilo.

Create a new virtual host directive in Apache. For example, create a new Apache configuration file named ‘chamilo.conf’ on your virtual server:

touch /etc/apache2/sites-available/chamilo.conf
ln -s /etc/apache2/sites-available/chamilo.conf /etc/apache2/sites-enabled/chamilo.conf
nano /etc/apache2/sites-available/chamilo.conf

Add the following lines:

<VirtualHost *:80>
ServerAdmin [email protected]
DocumentRoot /var/www/html
ServerName your-domain.com
ServerAlias www.your-domain.com
<Directory /var/www/html/>
Options FollowSymLinks
AllowOverride All
</Directory>
ErrorLog /var/log/apache2/your-domain.com-error_log
CustomLog /var/log/apache2/your-domain.com-access_log common

Save and close the file. Restart the apache service for the changes to take effects:

a2ensite chamilo.conf
a2enmod rewrite
systemctl restart apache2

Step 6. Accessing Chamilo.

Chamilo will be available on HTTP port 80 by default. Open your favorite browser and navigate to http://yourdomain.com/ or http://server-ip/ and complete the required the steps to finish the installation. If you are using a firewall, please open port 80 to enable access to the control panel.
chamilo_ubuntu_install

Congratulation’s! You have successfully installed Chamilo. Thanks for using this tutorial for installing Chamilo e-learning and content management system on your Ubuntu 18.04 LTS (Bionic Beaver) system. For additional help or useful information, we recommend you to check the official Chamilo web site.
How To Install BlogoText CMS on Ubuntu 18.04 LTS

Install BlogoText CMS on Ubuntu 18

BlogoText is an open source, lightweight, web publishing platform (CMS) for creating minimalist blogs and websites.

This article assumes you have at least basic knowledge of Linux, know how to use the shell, and most importantly, you host your site on your own VPS. The installation is quite simple and assumes you are running in the root account, if not you may need to add ‘sudo’ to the commands to get root privileges. I will show you through the step by step installation BlogoText CMS on a Ubuntu 18.04 (Bionic Beaver) server.

BlogoText features:

    • Blog with comments and RSS feeds
    • Links sharing
    • RSS Reader
    • Images/Files uploading and sharing
    • JSON/ZIP/HTML import-export; WordPress import
    • Support Addons

Install BlogoText CMS on Ubuntu 18.04 LTS

Step 1. First make sure that all your system packages are up-to-date

sudo apt-get update
sudo apt-get upgrade

Step 2. Install LAMP (Linux, Apache, MariaDB and PHP) server.

A Ubuntu 18.04 LAMP server is required. If you do not have LAMP installed, you can follow our guide here. Also install all required PHP modules:

apt-get install php7.1-cli php7.1-mbstring php7.1-gd php7.1-opcache php7.1-mysql php7.1-json php7.1-mcrypt php7.1-xml php7.1-curl

You’ll need to also adjust some settings in your php.ini. Open up the file and edit these two variables:

nano /etc/php/7.1/apache2/php.ini

Also, add/modify the following settings:

date.timezone = 'America/New_York'
file_uploads = On
allow_url_fopen = On
short_open_tag = On
memory_limit = 256M
upload_max_filesize = 100M
max_execution_time = 360

Step 3. Installing BlogoText CMS on Ubuntu 18.04 LTS.

First thing to do is to go to BlogoText’s download page and download the latest stable version of BlogoText, At the moment of writing this article it is version 3.7:

https://github.com/BlogoText/blogotext/archive/3.7.6.zip
unzip 3.7.6.zip
sudo mv blogotext-3.7.6 /var/www/html/blogotext

We will need to change some folders permissions:

chown -R www-data:www-data /var/www/html/blogotext/
chmod -R 755 /var/www/html/blogotext/

Step 4. Configuring MariaDB for BlogoText CMS.

By default, MariaDB is not hardened. You can secure MariaDB using the mysql_secure_installation script. you should read and below each steps carefully which will set root password, remove anonymous users, disallow remote root login, and remove the test database and access to secure MariaDB:

mysql_secure_installation

Configure it like this:

- Set root password? [Y/n] y
- Remove anonymous users? [Y/n] y
- Disallow root login remotely? [Y/n] y
- Remove test database and access to it? [Y/n] y
- Reload privilege tables now? [Y/n] y

Next we will need to log in to the MariaDB console and create a database for the BlogoText CMS. Run the following command:

mysql -u root -p

This will prompt you for a password, so enter your MariaDB root password and hit Enter. Once you are logged in to your database server you need to create a database for BlogoText CMS installation:

CREATE DATABASE chamilodb;
CREATE USER 'chamilouser'@'localhost' IDENTIFIED BY 'Pa$$worD123';
GRANT ALL PRIVILEGES ON chamilodb.* TO 'chamilouser'@'localhost';
FLUSH PRIVILEGES;
quit

Step 5. Configuring Apache web server for BlogoText CMS.

Create a new virtual host directive in Apache. For example, create a new Apache configuration file named ‘blogotext.conf’ on your virtual server:

touch /etc/apache2/sites-available/blogotext.conf
ln -s /etc/apache2/sites-available/blogotext.conf /etc/apache2/sites-enabled/blogotext.conf
nano /etc/apache2/sites-available/blogotext.conf

Add the following lines:

<VirtualHost *:80>
ServerAdmin [email protected]
DocumentRoot /var/www/html/blogotext
ServerName your-domain.com
ServerAlias www.your-domain.com
<Directory /var/www/html/blogotext/>
Options FollowSymLinks
AllowOverride All
</Directory>
ErrorLog /var/log/apache2/your-domain.com-error_log
CustomLog /var/log/apache2/your-domain.com-access_log common

Save and close the file. Restart the apache service for the changes to take effects:

a2ensite blogotext.conf
a2enmod rewrite
systemctl restart apache2

BlogoText will be available on HTTP port 80 by default. Open your favorite browser and navigate to http://your-domain.com/ or http://server-ip/ and complete the required the steps to finish the installation. If you are using a firewall, please open port 80 to enable access to the control panel.

blogotext-install

Congratulation’s! You have successfully installed BlogoText CMS. Thanks for using this tutorial for installing BlogoText content management system on your Ubuntu 18.04 LTS (Bionic Beaver) system. For additional help or useful information, we recommend you to check the official BlogoText web site.

How To Install Backdrop CMS v1.12.6 on Ubuntu 18.04 LTS

Install Backdrop CMS on Ubuntu 18

Backdrop CMS is a full-featured content management system that allows non-technical users to manage a wide variety of content. It can be used to create all kinds of websites including blogs, image galleries, social networks, intranets, and more.

This article assumes you have at least basic knowledge of Linux, know how to use the shell, and most importantly, you host your site on your own VPS. The installation is quite simple and assumes you are running in the root account, if not you may need to add ‘sudo’ to the commands to get root privileges. I will show you through the step by step installation Backdrop CMS on an Ubuntu 18.04 Bionic Beaver server.

Install Backdrop CMS on Ubuntu 18.04 LTS

Step 1. First make sure that all your system packages are up-to-date

sudo apt-get update
sudo apt-get upgrade

Step 2. Install LAMP (Linux, Apache, MariaDB and PHP) server.

A Ubuntu 18.04 LAMP server is required. If you do not have LAMP installed, you can follow our guide here. Also install all required PHP modules:

apt-get install php7.1-cli php7.1-mbstring php7.1-gd php7.1-opcache php7.1-mysql php7.1-json php7.1-mcrypt php7.1-xml php7.1-curl

Step 3. Installing Backdrop CMS on Ubuntu 18.04 LTS.

First thing to do is to go to Backdrop CMS’s download page and download the latest stable version of Backdrop CMS, At the moment of writing this article it is version v1.10.1:

wget https://github.com/backdrop/backdrop/releases/download/1.10.1/backdrop.zip

Unpack the Backdrop archive to the document root directory on your server:

unzip backdrop.zip
mkdir -p /var/www/html
mv backdrop /var/www/html

We will need to change some folders permissions:

chown -R www-data:www-data /var/www/html/backdrop/

Step 4. Configuring MariaDB for Backdrop CMS.

By default, MariaDB is not hardened. You can secure MariaDB using the mysql_secure_installation script. You should read and below each steps carefully which will set root password, remove anonymous users, disallow remote root login, and remove the test database and access to secure MariaDB.

mysql_secure_installation

Configure it like this:

- Set root password? [Y/n] y
- Remove anonymous users? [Y/n] y
- Disallow root login remotely? [Y/n] y
- Remove test database and access to it? [Y/n] y
- Reload privilege tables now? [Y/n] y

Next we will need to log in to the MariaDB console and create a database for the Backdrop CMS. Run the following command:

mysql -u root -p

This will prompt you for a password, so enter your MariaDB root password and hit Enter. Once you are logged in to your database server you need to create a database for Backdrop CMS installation:

MariaDB [(none)]> CREATE DATABASE backdropdb character set UTF8;
MariaDB [(none)]> GRANT ALL PRIVILEGES ON mahara.* TO 'backdropuser'@'localhost' IDENTIFIED BY 'your-password';
MariaDB [(none)]> FLUSH PRIVILEGES;
MariaDB [(none)]> \q

Step 5. Configuring Apache web server for Backdrop CMS.

Create a new virtual host directive in Apache. For example, create a new Apache configuration file named ‘backdrop.conf’ on your virtual server:

touch /etc/apache2/sites-available/backdrop.conf
ln -s /etc/apache2/sites-available/backdrop.conf /etc/apache2/sites-enabled/backdrop.conf
nano /etc/apache2/sites-available/backdrop.conf

Add the following lines:

<VirtualHost *:80>
ServerAdmin [email protected]
DocumentRoot "/var/www/html/backdrop/"
ServerName your-domain.com
ServerAlias www.your-domain.com
<Directory "/var/www/html/backdrop/">
Options FollowSymLinks
AllowOverride All
Order allow,deny
allow from all
</Directory>
ErrorLog /var/log/apache2/your-domain.com-error_log
CustomLog /var/log/apache2/your-domain.com-access_log common
</VirtualHost>

Now, we can restart Apache web server so that the changes take place:

sudo a2enmod rewrite
a2ensite backdrop.conf
systemctl restart apache2.service

Step 6. Accessing Backdrop content management system.

Backdrop CMS will be available on HTTP port 80 by default. Open your favorite browser and navigate to http://yourdomain.com or http://server-ip and complete the required the steps to finish the installation. If you are using a firewall, please open port 80 to enable access to the control panel.

Congratulation’s! You have successfully installed Backdrop CMS. Thanks for using this tutorial for installing Backdrop CMS (content management system) on your Ubuntu 18.04 LTS (Bionic Beaver) system. For additional help or useful information, we recommend you to check the official Backdrop CMS Installation guide.

How To Install LEMP on Ubuntu 18.04 LTS

Install LEMP on Ubuntu 18

A LEMP software stack is a group of open source software that is typically installed together to enable a server to host dynamic websites and web apps. This term is actually an acronym which represents the Linux operating system, with the Nginx web server (which replaces the Apache component of a LAMP stack). The site data is stored in a MySQL database (using MariaDB), and dynamic content is processed by PHP.

This article assumes you have at least basic knowledge of Linux, know how to use the shell, and most importantly, you host your site on your own VPS. The installation is quite simple and assumes you are running in the root account, if not you may need to add ‘sudo’ to the commands to get root privileges. I will show you through the step by step installation LEMP stack (Linux, Nginx, MariaDB and PHP) on an Ubuntu 18.04 Bionic Beaver server.

Install LEMP on Ubuntu 18.04 LTS

Step 1. First make sure that all your system packages are up-to-date

sudo apt-get update
sudo apt-get upgrade

Step 2. Installing Nginx on Ubuntu 18.04 LTS.

Install Nginx with apt, which is the default package manager for Ubuntu:

sudo apt install nginx

Once installed, start Nginx service using the following command:

sudo systemctl start nginx

Now if you have your UFW firewall running, you will need to allow connections to Nginx:

sudo ufw allow 'Nginx HTTP'

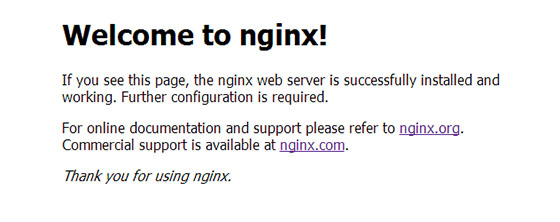
You can verify that Nginx is really running by opening your favorite web browser and entering the URL http://your-domain.com, if it is installed, then you will see this:Install LEMP on Ubuntu 18.04 LTS

nginx-default-page

To get Nginx to work with PHP correctly, we need to make changes to the Nginx configuration file. This guide we will be using a simple Nginx config file:

sudo nano /etc/nginx/sites-available/default

Copy the following into your text editor:

    server {
            listen       80;
            server_name  your_domain_name.com;
            root /usr/share/nginx/html;
            index index.php index.html;
            location / {
                    try_files $uri $uri/ =404;
            }
            error_page 404 /404.html;
            error_page 500 502 503 504 /50x.html;
            location = /50x.html {
                    root /var/www/html;
            }
            location ~ \.php$ {
                    try_files $uri =404;
                    fastcgi_pass unix:/var/run/php7.2-fpm.sock;
                    fastcgi_index index.php;
                    fastcgi_param SCRIPT_FILENAME $document_root$fastcgi_script_name;
                    include fastcgi_params;
            }
    }

Once you have finished editing the file restart Nginx with:

sudo nginx -t
sudo systemctl restart nginx

Step 4. Installing MariaDB on Ubuntu 18.04 LTS.

To install MariaDB in Ubuntu 18.04 run the following command:

sudo apt install mariadb-server

Once complete, you can verify MariaDB is installed by running the below command:

sudo systemctl status mariadb

By default, MariaDB is not hardened. You can secure MariaDB using the mysql_secure_installation script. you should read and below each steps carefully which will set root password, remove anonymous users, disallow remote root login, and remove the test database and access to secure MariaDB:

mysql_secure_installation

Configure it like this:

- Set root password? [Y/n] y
- Remove anonymous users? [Y/n] y
- Disallow root login remotely? [Y/n] y
- Remove test database and access to it? [Y/n] y
- Reload privilege tables now? [Y/n] y

To log into MariaDB, use the following command (note that it’s the same command you would use to log into a MariaDB database):

mysql -u root -p

Step 5. Installing PHP and Configure PHP-FPM Settings.

Unlike Apache, Nginx does not contain native PHP processing. For that we have to install PHP-FPM (FastCGI Process Manager):

sudo apt install php-fpm php-mysql

Once installed, check the PHP version:

php --version

Now open the PHP-FPM default file to edit the following content:

### nano /etc/php/7.2/fpm/php.ini
cgi.fix_pathinfo=0
date.timezone = Africa/Douala

Save the file and restart php-fpm:

systemctl restart php7.2-fpm

To test PHP, create a test file named info.php with he content below. Save the file, then browse to it to see if PHP is working:

nano /usr/share/nginx/html/info.php

Copy the following into your text editor:

<?php
phpinfo();
?>

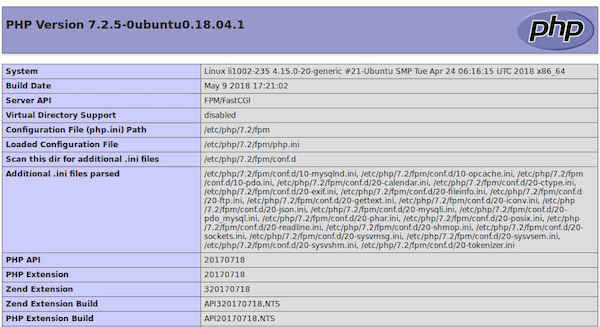
Try to access it at http://your_server_ip/info.php . If the PHP info page is rendered in your browser then everything looks good and you are ready to proceed further.

nginx-php7.2

Congratulation’s! You have successfully installed LEMP stack. Thanks for using this tutorial for installing LAMP (Linux, Nginx, MySQL and PHP) in Ubuntu 18.04 LTS system.

How To Install Phabricator on Ubuntu 18.04 LTS

Install Phabricator on Ubuntu 18

Phabricator is an open source collection of web applications which help software companies build better software. Phabricator is similar to GIT, and SVN. Currently maintained by Phacility, it was originally developed as an internal tool at Facebook. It is available as free software under the Apache License, version 2.

This article assumes you have at least basic knowledge of Linux, know how to use the shell, and most importantly, you host your site on your own VPS. The installation is quite simple and assumes you are running in the root account, if not you may need to add ‘sudo’ to the commands to get root privileges. I will show you through the step by step installation Phabricator on a Ubuntu 18.04 (Bionic Beaver) server.

Install Phabricator on Ubuntu 18.04 LTS

Step 1. First make sure that all your system packages are up-to-date

sudo apt-get update
sudo apt-get upgrade

Step 2. Install LAMP (Linux, Apache, MariaDB and PHP) server.

A Ubuntu 18.04 LAMP server is required. If you do not have LAMP installed, you can follow our guide here. Also install all required PHP modules:

apt-get install php7.1-cli php7.1-gd php7.1-opcache php7.1-mysql php7.1-json php7.1-mcrypt php7.1-xml php7.1-curl

Step 3. Installing Phabricator on Ubuntu 18.04 LTS.

First, create and switch to the directory in which we will download Phabricator and its dependencies run the following command:

mkdir /var/www/html/myapps
cd /var/www/html/myapps

Next, clone the needed Git repositories from Phacility:

sudo git clone https://github.com/phacility/libphutil.git
sudo git clone https://github.com/phacility/arcanist.git
sudo git clone https://github.com/phacility/phabricator.git

Step 4. Configuring MariaDB for Phabricator.

By default, MariaDB is not hardened. You can secure MariaDB using the mysql_secure_installation script. you should read and below each steps carefully which will set root password, remove anonymous users, disallow remote root login, and remove the test database and access to secure MariaDB:

mysql_secure_installation

Configure it like this:


- Set root password? [Y/n] y
- Remove anonymous users? [Y/n] y
- Disallow root login remotely? [Y/n] y
- Remove test database and access to it? [Y/n] y
- Reload privilege tables now? [Y/n] y

Next we will need to log in to the MariaDB console and create a database for the Phabricator. Run the following command:

mysql -u root -p

This will prompt you for a password, so enter your MariaDB root password and hit Enter. Once you are logged in to your database server you need to create a database for Phabricator installation:

use mysql;
ALTER USER 'root'@'localhost' IDENTIFIED WITH mysql_native_password BY 'your_mysql_root_password';
flush privileges;

Next, Enter the phabricator directory:

cd /var/www/html/myapp/phabricator

Now, it’s time to configure MySQL. Execute the following commands:

./bin/config set mysql.host localhost
./bin/config set mysql.user root
./bin/config set mysql.pass your_mysql_root_password

Then, run storage upgrade script to load the Phabricator schemata into it. You’ll be asked to press ‘y’ while loading database schema:

./bin/storage upgrade --user root --password your_mariadb_root_password

Step 5. Configuring Apache web server for Phabricator.

Create a new virtual host directive in Apache. For example, create a new Apache configuration file named ‘phabricator.conf’ on your virtual server:

sudo a2enmod rewrite
touch /etc/apache2/sites-available/phabricator.conf
ln -s /etc/apache2/sites-available/phabricator.conf /etc/apache2/sites-enabled/phabricator.conf
nano /etc/apache2/sites-available/phabricator.conf

Add the following lines:

<VirtualHost *:80>
ServerAdmin [email protected]
DocumentRoot /var/www/html/myapp/phabricator/webroot
ServerName your-domain.com
ServerAlias www.your-domain.com
<Directory /var/www/html/myapp/phabricator/webroot/>
Options FollowSymLinks
AllowOverride All
Order allow,deny
allow from all
</Directory>
ErrorLog /var/log/apache2/your-domain.com-error_log
CustomLog /var/log/apache2/your-domain.com-access_log common
</VirtualHost>

Now, we can restart Apache web server so that the changes take place:

sudo a2ensite phabricator
systemctl restart apache2.service

Step 6. Accessing Phabricator.

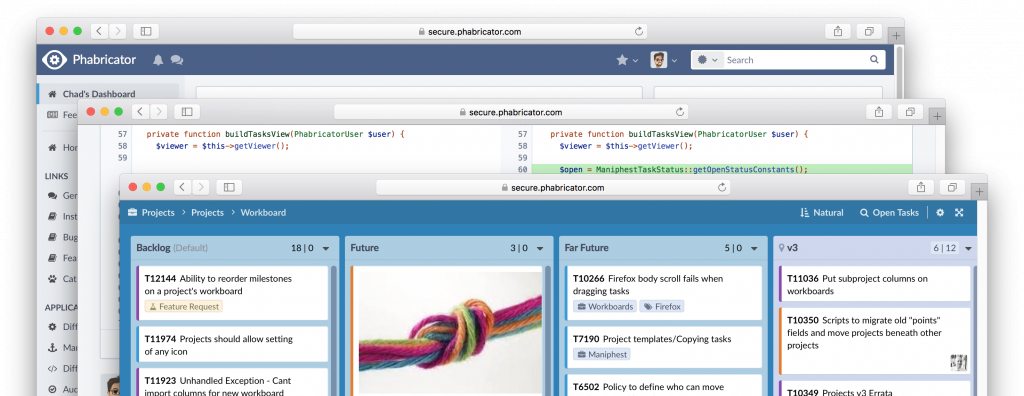
Phabricator will be available on HTTP port 80 by default. Open your favorite browser and navigate to http://phabricator.domain.com and complete the required the steps to finish the installation. If you are using a firewall, please open port 80 to enable access to the control panel.

install phabricator on ubuntu 18

Congratulation’s! You have successfully installed Phabricator. Thanks for using this tutorial for installing Phabricator in Ubuntu 18.04 LTS (Bionic Beaver) systems. For additional help or useful information, we recommend you to check the official Phabricator Installation page.

How To Install Craft CMS on Ubuntu 18.04 LTS

Install Craft CMS on Ubuntu 18

Craft is a content management system (CMS) designed for publishers who want more control and more powerful performances from their CMS. It is a PHP based application build on Yii framework.

This article assumes you have at least basic knowledge of Linux, know how to use the shell, and most importantly, you host your site on your own VPS. The installation is quite simple and assumes you are running in the root account, if not you may need to add ‘sudo’ to the commands to get root privileges. I will show you through the step by step installation Craft content management system (CMS) on a Ubuntu 18.04 LTS (Bionic Beaver) server.

Install Craft CMS on Ubuntu 18.04 LTS

Step 1. First make sure that all your system packages are up-to-date

sudo apt-get update
sudo apt-get upgrade

Step 2. Install LAMP (Linux, Apache, MariaDB and PHP) server.

A Ubuntu 18.04 LAMP server is required. If you do not have LAMP installed, you can follow our guide here. Also install all required PHP modules:

apt-get install php7.1-cli php7.1-gd php7.1-opcache php7.1-mysql php7.1-json php7.1-mcrypt php7.1-xml php7.1-curl

Step 3. Installing Craft CMS on Ubuntu 18.04 LTS.

First thing to do is to go to Craft CMS’s download page and download the latest stable version of Craft CMS, At the moment of writing this article it is version 3:

wget https://craftcms.com/latest-v3.zip

Unpack the Craft CMS archive to the document root directory on your server:

mkdir /var/www/html/craft
unzip latest-v3.zip -d /var/www/html/craft

We will need to change some folders permissions:

chown -R www-data:www-data /var/www/html/craft/
chmod -R 755 /var/www/html/craft/

Step 4. Configuring MariaDB for Craft CMS.

By default, MariaDB is not hardened. You can secure MariaDB using the mysql_secure_installation script. you should read and below each steps carefully which will set root password, remove anonymous users, disallow remote root login, and remove the test database and access to secure MariaDB:

mysql_secure_installation

Configure it like this:

- Set root password? [Y/n] y
- Remove anonymous users? [Y/n] y
- Disallow root login remotely? [Y/n] y
- Remove test database and access to it? [Y/n] y
- Reload privilege tables now? [Y/n] y

Next we will need to log in to the MariaDB console and create a database for the Craft CMS. Run the following command:

mysql -u root -p

This will prompt you for a password, so enter your MariaDB root password and hit Enter. Once you are logged in to your database server you need to create a database for Craft CMS installation:

CREATE DATABASE craft;
CREATE USER 'craftuser'@'localhost' IDENTIFIED BY 'PASSWORD';
GRANT ALL PRIVILEGES ON `craft`.* TO 'craftuser'@'localhost';
FLUSH PRIVILEGES;

Step 5. Configuring Apache web server for Craft CMS.

Create a new virtual host directive in Apache. For example, create a new Apache configuration file named ‘craft.conf’ on your virtual server:

touch /etc/apache2/sites-available/craft.conf
ln -s /etc/apache2/sites-available/craft.conf /etc/apache2/sites-enabled/craft.conf
nano /etc/apache2/sites-available/craft.conf

Add the following lines:

&amp;lt;VirtualHost *:80&amp;gt;
ServerAdmin [email protected]
DocumentRoot /var/www/html/craft/web
ServerName your-domain.com
ServerAlias www.your-domain.com
&amp;lt;Directory /var/www/html/craft/&amp;gt;
Options FollowSymLinks
AllowOverride All
Order allow,deny
allow from all
&amp;lt;/Directory&amp;gt;
ErrorLog /var/log/apache2/your-domain.com-error_log
CustomLog /var/log/apache2/your-domain.com-access_log common
&amp;lt;/VirtualHost&amp;gt;

Now, we can restart Apache web server so that the changes take place:

sudo a2ensite craft.conf
sudo a2enmod rewrite
sudo systemctl restart apache2.service

Step 6. Accessing Craft CMS.

Craft CMS will be available on HTTP port 80 by default. Open your favorite browser and navigate to http://yourdomain.com/admin or http://server-ip/admin and complete the required the steps to finish the installation. If you are using a firewall, please open port 80 to enable access to the control panel.

Congratulation’s! You have successfully installed Craft CMS. Thanks for using this tutorial for installing Craft content management system (CMS) on your Ubuntu 18.04 LTS (Bionic Beaver) system. For additional help or useful information, we recommend you to check the official Craft CMS Installation guide.

How To Install Sitemagic CMS on Ubuntu 18.04 LTS

Install Sitemagic CMS on Ubuntu 18

Sitemagic CMS is an amazing Content Management System that helps you build and maintain professional websites. Sitemagic CMS is a lightweight yet very capable Content Management System. Sitemagic CMS is super user friendly. Installation is easy as no database is required (but MySQL is supported for big websites). The administration menu provides easy access to all the built in functionality. Sitemagic CMS is super fast, super reliable, and super flexible, as you would expect from a professional Content Management System.

This article assumes you have at least basic knowledge of linux, know how to use the shell, and most importantly, you host your site on your own VPS. The installation is quite simple and assumes you are running in the root account, if not you may need to add ‘sudo’ to the commands to get root privileges. I will show you through the step by step installation Sitemagic CMS on a Ubuntu 18.04 LTS (Bionic Beaver) server.

Install Sitemagic CMS on Ubuntu 18.04 LTS

Step 1. First make sure that all your system packages are up-to-date

sudo apt-get update
sudo apt-get upgrade

Step 2. Install LAMP (Linux, Apache, MariaDB and PHP) server.

A Ubuntu 18.04 LAMP server is required. If you do not have LAMP installed, you can follow our guide here. Also install all required PHP modules:

apt-get install php7.1-cli php7.1-gd php7.1-opcache php7.1-mysql php7.1-json php7.1-mcrypt php7.1-xml php7.1-curl

Step 3. Installing Sitemagic CMS on Ubuntu 18.04 LTS.

First thing to do is to go to Sitemagic CMS’s download page and download the latest stable version of Sitemagic CMS, At the moment of writing this article it is version 4.3.0 series:

wget https://github.com/Jemt/SitemagicCMS/archive/master.zip
unzip master.zip
sudo mv SitemagicCMS-master /var/www/html/sitemagic

We will need to change some folders permissions:

chown -R www-data:www-data /var/www/html/sitemagic/
chmod -R 755 /var/www/html/sitemagic/

Step 4. Configuring MariaDB for Sitemagic CMS.

By default, MariaDB is not hardened. You can secure MariaDB using the mysql_secure_installation script. you should read and below each steps carefully which will set root password, remove anonymous users, disallow remote root login, and remove the test database and access to secure MariaDB:

mysql_secure_installation

Configure it like this:

- Set root password? [Y/n] y
- Remove anonymous users? [Y/n] y
- Disallow root login remotely? [Y/n] y
- Remove test database and access to it? [Y/n] y
- Reload privilege tables now? [Y/n] y

Next we will need to log in to the MariaDB console and create a database for the Sitemagic CMS. Run the following command:

mysql -u root -p

This will prompt you for a password, so enter your MariaDB root password and hit Enter. Once you are logged in to your database server you need to create a database for Sitemagic CMS installation:

CREATE DATABASE sitemagic;
CREATE USER 'siteuser'@'localhost' IDENTIFIED BY 'PASSWORD';
GRANT ALL PRIVILEGES ON `sitemagic`.* TO 'siteuser'@'localhost';
FLUSH PRIVILEGES;
exit

Step 5. Configuring Apache web server for Sitemagic CMS.

Create a new virtual host directive in Apache. For example, create a new Apache configuration file named ‘sitemagic.conf’ on your virtual server:

touch /etc/apache2/sites-available/sitemagic.conf
ln -s /etc/apache2/sites-available/sitemagic.conf /etc/apache2/sites-enabled/sitemagic.conf
nano /etc/apache2/sites-available/sitemagic.conf

Add the following lines:

<VirtualHost *:80>
ServerAdmin [email protected]
DocumentRoot /var/www/html/sitemagic
ServerName your-domain.com
ServerAlias www.your-domain.com
<Directory "/var/www/html/sitemagic/">
Options FollowSymLinks
AllowOverride All
Order allow,deny
allow from all
</Directory>
ErrorLog /var/log/apache2/your-domain.com-error_log
CustomLog /var/log/apache2/your-domain.com-access_log common
</VirtualHost>

Now, we can restart Apache web server so that the changes take place:

a2ensite sitemagic.conf
a2enmod rewrite
systemctl restart apache2.service

Step 6. Accessing Sitemagic CMS.

Sitemagic CMS will be available on HTTP port 80 by default. Open your favorite browser and navigate to http://yourdomain.com/ or http://server-ip/ and complete the required the steps to finish the installation, Also log in using ‘admin’ as username and ‘admin’ as password. If you are using a firewall, please open port 80 to enable access to the control panel.

Congratulation’s! You have successfully installed Sitemagic CMS. Thanks for using this tutorial for installing Sitemagic Content Management System on your Ubuntu 18.04 LTS (Bionic Beaver) system. For additional help or useful information, we recommend you to check the official Sitemagic web site.