How To Install phpMyAdmin 4.8.5 with Nginx on Ubuntu 18.04 LTS

Install phpMyAdmin with Nginx on Ubuntu 18

phpMyAdmin is a web-based client written in php for managing MySQL and MariaDB databases. It provides a user friendly web interface to access and manage your databases. To ease usage to a wide range of people, phpMyAdmin is being translated into 72 languages and supports both LTR and RTL languages.

This article assumes you have at least basic knowledge of Linux, know how to use the shell, and most importantly, you host your site on your own VPS. The installation is quite simple and assumes you are running in the root account, if not you may need to add ‘sudo’ to the commands to get root privileges. I will show you through the step by step installation phpMyAdmin with Nginx on an Ubuntu 18.04 LTS (Bionic Beaver) server.

Install phpMyAdmin with Nginx on Ubuntu

Step 1. First, make sure that all your system packages are up-to-date

sudo apt-get update
sudo apt-get upgrade


<strong> Step 2. Installing phpMyAdmin on Ubuntu 18.04 LTS.
</strong>

Use this command to install phpmyadmin on Ubuntu 18.04:
[php]
sudo apt install phpmyadmin

The installer will ask you to choose the web server that should be automatically configured to run phpMyAdmin. There is no option to choose Nginx, press TAB to select OK and then Enter. We’ll configure Nginx in the next section.
configuring-phpmyadmin-web-server

Next, the installer will ask you whether you want to use dbconfig-common tool to set up the database. Select Yes and hit Enter.
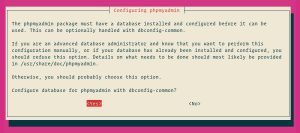
configuring-phpmyadmin-database

Enter a password for phpMyAdmin to register with the database, select OK and press Enter.
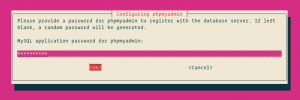
configuring-phpmyadmin-password

You will be prompted to confirm the password, enter the same password, select OK and press Enter.
configuring-phpmyadmin-confirm-password

Step 3. Configure Administrative MySQL.

Start by logging in to the MySQL server as the root user:

sudo mysql

From within the MySQL shell execute the following commands which will create a new administrative user and grant appropriate permissions:

CREATE USER 'padmin'@'localhost' IDENTIFIED BY 'change-with-your-secure-password';GRANT ALL PRIVILEGES ON *.* TO 'padmin'@'localhost' WITH GRANT OPTION;

Step 4. Configure Nginx to serve phpMyAdmin.

 In Nginx, virtual host file can be found in etc/nginx/snippets directory. Let’s create a file called “phpmyadmin.conf”:
sudo nano /etc/nginx/snippets/phpmyadmin.conf 

Add the following content:

location /phpmyadmin {
    root /usr/share/;
    index index.php index.html index.htm;
    location ~ ^/phpmyadmin/(.+\.php)$ {
        try_files $uri =404;
        root /usr/share/;
        fastcgi_pass unix:/run/php/php7.2-fpm.sock;
        fastcgi_index index.php;
        fastcgi_param SCRIPT_FILENAME $document_root$fastcgi_script_name;
        include /etc/nginx/fastcgi_params;
    }

    location ~* ^/phpmyadmin/(.+\.(jpg|jpeg|gif|css|png|js|ico|html|xml|txt))$ {
        root /usr/share/;
    }
}

Then, add the following line to each domain’s server block where you want to access phpMyAdmin using: domain.com/phpmyadmin:

include snippets/phpmyadmin.conf;
### /etc/nginx/conf.d/domain.com.conf

server {

    # . . . other code

    include snippets/phpMyAdmin.conf;

    # . . . other code 

}

Step 5. Finally, test phpMyAdmin.

Now open your browser and surf to http://youripaddress/phpMyAdmin and your phpmyadmin will ask you for user and password of your mysql installation, you can use root as user and the root mysql password, or any other mysql user/password.
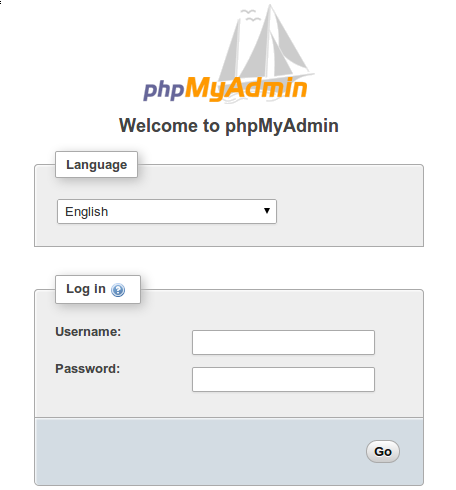
 

phpMyAdmin-login

Congratulation’s! You have successfully installed phpMyAdmin. Thanks for using this tutorial for installing phpMyAdmin with Nginx on Ubuntu 18.04 LTS system. For additional help or useful information, we recommend you to check the official phpMyAdmin web site.

How To Install PHP 7.2 on Ubuntu 18.04 LTS

Install PHP 7.2 on Ubuntu 18

PHP (recursive acronym for PHP: Hypertext Preprocessor) is an open source, popular general-purpose scripting language that is widely-used and best suited for developing websites and web-based applications. It is a server-side scripting language that can be embedded in HTML.

This article assumes you have at least basic knowledge of Linux, know how to use the shell, and most importantly, you host your site on your own VPS. The installation is quite simple and assumes you are running in the root account, if not you may need to add ‘sudo’ to the commands to get root privileges. I will show you through the step by step installation PHP 7.2 on a Ubuntu 18.04 (Bionic Beaver) server.

Install PHP 7.2 on Ubuntu 18.04 LTS

Step 1. First make sure that all your system packages are up-to-date

sudo apt update
sudo apt upgrade

Step 2. Installing PHP 7.2 on Ubuntu 18.04 LTS.

If Apache is installed and configured as your web server, then you can follow the steps below to install PHP 7.2:

sudo apt install php libapache2-mod-php

Once, the process is complete, execute the following command to restart your Apache service:

sudo systemctl restart apache2

Step 3. Installing PHP With Nginx Web Server.

Run the command below to install the latest version of PHP and the required PHP FPM packages:

sudo apt install php-fpm
[php]

Once the modules are installed, you can run the command below to check the status of your PHP FPM service:
[php]
systemctl status php7.2-fpm

Then, edit your Nginx server block and include the lines below to enable Nginx web server to process PHP files:

server {
        # . . . other code
        location~ .php$ {
            include snippets/fastcgi-php.conf;
            fastcgi_pass unix:/run/php/php7.2-fpm.sock;
        }
    }

Restart your Nginx web server for the configuration changes to take effect:

sudo systemctl restart nginx

Step 4. Installing PHP Extensions.

First, execute the command below to see all the available PHP modules:

sudo apt-cachesearch php7.2

To install one PHP 7.2 extension run the command:

sudo apt install php-[package name]

To test PHP, create a test file named info.php with he content below. Save the file, then browse to it to see if PHP is working:

nano /var/www/html/info.php

In this file, paste the following code:


<?php
phpinfo();
?>

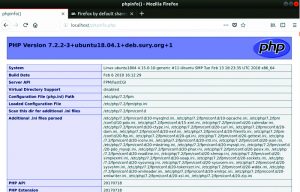
php_ubuntu_test_18.04_LTS.

Try to access it at http://your_server_ip/info.php . If the PHP info page is rendered in your browser then everything looks good and you are ready to proceed further.


Congratulation’s! You have successfully installed PHP 7.2. Thanks for using this tutorial for installing PHP 7.2 on Ubuntu 18.04 LTS (Bionic Beaver) system. For additional help or useful information, we recommend you to check the official PHP web site.

How To Install Let’s Encrypt SSL for Nginx on Ubuntu 18.04 LTS

Install Let’s Encrypt SSL for Nginx on Ubuntu 18

Let’s Encrypt is a free open certificate authority (CA) that provides free certificates for websites and other services. The service, which is backed by the Electronic Frontier Foundation, Mozilla, Cisco Systems, and Akamai. Unfortunately, LetsEncrypt.org certificates currently have a 3 month lifetime. This means you’ll need to renew your certificate quarterly for now.

This article assumes you have at least basic knowledge of Linux, know how to use the shell, and most importantly, you host your site on your own VPS. The installation is quite simple and assumes you are running in the root account, if not you may need to add ‘sudo’ to the commands to get root privileges. I will show you through the step by step installation Let’s Encrypt SSL for Nginx on Ubuntu 18.04 LTS server.

Install Let’s Encrypt SSL for Nginx on Ubuntu 18.04 LTS

Step 1. First make sure that all your system packages are up-to-date

apt-get update
apt-get upgrade

Step 2. Installing Let’s Encrypt SSL on Ubuntu 18.04 LTS.

First, Add certbot to the repository:

sudo add-apt-repository ppa:certbot/certbot
sudo apt update
sudo apt install python-certbot-nginx

Step 3. Setup Domain Name to Server Block.

Certbot automates the configuration of SSL for Nginx by looking for the server_name directive that matches the domain you’re requesting a certificate for. If you have already configured the server_name directive previously, you can skip to Step 4.

Step 4. Generate Certs using Certbot.

First, We can now generate certs using certbot. Replace intanramona.net with your own domain:

sudo certbot --nginx -d intanramona.net -d www.intanramona.net

Enter an email address where you can be contacted in case of urgent renewal and security notices:

Please read the Terms of Service at
https://letsencrypt.org/documents/LE-SA-v1.2-November-15-2017.pdf. You must
agree in order to register with the ACME server at
https://acme-v01.api.letsencrypt.org/directory
-------------------------------------------------------------------------------
(A)gree/(C)ancel:

Press a and ENTER to agree to the Terms of Service:

Would you be willing to share your email address with the Electronic Frontier
Foundation, a founding partner of the Let's Encrypt project and the non-profit
organization that develops Certbot? We'd like to send you email about EFF and
our work to encrypt the web, protect its users and defend digital rights.
-------------------------------------------------------------------------------
(Y)es/(N)o:

Press n and ENTER to not share your email address with EFF:

Obtaining a new certificate
Performing the following challenges:
http-01 challenge for intanramona.net
http-01 challenge for www.intanramona.net
Waiting for verification...
Cleaning up challenges
Deploying Certificate to VirtualHost /etc/nginx/sites-enabled/default

If successful, you will be able to choose between enabling both http and https access or forcing all requests to redirect to https:

Please choose whether or not to redirect HTTP traffic to HTTPS, removing HTTP access.
-------------------------------------------------------------------------------
1: No redirect - Make no further changes to the webserver configuration.
2: Redirect - Make all requests redirect to secure HTTPS access. Choose this for
new sites, or if you're confident your site works on HTTPS. You can undo this
change by editing your web server's configuration.
-------------------------------------------------------------------------------
Select the appropriate number [1-2] then [enter] (press 'c' to cancel):

Press 2 and ENTER to redirect HTTP traffic to HTTPS:

Redirecting all traffic on port 80 to ssl in /etc/nginx/sites-enabled/default

-------------------------------------------------------------------------------
Congratulations! You have successfully enabled https://devtest1.com and
https://www.devtest1.com

You should test your configuration at:
https://www.ssllabs.com/ssltest/analyze.html?d=intanramona.net
https://www.ssllabs.com/ssltest/analyze.html?d=www.intanramona.net
-------------------------------------------------------------------------------

IMPORTANT NOTES:
- Congratulations! Your certificate and chain have been saved at:
/etc/letsencrypt/live/intanramona.net/fullchain.pem
Your key file has been saved at:
/etc/letsencrypt/live/intanramona.net/privkey.pem
Your cert will expire on 2018-12-05. To obtain a new or tweaked
version of this certificate in the future, simply run certbot again
with the "certonly" option. To non-interactively renew *all* of
your certificates, run "certbot renew"
- If you like Certbot, please consider supporting our work by:

Donating to ISRG / Let's Encrypt: https://letsencrypt.org/donate
Donating to EFF: https://eff.org/donate-le

Step 5. Setup auto renewal Let’s Encrypt.

Let’s Encrypt certificates are valid for 3 month, they need to be checked for renewal periodically. Certbot will automatically run twice a day and renew any certificate that is within thirty days of expiration:

sudo certbot renew --dry-run

Congratulation’s! You have successfully installed Let’s Encrypt. Thanks for using this tutorial for installing Let’s Encrypt SSL on Ubuntu 18.04 LTS Bionic Beaver system. For additional help or useful information, we recommend you to check the official Let’s Encrypt web site.

How To Install LEMP on Ubuntu 18.04 LTS

Install LEMP on Ubuntu 18

A LEMP software stack is a group of open source software that is typically installed together to enable a server to host dynamic websites and web apps. This term is actually an acronym which represents the Linux operating system, with the Nginx web server (which replaces the Apache component of a LAMP stack). The site data is stored in a MySQL database (using MariaDB), and dynamic content is processed by PHP.

This article assumes you have at least basic knowledge of Linux, know how to use the shell, and most importantly, you host your site on your own VPS. The installation is quite simple and assumes you are running in the root account, if not you may need to add ‘sudo’ to the commands to get root privileges. I will show you through the step by step installation LEMP stack (Linux, Nginx, MariaDB and PHP) on an Ubuntu 18.04 Bionic Beaver server.

Install LEMP on Ubuntu 18.04 LTS

Step 1. First make sure that all your system packages are up-to-date

sudo apt-get update
sudo apt-get upgrade

Step 2. Installing Nginx on Ubuntu 18.04 LTS.

Install Nginx with apt, which is the default package manager for Ubuntu:

sudo apt install nginx

Once installed, start Nginx service using the following command:

sudo systemctl start nginx

Now if you have your UFW firewall running, you will need to allow connections to Nginx:

sudo ufw allow 'Nginx HTTP'

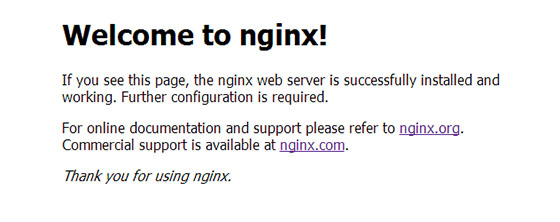
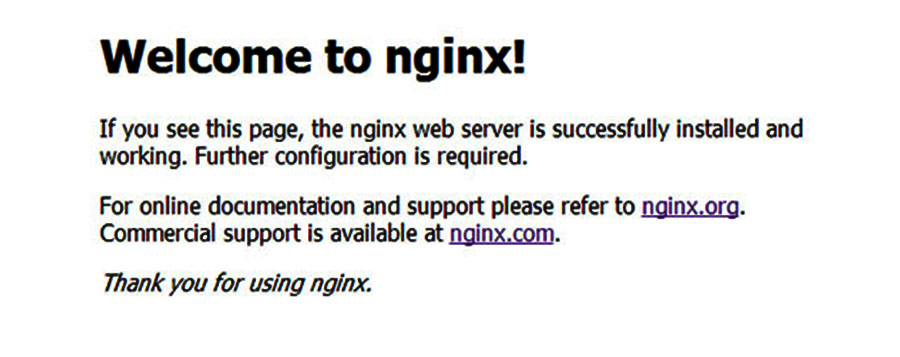
You can verify that Nginx is really running by opening your favorite web browser and entering the URL http://your-domain.com, if it is installed, then you will see this:Install LEMP on Ubuntu 18.04 LTS

nginx-default-page

To get Nginx to work with PHP correctly, we need to make changes to the Nginx configuration file. This guide we will be using a simple Nginx config file:

sudo nano /etc/nginx/sites-available/default

Copy the following into your text editor:

    server {
            listen       80;
            server_name  your_domain_name.com;
            root /usr/share/nginx/html;
            index index.php index.html;
            location / {
                    try_files $uri $uri/ =404;
            }
            error_page 404 /404.html;
            error_page 500 502 503 504 /50x.html;
            location = /50x.html {
                    root /var/www/html;
            }
            location ~ \.php$ {
                    try_files $uri =404;
                    fastcgi_pass unix:/var/run/php7.2-fpm.sock;
                    fastcgi_index index.php;
                    fastcgi_param SCRIPT_FILENAME $document_root$fastcgi_script_name;
                    include fastcgi_params;
            }
    }

Once you have finished editing the file restart Nginx with:

sudo nginx -t
sudo systemctl restart nginx

Step 4. Installing MariaDB on Ubuntu 18.04 LTS.

To install MariaDB in Ubuntu 18.04 run the following command:

sudo apt install mariadb-server

Once complete, you can verify MariaDB is installed by running the below command:

sudo systemctl status mariadb

By default, MariaDB is not hardened. You can secure MariaDB using the mysql_secure_installation script. you should read and below each steps carefully which will set root password, remove anonymous users, disallow remote root login, and remove the test database and access to secure MariaDB:

mysql_secure_installation

Configure it like this:

- Set root password? [Y/n] y
- Remove anonymous users? [Y/n] y
- Disallow root login remotely? [Y/n] y
- Remove test database and access to it? [Y/n] y
- Reload privilege tables now? [Y/n] y

To log into MariaDB, use the following command (note that it’s the same command you would use to log into a MariaDB database):

mysql -u root -p

Step 5. Installing PHP and Configure PHP-FPM Settings.

Unlike Apache, Nginx does not contain native PHP processing. For that we have to install PHP-FPM (FastCGI Process Manager):

sudo apt install php-fpm php-mysql

Once installed, check the PHP version:

php --version

Now open the PHP-FPM default file to edit the following content:

### nano /etc/php/7.2/fpm/php.ini
cgi.fix_pathinfo=0
date.timezone = Africa/Douala

Save the file and restart php-fpm:

systemctl restart php7.2-fpm

To test PHP, create a test file named info.php with he content below. Save the file, then browse to it to see if PHP is working:

nano /usr/share/nginx/html/info.php

Copy the following into your text editor:

<?php
phpinfo();
?>

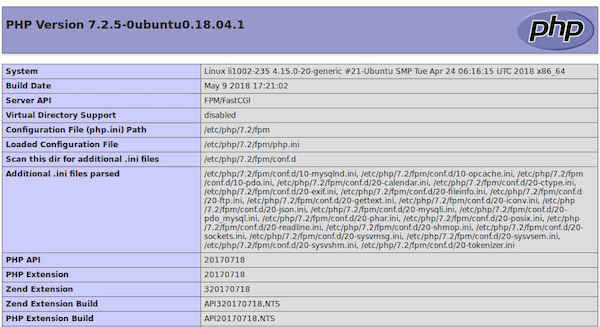
Try to access it at http://your_server_ip/info.php . If the PHP info page is rendered in your browser then everything looks good and you are ready to proceed further.

nginx-php7.2

Congratulation’s! You have successfully installed LEMP stack. Thanks for using this tutorial for installing LAMP (Linux, Nginx, MySQL and PHP) in Ubuntu 18.04 LTS system.

How To Install Nginx Mainline Version on Ubuntu 16.04 LTS

Install Nginx Mainline Version on Ubuntu 16

Nginx has two primary repositories or branches that folks can use to install or update Nginx packages. When you install Nginx from Ubuntu default repositories, you’re installing Nginx from the stable repository. In this tutorial we will show you how to install Nginx Mainline Version on Ubuntu 16.04 LTS.

This article assumes you have at least basic knowledge of Linux, know how to use the shell, and most importantly, you host your site on your own VPS. The installation is quite simple and assumes you are running in the root account, if not you may need to add ‘sudo’ to the commands to get root privileges. I will show you through the step by step installation Nginx Mainline Version on a Ubuntu 16.04 (Xenial Xerus) server.

Install Nginx Mainline Version on Ubuntu 16.04 LTS

Step 1. First make sure that all your system packages are up-to-date

sudo apt-get update
sudo apt-get upgrade

Step 2. Installing nginx mainline verison.

First, we will need to add the official Nginx repository:

nano /etc/apt/sources.list

Next, append the following two lines at the end of the file:

deb http://nginx.org/packages/mainline/ubuntu/ xenial nginx
deb-src http://nginx.org/packages/mainline/ubuntu/ xenial nginx

Then, add the repository key. The key is there so Ubuntu can validate that the packages downloading from Nginx’s repository are trusted:

wget http://nginx.org/keys/nginx_signing.key
apt-key add nginx_signing.key

Run the commands below to install Nginx:

apt-get update
apt-get install nginx

Check Nginx version:

### nginx -v
nginx version: nginx/1.13.8

Start Nginx and add it to automatically start on your system start-up using:

systemctl restart nginx
systemctl enable nginx

You can verify that Nginx is really running by opening your favorite web browser and entering the URL http://your-server’s-address, if it is installed, then you will see this:

nginx-default-page
Congratulation’s! You have successfully installed Nginx. Thanks for using this tutorial for installing latest stable version of Nginx mainline version web server on Ubuntu 16.04 LTS (Xenial Xerus) system. For additional help or useful information, we recommend you to check the official Nginx web site.

How To Install LEMP on Ubuntu 17.10

Install LEMP on Ubuntu 17

A LEMP software stack is a group of open source software that is typically installed together to enable a server to host dynamic websites and web apps. This term is actually an acronym which represents the Linux operating system, with the Nginx web server (which replaces the Apache component of a LAMP stack). The site data is stored in a MySQL database (using MariaDB), and dynamic content is processed by PHP. In this tutorial we will show you how to install LEMP on Ubuntu 17.10 Artful Aardvark.

This article assumes you have at least basic knowledge of Linux, know how to use the shell, and most importantly, you host your site on your own VPS. The installation is quite simple and assumes you are running in the root account, if not you may need to add ‘sudo’ to the commands to get root privileges. I will show you through the step by step installation LEMP Stack on an Ubuntu Ubuntu 17.10 Artful Aardvark server.

Install LEMP on Ubuntu 17.10 Artful Aardvark

Step 1. First make sure that all your system packages are up-to-date

sudo apt-get update
sudo apt-get upgrade

Step 2. Installing Nginx on Ubuntu 17.10.

Install Nginx with apt-get, which is the default package manager for Ubuntu:

sudo apt-get install nginx

Start Nginx service using the following command:

sudo systemctl start nginx

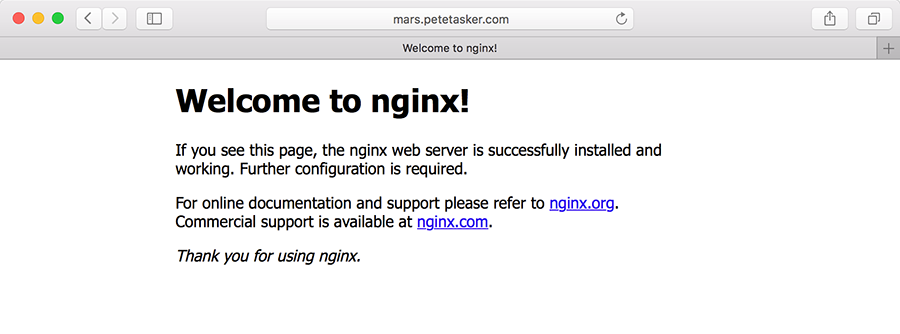
You can verify that Nginx is really running by opening your favorite web browser and entering the URL http://your-server’s-address, if it is installed, then you will see this:
Welcome_to_nginx_cropped

Step 3 Configure Nginx web server.

To get Nginx to work with PHP correctly, we need to make changes to the Nginx configuration file. This guide we will be using a simple Nginx config file:

sudo nano /etc/nginx/sites-available/default

Copy the following into your text editor:

    server {
            listen       80;
            server_name  your_domain_name.com;
            root /usr/share/nginx/html;
            index index.php index.html;
            location / {
                    try_files $uri $uri/ =404;
            }
            error_page 404 /404.html;
            error_page 500 502 503 504 /50x.html;
            location = /50x.html {
                    root /var/www/html;
            }
            location ~ \.php$ {
                    try_files $uri =404;
                    fastcgi_pass unix:/var/run/php5-fpm.sock;
                    fastcgi_index index.php;
                    fastcgi_param SCRIPT_FILENAME $document_root$fastcgi_script_name;
                    include fastcgi_params;
            }
    }

Once you have finished editing the file restart Nginx with:

sudo nginx -t
sudo systemctl restart nginx

Step 4. Installing MySQL on Ubuntu 17.10.

To install MySQL in Ubuntu 17.10 run the following command:

sudo apt-get install mysql-server php7.0-mysql

Once complete, you can verify MySQL is installed by running the below command:

systemctl status mysql

By default, MySQL is not hardened. You can secure MySQL using the mysql_secure_installation script. you should read and below each steps carefully which will set root password, remove anonymous users, disallow remote root login, and remove the test database and access to secure MySQL:

mysql_secure_installation

Configure it like this:

- Set root password? [Y/n] y
- Remove anonymous users? [Y/n] y
- Disallow root login remotely? [Y/n] y
- Remove test database and access to it? [Y/n] y
- Reload privilege tables now? [Y/n] y

To log into MySQL, use the following command (note that it’s the same command you would use to log into a MySQL database):

mysql -u root -p

Step 5. Installing and Configuring PHP on Ubuntu 17.10

Install PHP on the Ubuntu 17.10 with the following command to begin the install:

sudo apt-get install php php-fpm php7.0-mysql

Once the installation is finished, edit the server php.ini file and change the cgi.fix_pathinfo parameter value to 0. By default it will be commented out with a semi-colon and the value set to 1 which practically ensures that PHP will attempt to execute the closest file available when a requested PHP file can’t be found. This is a bad security practice, so let’s change it. Execute the below command:

nano /etc/php/7.0/fpm/php.ini

Now find the cgi.fix_pathinfo line, uncomment it and set the value to 0. Save and close the file.

Your server should restart Nginx automatically after the installation of both MySQL and PHP. If it doesn’t, execute this command:

sudo systemctl restart nginx

To test PHP, create a test file named info.php with he content below. Save the file, then browse to it to see if PHP is working:

nano /usr/share/nginx/html/info.php

Copy the following into your text editor:

<?php phpinfo(); ?>

Try to access it at http://your_server_ip/info.php . If the PHP info page is rendered in your browser then everything looks good and you are ready to proceed further.

Congratulation’s! You have successfully installed LEMP stack. Thanks for using this tutorial for installing LAMP (Linux, Nginx, MySQL and PHP) in Ubuntu 17.10 Artful Aardvark system. For additional help or useful information, we recommend you to check the official Nginx, MySQL and PHP web site.

How To Install Varnish Cache on Ubuntu 18.04 LTS

Varnish Cache on Ubuntu 18

Varnish Cache is a powerful open source HTTP accelerator that can be installed in front of any Webserver such as Apache or Nginx. Varnish Cache can improve overall performance of your web server by caching contents. The Varnish cache stores the copy of user request’s and serves the same page when the user revisits the webpage. It makes your website really fast and accelerate your web site performance up-to 300 – 1000x (means 80% or more).

This article assumes you have at least basic knowledge of Linux, know how to use the shell, and most importantly, you host your site on your own VPS. The installation is quite simple and assumes you are running in the root account, if not you may need to add ‘sudo’ to the commands to get root privileges. I will show you through the step by step installation Varnish Cache on a Ubuntu 18.04 (Bionic Beaver) server.

Install Varnish Cache on Ubuntu 18.04 LTS Bionic Beaver

Step 1. First make sure that all your system packages are up-to-date by running these following apt-get commands in the terminal.

sudo apt-get update
sudo apt-get upgrade

Step 2. Install Apache web server.

For this part we will be assuming that you have already installed Apache on your server and have it running properly. If not write this command in your terminal:

sudo apt-get install apache2

Step 3. Installing Varnish on Ubuntu 18.04 LTS.

Install Varnish using apt-get command:

apt-get install varnish

After the installation is finished, start and enable varnish.service using the systemctl command:

systemctl start varnish.service
systemctl enable varnish.service

Step 4. Configuring Varnish Cache on Ubuntu 18.04 Bionic Beaver.

Varnish is automatically configured to server content over port 80 and fetch contents from Apache on port 8080, we need to update Apache to serve content over port 8080:

# If you just change the port or add more ports here, you will likely also
# have to change the VirtualHost statement in
# /etc/apache2/sites-enabled/000-default.conf

NameVirtualHost 127.0.0.1:8080
Listen 127.0.0.1:8080

If you have any virtual hosts configured, you will need to update these as well – ensure your configuration looks like this:

<VirtualHost 127.0.0.1:8080>

We need to configure varnish to run on port 80. First, create a file called varnish.service inside the /etc/systemd/system directory:

### nano /etc/systemd/system/varnish.service

Then, add the following configuration:

[Service]
ExecStart=/usr/sbin/varnishd -j unix,user=vcache -F -a :80 -T localhost:6082 -f /etc/varnish/default.vcl -S /etc/varnish/secret -s malloc,256m

Once you save and exit out of that file, open up the default.vcl file:

### nano /etc/varnish/default.vcl
backend default {
    .host = "127.0.0.1";
    .port = "8080";
}

Restart the Apache and Varnish service for the changes to take effect:

systemctl restart apache2.service
systemctl restart varnish.service

You can check to see if varnish is working by typing the following command:

varnishstat

Step 5. Testing Varnish.

The test consists in making a HTTP request via curl and verifying that it is handled by Varnish:

[[email protected] ~ ]# curl -I 192.168.10.100
 HTTP/1.1 403 Forbidden
 Date: Mon, 17 March 2018 24:06:10 GMT
 Server: Apache/2.4.6 (Ubuntu) PHP/7.0.16
 Last-Modified: Thu, 16 Dec 2017 19:30:58 GMT
 ETag: "1321-5758ramona728280"
 Accept-Ranges: bytes
 Content-Length: 4897
 Content-Type: text/html; charset=UTF-8
 X-Varnish: 32779
 Age: 4
 Via: 1.1 varnish-v5
 Connection: keep-alive

Congratulation’s! You have successfully installed Varnish. Thanks for using this tutorial for installing Varnish Cache on Ubuntu 18.04 LTS (Bionic Beaver) system. For additional help or useful information, we recommend you to check the official Varnish web site.

[youtube https://www.youtube.com/watch?v=fGD14ChpcL4]