How To Install Nginx on Ubuntu 18.04 LTS

Install Nginx on Ubuntu 18

Nginx is a powerful web server software that can be used on your server. It is also known for its high performance and low memory usage which will allow fewer resources to be used but getting the job done efficiently. A popular set up is to use it as a proxy for Apache, which can then serve application requests.

This article assumes you have at least basic knowledge of Linux, know how to use the shell, and most importantly, you host your site on your own VPS. The installation is quite simple and assumes you are running in the root account, if not you may need to add ‘sudo’ to the commands to get root privileges. I will show you through the step by step installation Nginx on a Ubuntu 18.04 (Bionic Beaver) server.

Install Nginx on Ubuntu 18.04 LTS Bionic Beaver

Step 1. First make sure that all your system packages are up-to-date by running these following apt-get commands in the terminal.

sudo apt-get update
sudo apt-get upgrade

Step 2. Installing Nginx.

Installing nginx package on Ubuntu 18.04 Bionic Beaver) is as easy as running:

apt-get install nginx

After that, run the commands to enable Nginx to automatically startup when your server starts:

sudo systemctl stop nginx.service
sudo systemctl start nginx.service
sudo systemctl enable nginx.service

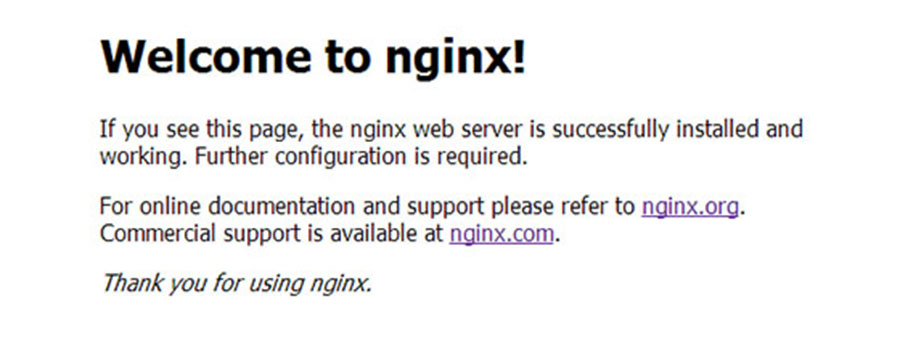
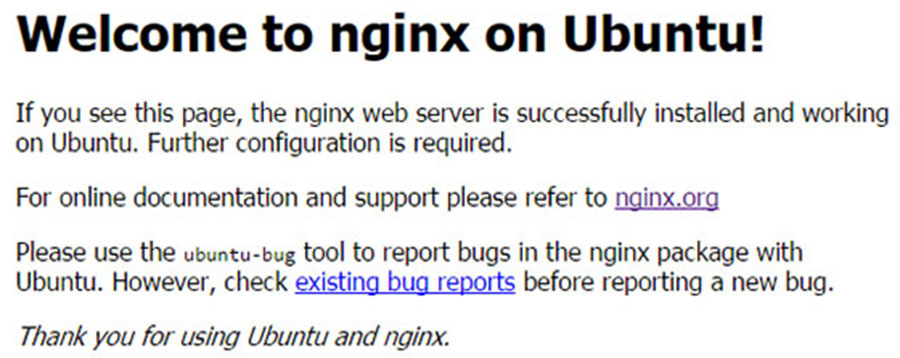
To test Nginx setup, open your browser and browse to the server hostname or IP address and you should see Nginx default test page as shown below:

Nginx-Default-Page-Ubuntu

Step 3. Configure Nginx.

Nginx site-specific configuration files are kept in /etc/nginx/conf.d/. Generally you will want a separate file in this directory for each domain or subdomain you will be hosting.

Copy the default configuration file. Replace wpcademy.com with your website’s domain name or your public IP address.


sudo cp /etc/nginx/conf.d/default.conf /etc/nginx/conf.d/https://wpcademy.com.conf

Open your site’s configuration file in a nano text editor. Replace example.com in the server_name directive with your site’s domain name or IP address. If you already have content ready to serve (such as a WordPress installation) replace the path in the root directive with the path to your site’s content:


server {
 listen 80;
 server_name wpcademy.com;

#charset koi8-r;
 #access_log /var/log/nginx/host.access.log main;

location / {
 root /usr/share/nginx/html;
 index index.html index.htm;
 }

#error_page 404 /404.html;

# redirect server error pages to the static page /50x.html
 #
 error_page 500 502 503 504 /50x.html;
 location = /50x.html {
 root /usr/share/nginx/html;
 }
}

Test your configuration for errors:

nginx -t

Step 4. Configure the Firewall for Nginx.
Firewall software needs to be adjusted to allow access to the service. Nginx registers itself as a service with ufw upon installation, making it straightforward to allow Nginx access:

sudo ufw allow 'Nginx HTTP'

Congratulations! You have successfully installed Nginx. Thanks for using this tutorial for installing Nginx web server in Ubuntu 18.04 LTS (Bionic Beaver) system. For additional help or useful information, we recommend you to check the official Nginx web site.

How To Install Nginx Amplify Agent on Ubuntu 16.04 LTS

Install Nginx Amplify Agent on Ubuntu 16

Nginx Amplify Agent is a Strong Nginx monitoring tool written in Python. Its function is to collect various metrics and metadata and send Them securely into the backend for storage and visualization. After appropriate Installation, it supplies you with NGINX Amplify web interface and also you Should observe real-time metrics to your monitored systems.

This article assumes you have at least basic knowledge of Linux, know how to use the shell, and most importantly, you host your site on your own VPS. The installation is quite simple and assumes you are running in the root account, if not you may need to add ‘sudo’ to the commands to get root privileges. I will show you through the step by step installation Nginx Amplify Agent monitoring tool on an Ubuntu 16.04 Xenial Xerus server.

Install Nginx Amplify Agent on Ubuntu 16.04 LTS

Step 1. First make sure that all your system packages are up-to-date by running these following apt-get commands in the terminal.

sudo apt-get update
sudo apt-get upgrade

Step 2. Installing Nginx Amplify Agent on Ubuntu 16.04.

First, add the necessary public key with the command:

curl -fs http://nginx.org/keys/nginx_signing.key | apt-key add -

Configure the repository with the command:

# codename=`lsb_release -cs` && \
os=`lsb_release -is | tr '[:upper:]' '[:lower:]'` && \
echo "deb http://packages.amplify.nginx.com/${os}/ ${codename} amplify-agent" > \
/etc/apt/sources.list.d/nginx-amplify.list

Install the Nginx Amplify Agent using apt:

apt-get update
apt-get install nginx-amplify-agent

Creating the Config File from a Template:

api_key="KEY" && \
sed "s/api_key.*$/api_key = ${api_key}/" \
/etc/amplify-agent/agent.conf.default > \
/etc/amplify-agent/agent.conf

*Where KEY is the API key is the unique key assigned to your NGINX Amplify account.

Once installed, These commands can be used to start/stop the agent:

systemctl enable amplify-agent
systemctl start amplify-agent

Step 3. Configuring the Nginx Amplify Agent.

Checklist:

stub status
extended access logging
‘warn’ level on error logging


server {
 listen [::]:80;
 server_name bmw.wpcademy.com localhost [::1] 127.0.0.1;
 keepalive_timeout 60;

location /nginx_status {
 stub_status;
 access_log off;

allow ::1;
 allow 127.0.0.1;
 deny all;
 }
}

The logging needs to be confiured to have extended information as per the documentation:

log_format  main      '$remote_addr - $remote_user [$time_local] "$request" '
                      ' $status $body_bytes_sent "$http_referer" '
                      '"$http_user_agent" "$http_x_forwarded_for" '
                      'rt=$request_time ua="$upstream_addr" '
                      'us="$upstream_status" ut="$upstream_response_time" '
                      'ul="$upstream_response_length" '
                      'cs=$upstream_cache_status' ;

Ensure warnings are logged to the error log:

error_log /var/log/nginx/error.log warn

Finally steps, You can overview the status of our monitored server in the Web interface logging to your Amplify Account as in the snapshot:
nginx-amplify-agent

Congratulation’s! You have successfully installed Nginx Amplify Agent. Thanks for using this tutorial for installing Nginx Amplify Agent monitoring tool on your Ubuntu 16.04 LTS. For additional help or useful information, we recommend you to check the official Nginx Amplify Agent web site.

How To Install Rocket.Chat on Ubuntu 16.04 LTS

Install Rocket.Chat on Ubuntu 16

Rocket.Chat is one of the most popular open source chat software. A fantastic alternate to both Slack and compensated live chat software. It’s free, what is unlimited and it’s a bunch of cool features like Video chat, Screen sharing, Mobile apps and more.

This article assumes you have at least basic knowledge of Linux, know how to use the shell, and most importantly, you host your site on your own VPS. The installation is quite simple and assumes you are running in the root account, if not you may need to add ‘sudo’ to the commands to get root privileges. I will show you through the step by step installation Rocket.Chat on an Ubuntu 16.04 Xenial Xerus server.

Install Rocket.Chat on Ubuntu 16.04 LTS

Step 1. First make sure that all your system packages are up-to-date by running these following apt-get commands in the terminal.

sudo apt-get update
sudo apt-get upgrade

Step 2. Installing MongoDB.

Rocket.Chat requires MongoDB for the installation. In this step, we will install MongoDB from the MongoDB repository:

apt-key adv --keyserver hkp://keyserver.ubuntu.com:80 --recv EA312927

Then add the MongoDB repository with the command below:

echo "deb http://repo.mongodb.org/apt/ubuntu xenial/mongodb-org/3.2 multiverse" | sudo tee /etc/apt/sources.list.d/mongodb-org-3.2.list

Update the repository and install MongoDB with the apt command:

apt-get update
apt-get install mongodb-org

Open MongoDB and set it to run automatically at boot time:

systemctl enable mongod
systemctl start mongod

Step 3. Configure a MongoDB ReplicaSet.

This is an optional step, but those who want performance improvements should follow it. Rocket.Chat Server uses a MongoDB replica set:

nano /etc/mongod.conf

There, add this section:
replication:

 replSetName: "001-rs"

Save, exit and restart MongoDB:

systemctl restart mongod

Next, run its shell and initiate the replica set:

# mongo
> rs.initiate()

After you run rs.initiate(), you should get the following results:

{
 "info2" : "no configuration specified. Using a default configuration for the set",
 "me" : "wpcademy.com:27017",
 "ok" : 1
}

If the value of “ok” is not 1, then something’s wrong. Please go back and follow the steps exactly as shown in this tutorial.

Step 4. Installing Node.js and npm.

Node.js and npm are required by Rocket.Chat and are both available on Ubuntu repositories:

apt-get install nodejs npm

First, install the ‘n’ package globally on the whole system:

npm install -g n

The messaging system requires Node.js 4.5+, so ensure that you choose 4.5:

n 4.5

Check if you have the right node.js version:

node --version

Step 5. Installing Rocket.Chat.

First, download the latest version of Rocket.Chat:

cd /var/www
curl -L https://rocket.chat/releases/latest/download -o rocket.chat.tgz

And extract it:

tar xzf rocket.chat.tgz

Rename the extracted folder:

mv bundle Rocket.Chat

Run the following commands to add some environment variables:

cd Rocket.Chat/programs/server
npm install
cd ../..
export ROOT_URL=http://your-host-name.com-as-accessed-from-internet:3000/
export MONGO_URL=mongodb://localhost:27017/rocketchat
export PORT=3000
node main.js

Step 6. Install LEMP (Linux, Nginx, MariaDB and PHP) server.

A Ubuntu 16.04 LEMP server is required. If you do not have LAMP installed, you can follow our guide here.

Create a new SSL directory, in which certificates will be stored:

mkdir -p /etc/nginx/ssl/

In this directory, generate a new SSL certificate file:

cd /etc/nginx/ssl
openssl req -new -x509 -days 365 -nodes -out /etc/nginx/ssl/rocketchat.crt -keyout /etc/nginx/ssl/rocketchat.key
chmod 400 rocketchat.key

Next, create a Virtual Host configuration:

nano /etc/nginx/sites-available/rocketchat

There, paste the following configuration:

# Upstreams
upstream backend {
 server 127.0.0.1:3000;
}
 
# Redirect Options
server {
 listen 80;
 server_name chat.mydomain.com;
 # enforce https
 return 301 https://$server_name$request_uri;
}
 
# HTTPS Server
server {
 listen 443;
 server_name chat.mydomain.com;
 
 error_log /var/log/nginx/rocketchat.access.log;
 
 ssl on;
 ssl_certificate /etc/nginx/ssl/rocketchat.crt;
 ssl_certificate_key /etc/nginx/ssl/rocketchat.key;
 ssl_protocols TLSv1 TLSv1.1 TLSv1.2; # dont use SSLv3 ref: POODLE
 
 location / {
 proxy_pass http://192.168.1.110:3000/;
 proxy_http_version 1.1;
 proxy_set_header Upgrade $http_upgrade;
 proxy_set_header Connection "upgrade";
 proxy_set_header Host $http_host;
 
 proxy_set_header X-Real-IP $remote_addr;
 proxy_set_header X-Forward-For $proxy_add_x_forwarded_for;
 proxy_set_header X-Forward-Proto http;
 proxy_set_header X-Nginx-Proxy true;
 
 proxy_redirect off;
 }
}

Save, exit and activate this configuration:

ln -s /etc/nginx/sites-available/rocketchat /etc/nginx/sites-enabled/rocketchat

Run:

nginx -t

And make sure there are no errors. If everything’s ok, restart Nginx:

systemctl restart nginx

Update the environment variables and run Rocket.Chat:

cd /var/www/Rocket.Chat/
export ROOT_URL=https://chat.mydomain.com
export MONGO_URL=mongodb://localhost:27017/rocketchat?replicaSet=001-rs
export PORT=3000
node main.js

Step 7. Accessing Rocket.Chat.

Rocket.Chat will be available on HTTP port 80 by default. Open your favorite browser and navigate to http://chat.mydomain.com and complete the required the steps to finish the installation. If you are using a firewall, please open port 80 to enable access to the control panel.

Congratulation’s! You have successfully installed Rocket.Chat with Docker. Thanks for using this tutorial for installing Rocket.Chat open source chat software on your Ubuntu 16.04. For additional help or useful information, we recommend you to check the official Rocket.Chat web site.

How To Install Nginx on Ubuntu 16.04

Install Nginx on Ubuntu 16

Nginx is a powerful web server software that can be used on your server. It is also known for its high performance and low memory usage which will allow fewer resources to be used but getting the job done efficiently. A popular set up is to use it as a proxy for Apache, which can then serve application requests. That will not be covered in this tutorial, though.

This article assumes you have at least basic knowledge of linux, know how to use the shell, and most importantly, you host your site on your own VPS. The installation is quite simple and assumes you are running in the root account, if not you may need to add ‘sudo’ to the commands to get root privileges. I will show you through the step by step installation Nginx on a Ubuntu 16.04 server.

Install Nginx on Ubuntu 16.04

Step 1. First let’s start by ensuring your system is up-to-date.

apt-get update
apt-get upgrade

Step 2. Installing Nginx.

Installing nginx package on Ubuntu 16.04 (Xenial Xerus) is as easy as running:

apt-get install nginx

After that, run the commands to enable Nginx to automatically startup when your server starts:

sudo systemctl enable nginx
sudo systemctl start nginx

To confirm if the Nginx service is indeed running, use the following command:

sudo systemctl status nginx

You can verify that Nginx is really running by opening your favorite web browser and entering the URL http://your-server’s-address, if it is installed, then you will see this:

nginx-default-page

This example is the default nginx web page on Ubuntu 16.04

Learn how to use Nginx server blocks here. If you’d like to build out a more complete application stack, check out this article on how to configure a LEMP stack on Ubuntu 15.04.

Congratulation’s! You have successfully installed Nginx. Thanks for using this tutorial for installing Nginx web server on your Ubuntu 15.04 system. For additional help or useful information, we recommend you to check the official Nginx web site.

You Might Also Like: How To Install LEMP on Ubuntu 16.04

How To Install LEMP on Ubuntu 16.04

Install LEMP on Ubuntu 16

A LEMP software stack is a group of open source software that is typically installed together to enable a server to host dynamic websites and web apps. This term is actually an acronym which represents the Linux operating system, with the Nginx web server (which replaces the Apache component of a LAMP stack). The site data is stored in a MySQL database (using MariaDB), and dynamic content is processed by PHP.

lemp stack install in ubuntu

This article assumes you have at least basic knowledge of linux, know how to use the shell, and most importantly, you host your site on your own VPS. The installation is quite simple. I will show you through the step by step installation LEMP stack (Linux, Nginx, MariaDB and PHP) on Ubuntu 16.04 server.

Install LEMP on Ubuntu 16.04

Step 1. First make sure that all your system packages are up-to-date by running these following apt-get commands in the terminal.

apt-get update
apt-get upgrade

Note: If another web server like Apache2 was installed in your system, remove it first to avoid conflicts. To uninstall Apache, run the following commands:

sudo service apache2 stop
sudo apt-get remove --purge apache2 apache2-utils apache2.2-bin apache2-common -y
sudo apt-get autoremove -y
sudo apt-get autoclean -y

Step 2. Installing Nginx on Ubuntu 16.04.

Install Nginx with apt-get, which is the default package manager for Ubuntu:

sudo apt-get install nginx

Start Nginx service using the following command:

sudo systemctl start nginx

You can verify that Nginx is really running by opening your favorite web browser and entering the URL http://your-server’s-address, if it is installed, then you will see this:
nginx-default-page
The default web page for NGINX on Ubuntu 16.04

Step 3. Configure Nginx web server.

To get Nginx to work with PHP correctly, we need to make changes to the Nginx configuration file. This guide we will be using a simple Nginx config file:

sudo nano /etc/nginx/sites-available/default

Copy the following into your text editor:

server {
listen 80;
server_name your_domain_name.com;
root /usr/share/nginx/html;
index index.php index.html;
location / {
try_files $uri $uri/ =404;
}
error_page 404 /404.html;
error_page 500 502 503 504 /50x.html;
location = /50x.html {
root /var/www/html;
}
location ~ \.php$ {
try_files $uri =404;
fastcgi_pass unix:/var/run/php5-fpm.sock;
fastcgi_index index.php;
fastcgi_param SCRIPT_FILENAME $document_root$fastcgi_script_name;
include fastcgi_params;
}
}

Once you have finished editing the file restart Nginx with:

sudo nginx -t
sudo systemctl restart nginx

Step 4. Installing MySQL on Ubuntu 16.04.

To install MySQL in Ubuntu 16.04 run the following command:

sudo apt-get install mysql-server php5-mysql

Once complete, you can verify MySQL is installed by running the below command:

systemctl status mysql

By default, MySQL is not hardened. You can secure MySQL using the mysql_secure_installation script. you should read and below each steps carefully which will set root password, remove anonymous users, disallow remote root login, and remove the test database and access to secure MySQL:

mysql_secure_installation

Configure it like this:

- Set root password? [Y/n] y
- Remove anonymous users? [Y/n] y
- Disallow root login remotely? [Y/n] y
- Remove test database and access to it? [Y/n] y
- Reload privilege tables now? [Y/n] y

To log into MySQL, use the following command (note that it’s the same command you would use to log into a MySQL database):

mysql -u root -p

Step 5. Installing and Configuring PHP on Ubuntu 16.04.

Install PHP on the Ubuntu 16.04 with the following command to begin the install:

sudo apt-get install php php-fpm php7.0-mysql

Once the installation is finished, edit the server php.ini file and change the cgi.fix_pathinfo parameter value to 0. By default it will be commented out with a semi-colon and the value set to 1 which practically ensures that PHP will attempt to execute the closest file available when a requested PHP file can’t be found. This is a bad security practice, so let’s change it. Execute the below command:

nano /etc/php/7.0/fpm/php.ini

Now find the cgi.fix_pathinfo line, uncomment it and set the value to 0. Save and close the file.

Your server should restart Nginx automatically after the installation of both MySQL and PHP. If it doesn’t, execute this command:

sudo systemctl restart nginx

To test PHP, create a test file named info.php with he content below. Save the file, then browse to it to see if PHP is working:

nano /usr/share/nginx/html/info.php

Copy the following into your text editor:

<!--?php phpinfo(); ?-->

Try to access it at http://your_server_ip/info.php . If the PHP info page is rendered in your browser then everything looks good and you are ready to proceed further.

installing-lemp-ubuntu-16-04
Congratulation’s! You have successfully installed LEMP stack. Thanks for using this tutorial for installing LAMP (Linux, Nginx, MySQL and PHP) in Ubuntu 16.04 system. For additional help or useful information, we recommend you to check the official Nginx, MySQL and PHP web site

You Might Also Like: How To Install LAMP Stack on Ubuntu 16.04

How To Install Nginx With Ngx_Pagespeed Module on Ubuntu 16.04 LTS

Install Nginx With Ngx_Pagespeed Module on Ubuntu 16

PageSpeed (ngx_pagespeed) is a Nginx module created by Google to help Make the Web Faster by rewriting web pages to reduce latency and bandwidth. For the installation, we will need to compile nginx from souce with the PageSpeed module, as Nginx doesn’t support Dynamic module loading (DSO), unless you want to build your own rpm or deb files.

This article assumes you have at least basic knowledge of linux, know how to use the shell, and most importantly, you host your site on your own VPS. The installation is quite simple and assumes you are running in the root account, if not you may need to add ‘sudo’ to the commands to get root privileges. I will show you through the step by step installation nginx with pagespeed module on a Ubuntu 16.04 (Xenial Xerus) server.
Install Nginx With Ngx_Pagespeed Module on Ubuntu 16.04 LTS

Step 1. First make sure that all your system packages are up-to-date by running these following apt-get commands in the terminal.

sudo apt-get update
sudo apt-get upgrade
sudo apt-get install dpkg-dev build-essential zlib1g-dev libpcre3 libpcre3-dev unzip

Step 2. Add the Nginx repository.

Run the commands below in terminal to compiling the latest Nginx mainline version:

wget http://nginx.org/keys/nginx_signing.key
apt-key add nginx_signing.key

Create a new repository and edit the sources.list file:

nano /etc/apt/sources.list

Add the following two lines at the end of this file:

deb http://nginx.org/packages/mainline/ubuntu/ xenial nginx
deb-src http://nginx.org/packages/mainline/ubuntu/ xenial nginx

Step 3. Download Nginx from source package.

Create a new directory for the nginx source files and download the nginx sources using apt command:

mkdir ~/nginx && cd ~/nginx
sudo apt source nginx

Check out the downloaded files:

### ls ~/nginx/
nginx-1.11.1                               nginx_1.11.1-1~xenial.dsc
nginx_1.11.1-1~xenial.debian.tar.xz        nginx_1.11.1.orig.tar.gz

Step 4. Download ngx_pagespeed source package.

To compile Nginx with ngx_pagespeed module, we also need ngx_pagespeed source package. Go to Github ngx_pagespeed download page:

wget https://codeload.github.com/pagespeed/ngx_pagespeed/zip/v1.11.33.4-beta

Unzip into the current directory:

unzip v1.11.33.4-beta
cd ngx_pagespeed-1.11.33.4-beta/

Next, we also need to download the psol library. (PageSpeed Optimization Library) and extract it:

wget https://dl.google.com/dl/page-speed/psol/1.11.33.4.tar.gz
tar xvf 1.11.33.4.tar.gz

Step 5. Configure Nginx to build with Pagespeed.

First, edit Nginx compilation rule file:

nano ~/nginx/nginx-1.11.1/debian/rules

Add the new line under ‘COMMON_CONFIGURE_ARGS’:

--add-module=/home/username/ngx_pagespeed-1.11.33.2-beta

Step 6. Start the Compilation Nginx Ubuntu package.

Go to the nginx source directory and build nginx from source with the dpkg-buildpackage command:

cd ~/nginx/nginx-1.11.1/
apt build-dep nginx
dpkg-buildpackage -b

When it’s done, there will be 7 deb files in ~/nginx/ directory. We only need to install the nginx_1.11.1-1~xenial_amd64.deb or nginx_1.11.1-1~xenial_i386.deb package, depending on your OS architecture. The others are Nginx dynamic module package and a debug package:

cd ~/nginx
dpkg -i nginx_1.11.1-1~xenial_amd64.deb

Now let’s start Nginx:

systemctl start nginx

Step 7. Configure ngx_pagespeed Module in Nginx.

Now edit Nginx server block config file:

nano /etc/nginx/nginx.conf

Add the following pagespeed directives in server section:

# enable pagespeed module on this server block
pagespeed on;

# Needs to exist and be writable by nginx. Use tmpfs for best performance.
pagespeed FileCachePath /var/ngx_pagespeed_cache;

# Ensure requests for pagespeed optimized resources go to the pagespeed handler
# and no extraneous headers get set.
location ~ "\.pagespeed\.([a-z]\.)?[a-z]{2}\.[^.]{10}\.[^.]+" {
  add_header "" "";
}
location ~ "^/pagespeed_static/" { }
location ~ "^/ngx_pagespeed_beacon$" { }

pagespeed RewriteLevel CoreFilters;

Step 8. Check if PageSpeed is Working.

Go to your website. Refresh a few times then check your page source. Hit Ctrl+F key and search pagespeed. You will see that many of your website resource has been processed by pagespeed or you can issue the following command:

curl -I -p http://y0ur-domain.com| grep X-Page-Speed

Congratulation’s! You have successfully installed nginx pagespeed. Thanks for using this tutorial for installing nginx with ngx_pagespeed module on Ubuntu 16.04 LTS (Xenial Xerus) system. For additional help or useful information, we recommend you to check the official Nginx web site.

How To Enable HTTP/2.0 Support on Nginx Ubuntu

How To Enable HTTP2.0 Support on Nginx

HTTP/2 is the new updated HTTP protocol, and its supposed to be much more efficient than the now outdated http/1.1 version. Its goal is to reduce the latency as well as to make the web applications faster by allowing multiple concurrent requests between the web browser and the server across a single TCP connection. If you are looking to speed up the loading time of your website or blog then you should enable http/2.0 in your web server.

This article assumes you have at least basic knowledge of linux, know how to use the shell, and most importantly, you host your site on your own VPS. The installation is quite simple and assumes you are running in the root account, if not you may need to add ‘sudo’ to the commands to get root privileges. I will show you through the step by step enable HTTP/2.0 support in Apache running Ubuntu 16.04 (Xenial Xerus) server.
Enable HTTP/2.0 Support on Nginx

Step 1. First make sure that all your system packages are up-to-date by running these following apt-get commands in the terminal.

sudo apt-get update
sudo apt-get upgrade

Step 2. Enable HTTP/2.0 Nginx web server.

So make sure that your Nginx version supporting HTTP/2 protocol. If you have not installed Nginx or using older version upgrade it first:

apt-get install nginx

To verify Nginx version we can use the following:

nginx -v 
# nginx version: nginx/1.10.1

To enable HTTP/2 in Nginx on an Ubuntu VPS you should edit the default Nginx server block:

nano /etc/nginx/sites-available/default

Add the http2 keywords to your virtualhost/server block configuration:

server {  
        server_name wpcademy.com www.wpcademy.com;
        listen 443 ssl http2 default_server;
        root /var/www/html;
        index index.html;

        location / {
                try_files $uri $uri/ =404;
        }

        ssl_certificate /etc/nginx/ssl/domain.com.crt;
        ssl_certificate_key /etc/nginx/ssl/domain.com.key;
}

server {
       listen         80;
       server_name    domain.com www.domain.com;
       return         301 https://$server_name$request_uri;
}

Enabling really is this simple, just change your current ssl-line from this:

server {
  listen        443 ssl;
  ...
}

to this:

server {
  listen        443 ssl http2;
  ...
}

Once you finish with editing the server block, save and close the file. Check if there are errors in the Nginx configuration using the command:

nginx -t

And then restart Nginx for the changes to take effect:

systemctl restart nginx.service

Step 3. Verify HTTP/2.

Go to https://tools.keycdn.com/http2-test and test if http/2.0 is detected in your domain:

https://tools.keycdn.com/http2-test

Congratulation’s! You have successfully enable HTTP/2.0 web server. Thanks for using this tutorial for enable HTTP/2.0 support on Nginx running Ubuntu 16.04 LTS (Xenial Xerus) system. For additional help or useful information, we recommend you to check the official Nginx web site.