
VNC (Virtual Network Computing) server is a free and open source software which is designed for allowing remote access to the Desktop Environment of the server to the VNC Client whereas VNC viewer is used on remote computer to connect to the server .
This article assumes you have at least basic knowledge of linux, know how to use the shell, and most importantly, you host your site on your own VPS. The installation is quite simple. I will show you through the step by step installation VNC server on CentOS 7.
Step 1. First, you need to update the system to ensure that we have all of the latest software installed.
yum update
Step 2. Install Gnome desktop.
yum groupinstall "GNOME Desktop"
Step 3. Install tigervnc server and X11 fonts.
yum install tigervnc-server xorg-x11-fonts-Type1
Copy the VNC server configuration file to /etc/systemd/system/ for configuring the system service. While copying, you can mention which port it should listen. By default VNC server listens on 5900:
cp /lib/systemd/system/[email protected] /etc/systemd/system/vncserver@:5.service
Edit VNC server file configuration:
nano /etc/systemd/system/vncserver@:5.service
## Replace <USER> with your real user, in my case i replaced with user called “wpcademy” with the screen size ##
[Unit]
Description=Remote desktop service (VNC)
After=syslog.target network.target[Service]
Type=forking
# Clean any existing files in /tmp/.X11-unix environment
ExecStartPre=/bin/sh -c ‘/usr/bin/vncserver -kill %i > /dev/null 2>&1 || :’
ExecStart=/sbin/runuser -l wpcademy-c “/usr/bin/vncserver %i -geometry 1280×1024″
PIDFile=/home/wpcademy/.vnc/%H%i.pid
ExecStop=/bin/sh -c ‘/usr/bin/vncserver -kill %i > /dev/null 2>&1 || :'[Install]
WantedBy=multi-user.target
Step 4. Configure firewall rules to allow the VNC connection.
firewall-cmd --permanent --zone=public --add-port=5905/tcp
firewall-cmd --reload
Step 5. Start VNC server.
vncserver
Set the password.
You will require a password to access your desktops.

Password:
Verify:
xauth:  file /home/wpcademy/.Xauthority does not exist

New ‘localhost.localdomain:1 (wpcademy)’ desktop is server.wpcademy.net:1

Creating default startup script /home/wpcademy/.vnc/xstartup
Starting applications specified in /home/wpcademy/.vnc/xstartup
Log file is /home/wpcademy/.vnc/server.wpcademy.net:1.log
Step 6. Enabling and starting the VNC service
Reload the systemctl daemon as root.
systemctl daemon-reload
Start the VNC service as root:
systemctl start vncserver@:5.service
Enable it on system startup as root:
systemctl enable vncserver@:5.service
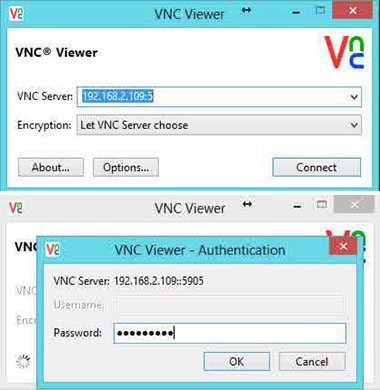
Step 7. Now you can able to connect VNC server using IP and Port ( Eg : 192.168.2.109:5 ) and you will be asked to enter the password, enter the password that you have created earlier.
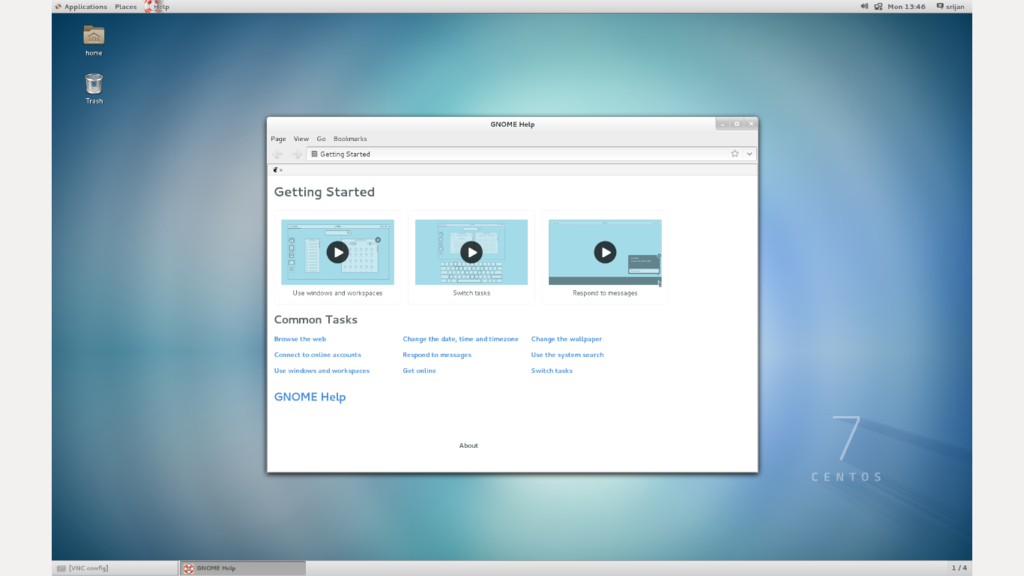
Congratulation’s! You have successfully installed VNC server. Thanks for using this tutorial for installing VNC server on CentOS 7 system.
You Might Also Like: How To Install VNC Server on CentOS 6